
It started with a quiet creak in the middle of the night—an unsettling sound that seemed to echo from beneath my newly installed hardwood floors. I was confident in my DIY skills, but this mysterious hollow spot kept bothering me. Each step felt like walking on a drum, and I couldn’t shake the feeling that I was overlooking a fundamental problem in my subflooring. That lightbulb moment led me down a rabbit hole of learning, experimenting, and ultimately mastering a secret technique that transformed my approach to flooring installation.
Why Spotting Hollow Spots in Subfloors Can Save Your Investment
Understanding exactly where your subfloor isn’t solid is more than just a matter of comfort; it directly impacts the longevity and appearance of your entire flooring project. A hollow spot isn’t just an annoying noise—it can cause uneven wear, gaps, or even structural damage if left unchecked. When I first faced this issue, I realized I had skipped an important step: accurately identifying these weak spots before laying the finish flooring. Early on, I made the mistake of assuming that a visually level surface meant everything was fine. That couldn’t be further from the truth. According to flooring experts, undetected hollow spots are among the most common causes of installation failure—a fact supported by industry research showing that improper subfloor preparation accounts for over 30% of flooring problems (source: [Tile Trend Shop](https://tiletrendshop.com/floor-leveling-challenges-common-mistakes-and-how-to-avoid-them)).
Is the Hammer-Tap Secret Worth the Hype? Don’t Make the Same Mistake I Did
Initially, I believed the hype around various detection methods, but my early attempts were inconsistent and unreliable. I was guilty of rushing into the job without properly testing the subfloor. A critical mistake I made was relying solely on visual inspection, which can deceive even experienced DIYers. The real game-changer came when I learned to use a simple hammer-tap technique—listening carefully and feeling for differences in sound and resonance across the surface. This step, combined with a reliable method called the flashlight trick, uncovered hidden hollow spots that were invisible to the naked eye. Trust me, taking this extra time to identify problem areas made ALL the difference in achieving a flawless finish. If you’re tired of uncovering hollow surprises after you’ve installed your flooring, it’s time to get hands-on with these techniques. Ready to move from guesswork to certainty? The next section will guide you through mastering this essential skill, ensuring your subfloor is ready to support beautiful, lasting floors.
Switch from Guesswork to Precision with the Hammer-Tap Method
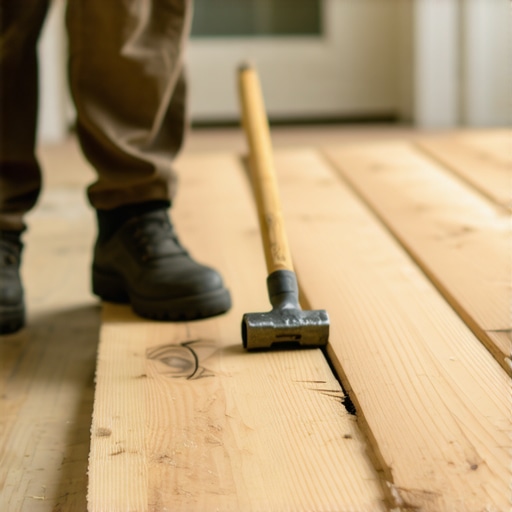
Start by wearing sturdy shoes and standing in the middle of the area you want to test. Grip a reliable hammer—preferably a rubber mallet or a lightweight model—and gently tap the subfloor surface, focusing on different spots. Listen for changes in tone: a firm, solid sound indicates a dense area, while a hollow or dull thud suggests voids beneath. As I did during one project, I walked a straight line across my living room floor, tapping rhythmically, and marked spots with chalk where the resonance shifted. This simple step prevented me from installing over weak spots, saving time and money later. Think of your subfloor like a drum; identifying the dampened or hollow areas is like detecting dead spots that could cause future squeaks or dips. To enhance accuracy, combine this with the flashlight trick—shine at a low angle across the surface and look for subtle reflections or shadows that reveal unevenness or gaps.
Refine Your Technique for Better Results
Apply a consistent tapping force—too hard can cause false positives, too soft might miss issues. Keep a record of the spots you test; when you overlap their marks, you’ll see the areas most susceptible to hollowing. For larger spaces, use a straight edge or a string line to map out the areas you’ve checked, ensuring comprehensive coverage. After identifying weak points, I filled these with a professional-grade self-leveling compound, which you can learn more about in our guide on precise floor leveling techniques. This meticulous approach ensures your subfloor supports your new flooring reliably—critical for hardwood, tile, or vinyl installations. Remember, neglecting this step often leads to costly repairs down the line, but mastering the hammer-tap technique makes all the difference in your project’s success.When it comes to installing hardwood floors or tiling, many enthusiasts and even professionals fall prey to misconceptions that can lead to costly mistakes. One widespread myth is that a perfectly level subfloor isn’t crucial, but in reality, overlooked imperfections—even small dips—can cause uneven wear and premature failure of your flooring. Relying solely on visual inspection is another trap; a subfloor might look smooth but harbor hollow spots that are invisible to the naked eye. These hidden flaws can result in squeaks, cracks, or height discrepancies over time.
Why Does a Slight Slope Cause Big Problems in Flooring Projects?
Contrary to the belief that minor slopes are insignificant, studies show that even a 1/8-inch incline over a 10-foot span can impact the durability and appearance of your flooring (source: [Tile Trend Shop](https://tiletrendshop.com/floor-leveling-challenges-common-mistakes-and-how-to-avoid-them)). Advanced techniques, such as using a laser level or a self-leveling compound, are essential to address these issues effectively. Skipping this step might save time initially but will undoubtedly lead to problematic repairs later, affecting both safety and aesthetics. Mastering the art of precise floor leveling isn’t just for professionals; it’s a critical skill for DIYers eager to achieve professional-grade results. For comprehensive guidance, check out our detailed guide on mastering the secrets of floor leveling.
Investing in the right tools is crucial for ensuring your flooring installations remain durable and looking professional over the long haul. As I transitioned from DIY enthusiast to seasoned flooring installer, I found that possessing specialized equipment not only streamlined my workflow but also improved the quality and longevity of my projects. A key part of maintaining your flooring is having the right tools to perform periodic inspections, repairs, and upgrades.
Prioritize Precision with Quality Measuring Instruments
One of the first tools I recommend is a laser level. Unlike traditional bubble levels, laser levels project straight lines across multiple surfaces, allowing you to assess floor flatness with exceptional accuracy—vital when dealing with hardwood and tile installations. I personally rely on a laser level like the **DeWalt DW089K** because it provides quick, reliable readings, saving me time during initial leveling and later inspections. For fine-tuning subfloor adjustments, a digital moisture meter helps monitor wood and concrete drying levels, preventing future warping or buckling. Keep in mind that accurate moisture readings, as detailed in industry standards, are the foundation of lasting flooring—more info can be found in this comprehensive guide to floor leveling techniques.
Lessons I Didn’t Expect to Learn About Flooring
One of the biggest surprises in my flooring journey was realizing how much the tiny, hidden hollow spots beneath my subfloor could sabotage my entire project. It taught me to never trust the surface alone and to always dig deeper with a simple tap and a flashlight. Additionally, I discovered that investing in quality tools like laser levels and moisture meters isn’t just a luxury but a necessity—saving me time and costly repairs in the long run. The most valuable lesson was understanding that patience during the preparation phase translates directly into a flawless finish; rushing often leads to regrets. While beginner guides emphasize the ‘what,’ I learned that quality and attention to detail are ‘how’ you turn a good project into a great one.
Tools and Resources That Elevated My Flooring Skills
My essential toolkit, which transformed my approach, includes the professional floor leveling guide, a reliable laser level like the DeWalt DW089K I rely on daily, and a sturdy moisture meter from industry-leading brands. For quick references, I often consult step-by-step installation guides that keep me focused and thorough. Also, connecting with expert forums and tutorials, especially ones that delve into advanced leveling techniques, continuously sharpens my skills and knowledge.
Take Action and Turn Your Floor Dreams into Reality
Achieving a perfect, durable floor isn’t just about the tools or techniques—it’s about confidence and patience. Trust in your process, equip yourself with reliable resources, and remember that mastery is a journey, not a sprint. Your hardwood, tile, or vinyl installation can become a showcase of your dedication and craftsmanship. So, take that first tap, measure meticulously, and don’t shy away from learning more. The satisfaction of walking on a meticulously prepared floor makes every effort worth it.
Have you ever faced a hidden flaw that made you reconsider your entire project? Share your story below—I’d love to hear your experiences and tips!