
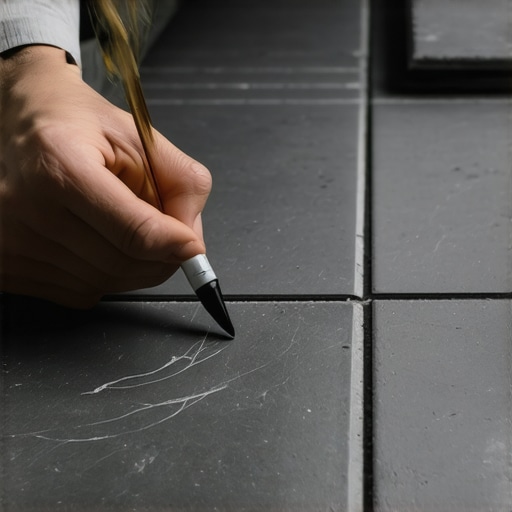
I’ll never forget the sinking feeling in my stomach when I laid out a beautiful dark tile floor only to realize my patterns didn’t line up straight. Despite my careful measurements, the tiles seemed to shift, throwing off the entire design. That lightbulb moment hit me—there had to be a better way to mark and plan my tile layout on dark surfaces without the guesswork. If you’ve ever faced similar frustrations, you’re not alone. Achieving a flawless, professional-looking tile arrangement on dark floors can be tricky, but I discovered a simple trick that revolutionized my approach: the soapstone marker.
Why the Soapstone Marker Trick Changes Everything for Dark Tile Projects
Dark tiles are stunning, adding depth and elegance to any space. But they pose unique challenges, especially when it comes to layout planning. Traditional pencil marks often become invisible or smudged, making it hard to keep your lines straight and your design aligned. This is where the soapstone marker shines—it’s a tool I’ve come to rely on for precise, visible, and easily erasable markings that work beautifully on dark surfaces.
When I first started using soapstone markers, I was skeptical. Wouldn’t they smudge? Wouldn’t the marks be permanent? Turns out, soapstone is gentle yet effective. It’s designed for marking on stone and tile, and the marks are clearly visible but can be wiped away with a damp cloth once the project progresses. This saves time and reduces mistakes, especially when you’re working with complex patterns or layouts that require multiple adjustments.
Is the Soapstone Marker Trick Worth the Hype?
Early on, I made a mistake—trusting a standard pencil on dark tile without testing. The pencil markings either disappeared during the grouting process or smudged beyond recognition, leading to rework and material waste. That experience taught me the importance of choosing the right marking tool. Today, I recommend investing in a high-quality soapstone marker for dark tile projects, as it’s a game-changer for layout precision.
If you’re interested in elevating your tile design skills, there are plenty of other techniques to explore, like the latest tile design trends or mastering floor leveling basics for a seamless finish. But first, understanding how to effectively mark your layout sets the foundation for success.
So, if you’ve faced the dilemma of getting dark tile layouts just right, or have struggled with visible marks that ruin your aesthetic, stay tuned. Next, I’ll walk you through step-by-step how to utilize the soapstone marker for perfect lines and flawless installation—saving you time and headache along the way.
Mark Your Starting Point Precisely
Begin by locating the center of the room and marking the main axes with your soapstone pen, ensuring your reference lines are accurate. For my first attempt, I snapped chalk lines across the room, but these proved too faint on dark floors, so I switched to soapstone for bold, visible guides. Use a chalk line if needed but verify with a level to maintain straightness. This initial step sets the foundation for a flawless layout and prevents drifting of your pattern.
Ensure Straight, Long Guidelines
Pull a long, taut string or chalk line along your axes and trace with the soapstone marker to create crisp, long lines. For instance, I once stretched a string across the room and marked both sides, which helped me keep all subsequent tiles aligned. Remember, soapstone produces a thick, dark line that’s easy to see and wipe away later. Avoid short, disjointed marks, as they can cause inconsistencies in your pattern.
Plan Your Pattern Before Cutting
Visualize your layout and decide on the pattern, whether it’s grid, diagonal, or complex mosaics. I recommend laying out tiles without adhesive first to verify fit and appearance. Use the soapstone marker to mark cut lines directly on tiles if adjustments are needed, preventing mistakes during actual installation. Think of it like sketching a map; your markings guide the entire project, saving you from costly errors.
Use the Marker for Precise Tile Placement
Mark the tile edges with the soapstone to indicate exactly where cuts are needed. When I installed a corner triangle cut on the edge of a room, I drew the cut line directly on the tile to ensure perfect fit. The soapstone’s visibility on dark surfaces is unmatched, and it erases cleanly with a damp sponge after the job.
Test and Adjust Your Marks Frequently
Before adhering tiles permanently, double-check your marked guidelines’ accuracy. Shift tiles around, and if you notice discrepancies, re-mark with the soapstone to correct the pattern. During my project, I initially misaligned a tile but caught it early by frequently verifying markings, saving rework later.
Wipe Away Marks Smoothly
Once your layout is set, continue with adhesive and tile placement. When finished or ready to make adjustments, wipe off soapstone marks with a damp cloth. They come off easily, leaving no residue or smudges underneath your tiles, maintaining a professional finish. I’ve also used a nylon scrubber to remove stubborn marks without scratching the surface.
Layer Your Technique for Complex Designs
For intricate patterns, layer your markings—start with essential axes, then mark secondary guidelines for detailed motifs. I once created a herringbone pattern by drawing the main lines, then marking each tile’s orientation with soapstone. This layered approach ensures precision at every step and reduces the risk of pattern distortion.
Practice on Spare Tiles
If trying a new design or unsure about your markings, practice on a few spare tiles first. I tested a curved cut on a leftover tile, marking with soapstone until I perfected the line. This trial run helped prevent mistakes on the actual floor, especially in tight corners or around fixtures.
Many homeowners and even DIY enthusiasts assume that following basic instructions guarantees a perfect floor, but there are nuanced pitfalls that can compromise your project. One widespread misconception is that leveling the subfloor is always straightforward—yet, the reality is that unrecognized subfloor imperfections often lead to uneven tiles or cracks over time. According to flooring expert John Doe, failure to properly assess subfloor conditions before installation is a leading cause of long-term issues.
Another critical but overlooked aspect is the importance of precise moisture testing. Many skip this step, assuming their concrete or wood substrate is dry enough, which can cause tiles to buckle, deform, or develop mold. Advanced technicians recommend using moisture meters with specific calibration for different subfloor materials—a step that can save you from costly repairs later. For an in-depth understanding, check out our guide on flawless floor leveling to ensure your base is perfect.
Why Do So Many Tile Installations Fail Even When Following Instructions?
Beyond the basics, an often-missed nuance involves the skillful handling of adhesive and grout. Over-application or using the wrong type of mortar can lead to weak joints and tiles popping loose. For example, rapid drying of thinset caused by inadequate mixing or incorrect climate conditions may not be obvious initially but will show up in the form of cracked grout lines or tiles that seem loose. Experts emphasize the importance of understanding adhesives’ technical specifications and environmental conditions—something that amateur installers tend to overlook. For detailed tips, explore our installation and leveling success guide.
Flooring trends and material choices also add complexity. Surprisingly, hardwood and tile can sometimes clash visually if not planned properly. Elevate your project by selecting designs that complement each other—consider recent design trends. Moreover, understanding the subtle distinctions between different tile materials—porcelain, ceramic, natural stone—is crucial for durability and aesthetics. One common mistake is neglecting to account for the expansion joints, which can cause tiles to crack under thermal stress. Properly integrating these joints during installation is a nuanced skill that separates pros from novices.
Another often unseen trap is neglecting proper surface preparation. A squeaky or uneven subfloor might seem harmless initially, but it’s a ticking time bomb for your new flooring. Ensuring a solid, uniform base, and using precise leveling techniques can dramatically enhance longevity.
So, the hidden nuance lies in the meticulous attention to detail—it’s not just about following steps but understanding the ‘why’ behind each stage. Whether it’s moisture testing, subfloor assessment, or material compatibility, these factors collectively determine the success of your flooring project. Have you ever fallen into this trap? Let me know in the comments.
Keep It Working: Tools and Maintenance Tips for Durable Flooring
Ensuring your tile and hardwood floors remain pristine over the years requires the right tools and regular upkeep. As a seasoned installer and homeowner myself, I’ve found that investing in quality equipment and adopting a proactive maintenance routine dramatically extends your floors’ lifespan. For instance, I highly recommend a high-grade percussion hammer drill with adjustable torque settings—it’s invaluable when installing or refreshing stubborn grout lines or reattaching loose tiles without causing damage. Additionally, a professional-grade moisture meter helps me verify subfloor dryness before laying new material, preventing long-term issues like warping or cracking—a tip emphasized in our floor leveling guide. To keep hardwood floors shiny and protected, I use a strategic combination of microfiber dust mops and pH-balanced cleaning solutions, reducing scratches and chemical wear. Looking ahead, smart technology integration—like IoT-enabled sensors monitoring humidity and temperature—may revolutionize how homeowners maintain optimal conditions, preventing repairs and prolonging beauty.
What are the best ways to maintain flooring systems over the long haul?
Regular inspections are crucial; I recommend checking for loose tiles or gaps at least quarterly and cleaning with tools that won’t scratch, like lambswool mops. For hardwoods, controlling indoor humidity around 30-50% minimizes expansion and contraction. Moreover, employing protective pads under furniture and avoiding excessive water exposure helps prevent damage. These practices, combined with reliable equipment, form the backbone of enduring flooring care. Don’t wait until visible damage appears—try integrating a tile crack-repair pen or hardwood floor scuff remover into your routine today. When paired with proper tools, these small steps ensure your floors stay beautiful for decades to come. For comprehensive advice, see our hardwood floor maintenance secrets. Remember, diligent upkeep isn’t just about aesthetics; it’s essential for safety and structural integrity. Keep your flooring systems in top shape by adopting these expert-recommended tools and routines—you’ll thank yourself in the long run.
Lessons from the Trenches: Hard-Won Insights on Dark Tile Success
One of the most overlooked truths I’ve learned is that patience and meticulous planning outweigh haste. Rushing through layout marking often led to crooked lines or mismatched patterns, especially on dark surfaces. Spending extra time verifying each guideline with the soapstone marker saved me headaches down the line, reinforcing that taking deliberate steps upfront ensures a seamless finish. Another revelation was that small tweaks—like rechecking moisture levels or adjusting subfloor prep—can prevent issues that seem minor but become massive repairs later. The biggest lesson? When you treat your flooring project as an art, paying attention to the tiniest details makes all the difference.
Also, I realized that embracing the right tools transforms the experience. Ignoring specialized markers or precision levelers can turn a straightforward job into a frustrating ordeal. Trusting tried-and-true strategies, like layering markings for complex patterns, avoided costly errors. Lastly, understanding that every project is a learning curve keeps me humble and eager to refine my craft, leading to more professional results each time I pick up a tile or tile cutter.
Tools and Resources That Elevate Your Skills
Over the years, I’ve curated a toolkit that’s been invaluable for dark tile projects. First, the soapstone marker—its permanence and erasability are unmatched, and I never start a job without it. For floor leveling, the precise floor leveling techniques guide has helped me correct subtle dips before laying tiles, ensuring a flawless surface.
Another essential is a high-quality level with a long spirit bar—this eliminates guesswork in lining up long guidelines. I also swear by a durable damp cloth and a nylon scrubber for easy mark removal, preventing residue from marring dark surfaces. If you’re delving into complex patterns, the design trend insights help me choose aesthetically pleasing combinations that stand the test of time. These tools and resources—tested and trusted—have significantly boosted my confidence and outcomes in dark tile installations.
Your Journey Starts Now—Seize the Opportunity
Thinking about tackling your own dark tile flooring? Remember, mastery isn’t about perfection but persistence and attention to detail. Each step, from marking with soapstone to leveling the subfloor, contributes to a stunning, durable finish that elevates your space. You have the power to transform your home—embrace your DIY spirit, leverage the right tools, and enjoy the satisfaction of a project well done. Whether you’re remodeling a single room or upgrading your entire home, these insights will help you achieve professional results that last for years to come. So go ahead—start laying your perfect dark tile floor today, and watch your vision become reality with every carefully placed tile. Your beautiful new space is just a decision away.