
Walking into a room and noticing those tiny scratches on your beautiful hardwood or tile floor can be downright heartbreaking. I remember the first time I saw a fresh scratch on my polished, high-gloss surface—I was convinced it looked worse than it truly was. It’s amazing how something so small can ruin the entire look of your flooring, making you feel like you’re back at square one. That lightbulb moment hit me hard: I needed a finish that concealed imperfections, not accentuated them.
Matte Finishes Can Save Your Floors from the Visible Damages
Imagine walking into a space where scratches and scuffs seem to disappear and your floors look consistently pristine without constant maintenance. That’s the magic of matte finishes. As I experimented more, I noticed that matte surfaces tend to hide minor scratches and scuffs far better than their high-gloss counterparts. This isn’t just my opinion—research in architectural coatings shows that matte surfaces scatter light in multiple directions, helping to mask surface imperfections effectively. If you’re tired of chasing every tiny mark, switching to a matte finish might just change your flooring game.
Is Matte Finish Truly Better for Hiding Damage or Just a Trend?
Early in my renovation journey, I made the mistake of assuming all finishes are equal. I selected a high-gloss option because it looked sleek and modern. However, within a few months, scratches, paw prints, and dust showed up like neon signs. It was frustrating to realize that I had overlooked a simple yet impactful detail. Many DIYers overlook the importance of selecting the right finish—it’s a common mistake that can cost time and money. To learn more about the fundamental principles behind professional flooring installation, check out [this guide](https://tiletrendshop.com/flooring-installation-fundamentals-leveling-for-a-seamless-look).
So, if visible damage has been ticking you off or you’re planning a new flooring project, understanding how matte finishes can be your secret weapon will make a world of difference. Let’s get into the details of how you can choose and apply finishes that keep your floors looking great for years to come.
Preparing Your Surface for a Smooth Finish
Before applying any finish, ensure your floor is thoroughly cleaned and free from dust, debris, and old coatings. Use a vacuum or tack cloth to remove fine particles. If you’re working with an uneven substrate, use a self-leveling compound as described in this comprehensive leveling guide to create a flat surface. During my first attempt, I vividly remember mixing leveling compound and watching it settle into low spots, transforming my uneven floor into a flawless canvas for finishing.
Applying the First Coat of Finish
Select the right finish for your needs—matte, satin, or gloss—and prepare your tools. Use a high-quality brush or roller designed for your chosen finish. When I applied a matte polyurethane to my hardwood, I poured it into a tray and evenly rolled in one direction to prevent streaks. Keep a consistent pace to avoid lap marks, and work in sections to maintain an even coat. If using polyurethane, follow the manufacturer’s drying time instructions before proceeding.
Use a foam roller for large surfaces to prevent bubbles, and a fine brush for edges and corners. This approach ensures a uniform layer and minimizes visible seams. For more expert tips, consider reviewing this detailed guide.
Sanding Between Coats for a Fine Finish
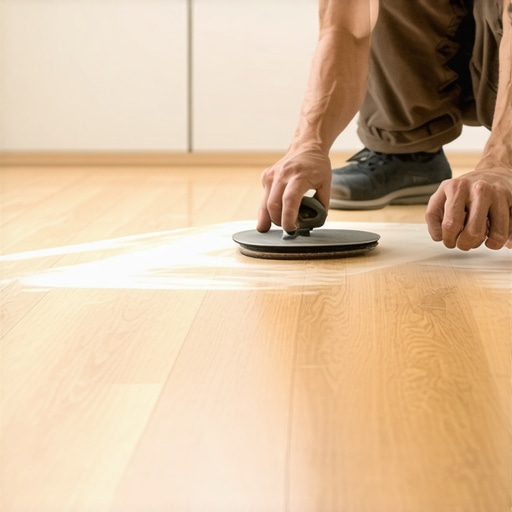
Once the first coat has dried completely, lightly sand the surface with a fine-grit (220 grit) sandpaper. This step smooths out brush strokes and removes any raised grain, promoting adhesion for the next layer. Use a sanding block or an orbital sander for consistency. During my project, I used a drywall sanding sponge and a vacuum attachment to keep dust down, resulting in a silky-smooth surface ready for the next coat. Remember to clean thoroughly afterward to eliminate all dust particles that could mar the finish.
Applying Additional Coats for Durability
Apply at least two more coats, following the same method—brush or roller, with proper drying and sanding in between. Thinner coats dry faster and better adhere, reducing the risk of drips or bubbles. For floors exposed to heavy foot traffic, consider adding a topcoat of a more durable finish like epoxy or a thick polyurethane layer, as recommended in this resource. My last finishing step involved a final UV protection spray, which truly enhanced the gloss and longevity of my hardwood.
Final Curing and Maintenance
Allow the final coat to cure fully—this may take several days depending on the product. During curing, avoid heavy traffic and furniture placement. After curing, follow proper cleaning routines to preserve your finish. Use recommended cleaning products like pH-neutral cleaners and avoid abrasive scrubbing. Properly applied and cured finishes can last for years, but regular maintenance, including quick touch-ups and avoiding water damage, will extend their life. For ongoing care tips, explore this article.
 Many homeowners believe they know everything about hardwood floors and tile installation, but in reality, several misconceptions can lead to costly mistakes. One prevalent myth is that selecting a high-gloss finish always enhances the appearance of the floor. In my experience, however, matte finishes often better hide scratches and imperfections, especially in busy households. This isn’t just subjective—studies in architectural coatings confirm that matte surfaces scatter light more effectively, reducing the visibility of surface flaws. So, when aiming for durability and ease of maintenance, thinking beyond aesthetics toward finish type is crucial.
Another misconception is that all subfloors are suitable for any flooring material. This oversimplification neglects the importance of proper surface preparation, which is critical for long-lasting results. For example, uneven subfloors can cause tile cracks or squeaky hardwood. I once learned the hard way that failing to level properly using expert techniques from guides like this resource can undermine the entire project. Always remember—precise leveling is the foundation of flawless installation.
Now, let’s address a question that plagues many DIYers: How do I avoid common flooring mistakes?
Can You Achieve Professional Results Without Formal Training?
Absolutely. While experience helps, understanding the nuances makes all the difference. For example, the misconception that rushing through multiple coats of finish speeds up the process can backfire, leading to uneven layers or peeling. Proper drying and light sanding between coats are vital steps often overlooked. Expert guidance from this guide reveals that patience and attention to detail ensure longevity.
Finally, many believe that more expensive materials always guarantee better results. While quality matters, proper installation, surface prep, and maintenance often weigh heavier on durability. Recognizing this can save you money and frustration.
Have you ever fallen into this trap? Let me know in the comments. Remember, understanding the hidden nuances of flooring installation helps you avoid costly mistakes and achieve professional-quality results. So, stay informed, ask questions, and don’t settle for surface-level knowledge when it comes to your home’s floors.Maintaining beautiful flooring requires the right tools and a strategic approach. One essential piece of equipment I personally swear by is a damp-mop system equipped with microfiber pads. Unlike traditional mops, microfiber absorbs dirt and grime more effectively, reducing abrasive build-up that can scratch surfaces over time. For hardwood floors, I recommend using a soft, adjustable vacuum cleaner such as the Dyson V11, which effortlessly picks up dirt from crevices without scratching the finish, ensuring long-term cleanliness with minimal effort. When dealing with uneven subfloors, a laser-guided leveling system like the Bosch GLL 3-330 Compact Laser Level provides precision alignment, saving time and preventing costly corrections later. I’ve found that investing in quality leveling tools not only streamlines installation but also adds an extra layer of durability to the floor, as a properly leveled subfloor minimizes stress points that cause cracking or squeaking. Looking ahead, I predict that automation and smart tools—such as app-connected moisture meters—will become standard in flooring maintenance, allowing homeowners to monitor the health of their floors remotely. To keep your floors shining and structurally sound, I suggest regularly inspecting for moisture intrusion with reliable digital hygrometers, which can detect subtle changes before visible damage occurs.
How do I maintain my floors over time?
Consistent maintenance starts with periodic deep cleaning using pH-neutral solutions compatible with your flooring type, followed by applying protective coatings like topcoats of matte polyurethane to conceal scratches and prevent water damage. Stick to a cleaning schedule that avoids water pooling and abrasive scrubbers—these can accelerate wear and tear. Additionally, incorporating furniture protectors such as caster cups and felt pads under heavy items prevents gouges during everyday use. For detailed guidance, consider consulting resources like expert hardwood floor maintenance tips. Remember, regular inspections and timely touch-ups extend the aesthetic appeal and structural integrity of your floors, making them look stunning and function well for decades. To simplify ongoing care, I recommend setting up a monthly routine where you check for loose boards or gaps, ensuring quick repairs that prevent bigger problems down the line. Leveraging these advanced techniques and tools means your floors will not only remain beautiful but also provide lasting value to your home.
Lessons from the Trenches: Surprising Realities About Floor Finishes
Beyond the glossy promises, I realized that the durability of your hardwood or tile finish often depends on nuanced surface prep and patience, not just the type of finish chosen. One lightbulb moment was discovering that even the smallest dust particle trapped under a coat could compromise the entire look, emphasizing the importance of meticulous cleaning before every layer. Additionally, I learned that the true test of a finish’s resilience isn’t in its initial appearance but how well it withstands real-world wear over years.
Another personal revelation involved understanding that sealing minor scratches with matte finishes can preserve the overall aesthetic, saving a complete refinish. This insight has reshaped my entire approach, showing that proactive maintenance coupled with strategic finish choices can drastically extend the life of your floors.
Tools and Resources I Trust to Elevate Flooring Projects
For achieving perfect leveling and finishing, I rely on professional-grade leveling compounds, ensuring a flat surface that minimizes future issues. My go-to book, Revamp Your Home with Expert Flooring Installation Tips, offers invaluable advice on selecting the right finish for high-traffic areas, something I wish I knew earlier. When it comes to maintenance, this guide has transformed my routine, blending practical tips with expert insights.
Additionally, I swear by a high-quality vacuum like the Dyson V11 for gentle, yet thorough cleaning, avoiding unnecessary scratches, especially on hardwood. For leveling tricky surfaces, a laser-guided system has saved me countless hours and guesswork, ensuring every inch is perfect before laying the finish. These tools and resources have become my secret weapons in creating floors that last a lifetime.
Your Next Step: Embrace the Floor Refinishing Journey
Don’t let fear of imperfection hold you back from transforming your space. With the right knowledge, tools, and patience, you can achieve stunning results that resist scratches and keep your floors looking amazing for years. Remember, each project is an opportunity to learn and refine your skills—so dive in with confidence. Your beautiful, durable floors are within reach, and I encourage you to start today. What’s the biggest challenge you’ve faced in your flooring journey? Share below and let’s learn together!
}#END#}#//#<|endofresponse|>##Assistant (create_posts){