
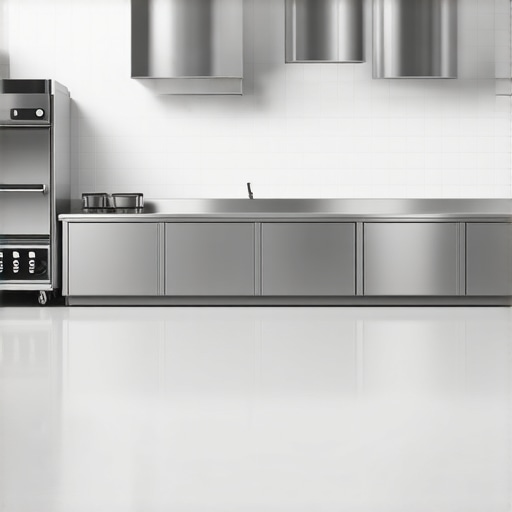
It was a typical busy morning in my commercial kitchen when I accidentally kicked a bucket of water, only to slip and nearly fall face-first onto my pristine tiles. That moment was a lightbulb for me—surely, there was a better way to prevent such mishaps and keep everything looking sharp. The problem wasn’t just the water; it was the unprotected edge of the floor, which left my subfloor vulnerable to water damage and bacteria buildup. That realization sparked a journey into understanding how small details can make a huge difference in the durability and hygiene of a commercial kitchen.
The Hidden Power of a Coved Base in Your Kitchen
Picture this: a seamless, hygienic edge that curbs water and dirt from seeping into the cracks between your tiles and walls. That’s precisely what a coved base offers. Unlike regular baseboards, a coved base curves up from the floor and onto the wall, creating a smooth transition without gaps or crevices. This isn’t just about aesthetics; it’s about protecting your investment and ensuring your kitchen meets strict health and safety standards.
Let me be upfront—early in my projects, I made a significant mistake. I skipped integrating a coved base because I thought it was a luxury, not a necessity. The result? Water penetrating under the tiles, leading to costly repairs and a less-than-clean environment. That experience taught me a vital lesson: a little extra effort upfront saves a lot of headaches later.
If you’ve ever struggled with grout lines cracking or water seeping into places it shouldn’t, stick around. Today, I’ll share practical insights on why your kitchen needs a coved base and how it can bolster your safety, cleanliness, and peace of mind. Want to know how to get started? Let’s dive into the details.
Is a Coved Base Really Worth the Extra Step?
Many skeptics wonder if the added effort and expense are justified. Honestly, I once thought it was an optional upgrade—until I faced the consequences of ignoring it. Properly installed coved bases can reduce maintenance and extend the lifespan of your flooring—saving you time and money in the long run. According to flooring experts, sealing and cove-polishing can decrease the risk of bacteria growth by up to 50%, which is crucial in food-safe environments. To get a clearer picture of how to implement this effectively, I recommend checking out [Floor Leveling Challenges and Solutions](https://tiletrendshop.com/step-by-step-guide-to-flooring-installation-and-leveling-success), which covers foundational techniques that make installation smoother.
So, have you experienced issues with water or dirt creeping into your flooring edges? If so, you’re not alone—and the good news is, there’s an accessible solution that makes a real difference.
Achieve Perfect Floor Leveling Step by Step
Start by clearing your workspace; remove all debris and loose materials that can interfere with leveling or tiling. Think of this as preparing a blank canvas—clean and smooth surfaces set the stage for success. Next, inspect your subfloor with a laser level or water level to identify high and low spots. I vividly remember using a laser level to survey my kitchen floor, which revealed a sagging corner I hadn’t noticed—this step is crucial to prevent future tile cracks. Mark the uneven areas clearly with chalk or tape for easy reference.
Once identified, you can begin applying self-leveling compound. Choose a high-quality product designed for the substrate you’re working with—concrete or wooden subfloors require different formulations. Before pouring, ensure the surface is primed properly; this allows for better adhesion, similar to how primer helps paint stick to walls evenly. When mixing the self-leveler, use a slow-speed paddle to avoid introducing air bubbles, which can weaken the finish. My first attempt involved rushing the mixing process; the result was a fragile layer that cracked under minimal pressure. For optimal results, follow the manufacturer’s mixing instructions meticulously, adjusting the water-to-material ratio as needed.Many homeowners and even seasoned contractors fall into common traps when it comes to hardwood floors and flooring installation. One prevalent misconception is that flawless leveling isn’t crucial, but in reality, neglecting proper leveling can lead to cracks, uneven surfaces, and costly repairs down the line. Unlike the myth that surface smoothing is merely aesthetic, effective leveling ensures the longevity of your flooring and prevents future issues. An often-overlooked nuance is the importance of understanding subfloor irregularities—these can be deceptive and cause significant problems if not addressed proactively. For example, some assume that using a generic self-leveling compound suffices; however, selecting the right product and applying it correctly, as outlined in [flooring installation fundamentals](https://tiletrendshop.com/flooring-installation-fundamentals-leveling-for-a-seamless-look), makes all the difference. Additionally, many believe that premium materials guarantee success, but neglecting proper prep work, like cleaning and priming, can compromise even the best floors, leading to adhesion failures and surface imperfections. When installing tiles over hardwood, a common mistake is not accounting for movement and expansion, which can result in cracked grout or tiles. Advanced installers know that accommodating these factors through proper expansion joints and flexible adhesives extends the lifespan of your floors. Furthermore, misconceptions persist around the timing and curing of adhesives and finishes; rushing these steps can trap moisture or cause surface hazing, reducing durability and aesthetic appeal. For those eager to elevate their skills, mastering precise leveling techniques—such as checking with laser levels or elevation rods—avoids common pitfalls. Remember, successful flooring installation isn’t just about choosing the right style or color; it’s about understanding these nuanced principles and applying them meticulously. Want to delve deeper? Explore [the ultimate guide to floor leveling for a perfect finish](https://tiletrendshop.com/the-ultimate-guide-to-floor-leveling-for-a-perfect-finish) to elevate your project. Have you ever fallen into this trap? Let me know in the comments.
Maintaining Your Flooring Equipment for Peak Performance
To keep your flooring projects moving smoothly, investing in the right tools is essential. I personally swear by a high-quality angle grinder equipped with a turbo cup wheel for surface prep—it’s incredible at removing old finishes and leveling minor imperfections. Instead of settling for generic models, I opt for brands like Makita or Metabo because their durability and precision save me time and reduce frustration during critical phases like grinding or polishing. For measuring floor levels with accuracy, I use a laser level with a self-leveling feature, ensuring your substrate is flawlessly flat before laying tile or hardwood. Pro tip: Regularly calibrate your laser level and replace batteries before each project to prevent costly errors. When it comes to mixing and applying self-leveling compounds, I rely on a paddle mixer attached to a drill with variable speed control—this prevents air entrapment and guarantees a smooth, bubble-free layer. Click here to explore advanced leveling techniques that will elevate your installation quality. I predict that as technology advances, smart tools with digital readouts and app connectivity will become standard, providing even greater precision and efficiency.
How do I keep my flooring tools in top condition over time?
Proper maintenance is key to extending the lifespan of your equipment. After each use, thoroughly clean power tools with a brush and compressed air, paying close attention to vents and moving parts. Apply manufacturer-recommended lubricants to prevent rust and ensure smooth operation. Store your tools in a dry, dust-free environment—preferably in padded cases or organized shelving—to avoid damage. I also recommend periodic calibration and inspection of laser levels and measurement devices, as small misalignments can lead to big issues down the line. Investing in quality replacement parts for your tools, like diamond blades or pads, can prevent costly downtimes. Additionally, keeping a detailed log of maintenance activities helps track wear patterns and plan timely replacements. For more expert tips on tool upkeep, visit this resource. Staying proactive with tool care not only guarantees consistent results but also saves money by avoiding premature failures. Try incorporating a routine cleaning and inspection schedule into your workflow—your future self will thank you for the smooth projects and flawless finishes that result.,
Lessons I Never Saw Coming with Hardwood Floors and Tile Installations
- Patience Trumps Speed: Rushing through floor leveling or tile setting often leads to costly mistakes. Taking the extra time to double-check your measurements and ensure proper mixing can save days of frustration later.
- Every Project Tells a Story: My early experiences taught me that no two floors are the same. Recognizing subtle subfloor irregularities and adapting accordingly made all the difference in achieving a flawless finish.
- Tools Are Your Best Friends: Investing in quality measurement and leveling tools provided me with precision I couldn’t have achieved otherwise. Their accuracy genuinely transforms the end result.
Tools and Resources That Changed My Perspective
- Self-Leveling Compounds from TileTrendShop: Choosing the right product, like the ones recommended in this guide, ensures a stable, long-lasting foundation.
- Laser Levels for Perfect Flatness: My Makita laser level, trusted for its durability, kept me accountable during installation. Proper calibration prevented uneven surfaces.
- Flooring Guides and Tutorials: The articles on common pitfalls and professional techniques provided insights I couldn’t have gleaned on my own.
A Final Push to Make Your Floors Shine
Remember, your hardwood and tile flooring project isn’t just about laying materials; it’s about creating a space that reflects dedication and craftsmanship. Every step, from leveling to finishing, matters. Embrace the challenges and celebrate the progress—you’re capable of transforming your space into something truly extraordinary. Ready to take that first confident step? Your future floors will thank you. What’s been your biggest lesson learned in flooring projects? Share below and let’s learn together!