
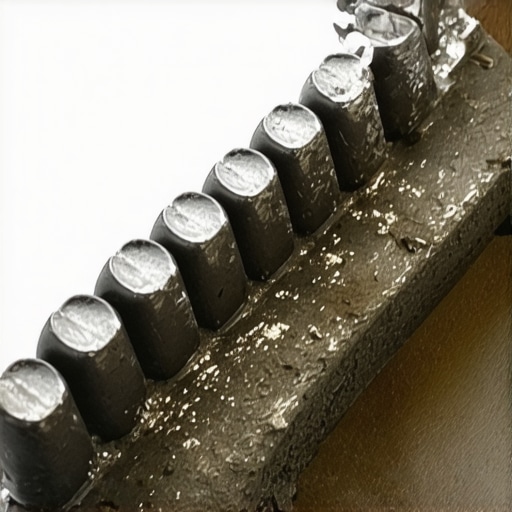
I remember the moment vividly—laying down a fresh layer of thinset, confident that my tile installation would turn out perfect. Then, I noticed it: uneven coverage, gaps, and worse, those telltale signs of a worn-out trowel. I had pushed my tools too hard, ignoring the subtle clues that my trowel’s teeth needed replacement. That lightbulb moment made me realize how critical the condition of your trowel teeth really is to the success of your project.
Don’t Let Equipment Wear Undermine Your Hard Work
When your trowel teeth are worn down, it’s like trying to write with a dull pen—nothing flows smoothly, and your results suffer. This issue is more common than many DIYers realize, and it impacts not only the coverage but also the longevity and appearance of your flooring installation. A worn-out trowel can cause thin patches, air pockets, and uneven adhesion, leading to future problems that are costly and time-consuming to fix.
Understanding the signs of wear and knowing when to replace your trowel teeth can save your project from failure. In my early days, I neglected this part, and it resulted in a lot of frustration and rework. Early on, I made the mistake of continuing to use a nearly toothless trowel, which only compounded the problem. Trust me, keeping your tools in top shape isn’t just about efficiency—it’s about ensuring the quality of your work.
If you’re wondering whether it’s time for a new trowel, ask yourself: Are my coverage patterns consistent? Is the thinset spreading evenly? If the answer is no, then it might be time to check your tool. And don’t worry, replacing or sharpening teeth is simpler than you might think. For a detailed guide on maintaining your tools effectively, check out [The Ultimate Guide to Floor Leveling for a Perfect Finish](https://tiletrendshop.com/the-ultimate-guide-to-floor-leveling-for-a-perfect-finish).
Next, let’s explore how to recognize the telltale signs of worn teeth and what steps you should take to keep your installations flawless. But first—have you faced issues with coverage or adhesion that made you question your tools? Share your experience in the comments; you’re not alone in this.
Remember, a little preventative maintenance goes a long way toward professional results—and preventing unnecessary headaches down the line.
Inspect Your Trowel Teeth Before Starting
Before each project, examine your trowel teeth closely, just like a chef checks their knives for sharpness. During a recent project, I noticed some teeth had rounded edges after a few uses, which caused uneven thinset coverage. I replaced the worn teeth immediately, preventing the typical gaps and air pockets that can ruin a tile job. Use a dedicated tool or pliers to assess the teeth for burrs or flattening. If substantial wear is evident, it’s time to sharpen or replace them, much like maintaining your blades for a cleaner cut.
Sharpen or Replace Teeth Promptly
If your teeth are dull, try sharpening them with a small file—imagine honing a chisel for precise carving. For significant damage, replacing the teeth is the best choice. To do this, remove the old teeth with a wrench, clean the slot, and insert new ones—think of it as swapping out worn gears for new, ensuring smooth operation. This routine minimizes downtime and maintains optimal coverage consistency, which is critical when laying large-format tiles where even minor inconsistencies become glaring issues.
Adjust Trowel Angles for Optimal Thinset Spread
Hold your trowel at a consistent angle—typically 45 degrees—akin to a painter maintaining a steady brush stroke. During my last job, I experimented with different angles, and found that a steeper angle increased thinset thickness, improving adhesion on uneven surfaces. Adjust the angle based on the substrate’s condition; flatter for smooth surfaces, steeper for rough ones. This precise control helps create a uniform bed of thinset, preventing voids that lead to tile breakage or loose installation.
Apply Even Pressure During Spreading
Press your trowel firmly but evenly, like spreading butter on bread. I once pressed too hard on one side, resulting in excessive thinset and a lopsided surface. Practicing even pressure ensures consistent coverage across the entire substrate. Use your body weight rather than arm strength alone, which reduces fatigue and improves accuracy, especially over large areas. This technique guarantees a level, strong adhesion that withstands foot traffic and environmental stresses.
Maintain Your Trowel for Long-Term Performance
After each use, clean your trowel thoroughly with warm water and a brush—think of it as cleaning a paintbrush to preserve its edge. Regular maintenance prevents buildup of dried thinset, which can dull teeth and impede smooth spreading. Store your tools in a dry, protected area, avoiding exposure to moisture that causes rust and deterioration. Well-maintained tools prevent slips during application, reduce material waste, and extend their functional lifespan, ensuring your projects stay on track without equipment failure slowing you down.
While many DIYers focus on the visible aspects of flooring like choosing the right wood or tile pattern, there are nuanced pitfalls that often go unnoticed but can seriously impact the longevity and appearance of your installation. Let’s dig deeper into some of the most common myths and advanced mistakes that even seasoned homeowners might fall for.
Firstly, there’s a widespread belief that all hardwood floors react similarly to humidity changes. In reality, not all wood species are created equal; for example, Brazilian cherry is known to shift color and even warp more rapidly in sunlight than oak or maple. This misconception can lead to choosing the wrong type of finish or underestimating the need for proper acclimation and expansion gaps. For an in-depth understanding, check out [how to choose the right hardwood for your environment](https://tiletrendshop.com/elevate-your-space-choosing-the-right-hardwood-floors-for-your-home).
When it comes to floor leveling, many assume that applying a quick-setting self-leveler will do the trick without meticulous surface prep. This is a trap—premature sealing or insufficient cleaning can prevent proper adhesion, leading to cracks or uneven surfaces over time. Advanced installers know to [master the right surface preparation techniques](https://tiletrendshop.com/precise-floor-leveling-techniques-to-achieve-flawless-surfaces), ensuring a durable, flat foundation.
In flooring installation, a pungent myth is that the thickness of thinset or adhesive is the primary factor for good adhesion. However, experts emphasize that installation conditions—like temperature, subfloor moisture, and mixing ratios—play equally critical roles. Overlooking these can result in bond failures, especially with tile or engineered wood. For example, [professional tips on optimal installation conditions](https://tiletrendshop.com/step-by-step-guide-to-flooring-installation-and-leveling-success) can help avoid costly mistakes.
The myth that all tiles are compatible with every substrate might seem harmless but can turn problematic in practice. Certain tiles—like natural stone—require specific primers or back coats. Failure to recognize this nuance can lead to staining, cracking, or delamination. Knowledge about tile compatibility is crucial for areas with high moisture or thermal fluctuations. For a comprehensive guide, explore [selecting the best tile for your project](https://tiletrendshop.com/choosing-the-best-tile-for-your-hardwood-floor-upgrade).
Finally, advanced practitioners know that some common practices like over-tightening grout or using too much thinset can cause issues that are hard to fix later. Over-tightening can crack tiles, and excess thinset may lead to uneven surfaces or discoloration. These mistakes highlight the importance of precise application techniques—because good craftsmanship makes the difference between a professional-looking finish and a project that needs redo.
Have you ever fallen into this trap? Let me know in the comments. Avoid these pitfalls by staying informed and paying attention to the subtle nuances that separate good results from great ones.
Invest in Precision Tools for Consistent Results
When tackling hardwood floors, floor leveling, or tile installations, having the right tools is non-negotiable. I personally rely on a high-quality notched trowel, specifically a ¼-inch V-notch for tile work. This size provides optimal thinset coverage without excess, reducing waste and preventing lippage. I prefer stainless steel trowels because they resist rust and maintain their edge over time, ensuring consistent application throughout multiple projects. To check the levelness of my subfloor, I use a laser level, which offers accuracy over traditional bubble levels—especially beneficial in large rooms where precision is key. For floor leveling, I turn to a vibratory power trowel designed for self-leveling compounds; its consistent vibration ensures a smooth, even pour, and I’ve found it invaluable for achieving professional-grade results. In my experience, upgrading to these specialized tools significantly reduces rework and enhances overall quality.
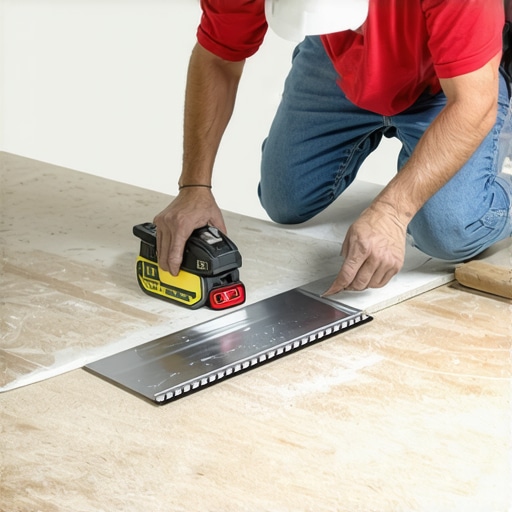
Image prompt: A professional flooring installer demonstrating the use of a laser level and a stainless steel notched trowel on a freshly prepared subfloor, illustrating precise tool usage for perfect installation. Alt: Expert using laser level and trowel for flooring; Title: Precision Tools in Flooring Installation.
Develop a Routine for Tool Maintenance
Consistent maintenance of your equipment extends its lifespan and preserves your workmanship’s integrity. After each project, I clean my trowels and floaters with warm water and a brush—dried thinset can harden and damage tool edges. Sharpen or replace worn teeth on my notched trowels every few jobs; dull teeth cause uneven thinset spread, which impacts tile flatness. For power tools, I follow manufacturer-specific maintenance routines—oil moving parts regularly and check for loose components before each use. When storing, I keep tools in a dry, protected environment, away from humidity that can cause rust. Investing in high-quality tools initially saves money long-term, removing the need for frequent replacements or repairs. A well-maintained toolkit ensures you’re always ready to deliver flawless results, whether you’re leveling a floor or installing tile.
Lessons Hidden Beneath the Surface of Flooring Success
One of the most eye-opening lessons I learned was the importance of consistent tool maintenance—neglecting this can silently sabotage your project, leading to uneven coverage or gaps that compromise durability. I once overlooked the wear on my trowel teeth, only to find my finish surface riddled with flaws. That moment taught me that sometimes, the smallest details—like replacing worn teeth or calibrating your laser level—hold the key to achieving professional results. Another lesson was realizing how critical substrate preparation is—skipping proper cleaning or surface smoothing can cause long-term issues, despite a seemingly flawless installation initially. Lastly, the myth that all adhesives behave similarly cost me dearly; understanding specific material compatibilities ensures longevity and aesthetic appeal in your flooring. These insights underscore that mastery isn’t just about techniques but about paying attention to subtle cues and refining your toolkit over time.