
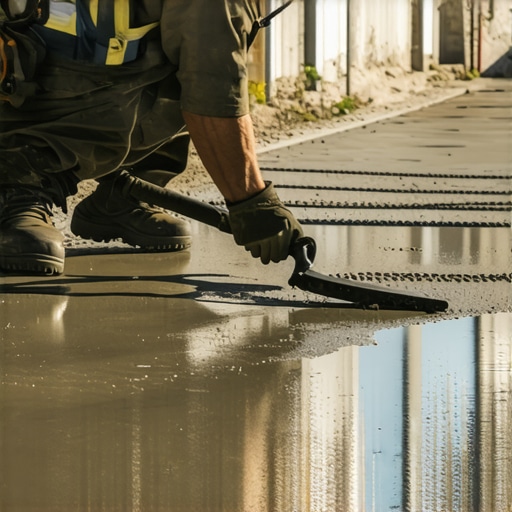
I remember the moment clearly—standing over a freshly poured concrete slab, arms aching from trying to smooth out an unavoidable dip. It was late, I was frustrated, and I knew I needed a better way. That lightbulb moment when I discovered The Steel Trowel Trick changed everything—turning a painstaking, never-ending battle into a straightforward fix. If you’ve ever battled with uneven patches on your concrete or struggled to achieve flawless flooring transitions, you’re not alone. I want to share with you the secret weapon that made my life—and my projects—so much easier.
The Ugly Truth About Hand-Patching Concrete Dips
Concrete dips are a sneaky problem—small at first, but they can grow into major issues that ruin the aesthetic and functionality of a floor. When I first started, I underestimated how critical proper patching is, often ending up with uneven surfaces, or worse, patch failures that cracked or sank over time. Early on, I made the mistake of rushing the finishing process, thinking a quick troweling would do. That oversight cost me time, money, and a lot of frustration. And trust me, cracks or dips become your project’s worst enemy. But I found a way—one that’s simple, effective, and surprisingly inexpensive: the Steel Trowel Trick.
Is This Technique Too Good to Be True?
Initially, I was skeptical. I’d seen many methods promising flawless results, but they often fell flat or required specialized tools. My biggest concern was, “Will this really work for my uneven patches?” I learned early on, however, that even simple tools can make a big difference—if used correctly. It’s important to understand that many mistakes stem from not knowing the right techniques. For instance, I once used too much fast-setting patch, which caused more dips than it covered. That was a costly lesson, but it taught me the importance of patience and precision. These days, I rely on my trusty steel trowel to get a smooth, level surface every time. And if you’re curious about smart, professional secrets, I suggest reviewing these expert techniques—they complement the steel trowel method perfectly.
Next, I’d love to guide you through how this trick works and how you can apply it to your own projects. Are you ready to say goodbye to those stubborn dips? Let’s get started!
,
Preparing the Surface for Success
Before applying the steel trowel technique, ensure your patch area is clean, dry, and free of loose debris. I once skipped this step, which led to poor adhesion and dips that reappeared within days. Use a wire brush or vacuum to remove dust and particles, then lightly dampen the area if needed. Proper prep is like laying a solid foundation for a house—crucial for long-lasting, smooth results.
Create a Level Bed with Fast-Setting Patch
Choose a high-quality fast-setting concrete patch, like Quick-Set or similar. Mix it according to manufacturer instructions, aiming for a consistency similar to peanut butter—thick but workable. I remember mixing a batch too watery once; it caused the patch to sink and crack. Spread the patch generously over the dip, filling it slightly above the surrounding slab. Think of this as filling a pothole—you want to slightly overfill to account for settling when you trowel smooth.
Yield to the Cure and Avoid Overworking
Let the patch cure for the time specified by the manufacturer, typically 15-30 minutes. Rushing this can lead to weak spots or cracks. During this wait, I once started troweling too early, which pulled the patch apart. Patience here is key—think of it as waiting for paint to dry before doing detail work. A properly cured patch provides a perfect surface for the steel trowel to work its magic.
Apply the Steel Trowel with Precision
Once cured, take your steel trowel—preferably a smooth, solid piece— and hold it at a low angle. Start at one edge, sliding the trowel across the patch in long, even strokes. Use moderate pressure, and keep your movements steady. During my first attempt, I applied uneven pressure, leaving ridges; I learned that consistent force and a controlled motion produce a glass-smooth finish. Imagine shaving off excess bulk—you’re leveling and blending the patch seamlessly with the existing slab.
Work in Sections, Not Haphazardly
Divide the patch into manageable sections—small enough to finish quickly. Focus on feathering the edges into the surrounding concrete to avoid noticeable lines. I once tried to tackle an entire patch at once, leading to fatigue and uneven surface. Breaking it into sections is like painting a wall—one panel at a time ensures quality and control.
Finalize and Cure the Surface
After troweling, the surface should be silky and level. Allow the patch to cure fully, typically 24 hours or as recommended. During curing, avoid foot traffic or vibrations that can cause dips or cracks. I learned this the hard way when walking over a fresh patch too soon; it caused a minor sink. Covering the patch with plastic during curing can prevent moisture loss and ensure a strong, flat surface. For more detailed techniques, consider reviewing these expert tips which complement the steel trowel method perfectly.
Inspect and Refine
Once cured, examine the patch for any imperfections. Lightly sand or re-trowel small areas if needed for perfection. My first patch wasn’t perfect the first time, but a gentle sanding revealed a smooth, flawless finish that blended seamlessly with the existing slab. Remember, patience and attention to detail turn a good patch into a professional-looking repair.
Even experienced professionals sometimes fall prey to misconceptions about floor leveling and installation, which can lead to costly mistakes. One widespread myth is that the fastest method or the cheapest materials always yield the best results. In reality, rushing a floor leveler or choosing subpar materials might save time upfront but will likely cause issues down the line, such as cracks, squeaks, or uneven surfaces. Advanced installers know that meticulous preparation, using high-quality underlayment, and following a precise leveling sequence—like the techniques detailed in these professional secrets—are crucial for long-term success. Furthermore, many assume that self-leveling compounds are foolproof; however, failing to mix them at the correct rate or ignoring ambient conditions can result in premature adhesion failure, as highlighted in recent studies on floor prep.
A common trap is to ignore the importance of subfloor stability, particularly under hardwood floors, which can cause significant problems like buckling or gaps over time. Using an improper substrate, or neglecting to install expansion joints in large open-concept areas, can amplify these issues. Advanced experts understand that understanding the nuances—such as the specific gravity of the leveling compound or proper application angle of tools—is as vital as the obvious steps. For example, the ultimate guide to floor leveling emphasizes these subtleties.
In addition, many people overlook the diversity among flooring types. For hardwood floors, the challenge is not just in laying planks but also in accounting for humidity fluctuations, which can cause them to expand or contract unpredictably. For tile installation, understanding joint width and grout compatibility can significantly influence aesthetic and durability. As expert opinions suggest, paying attention to these less obvious factors—like moisture barriers over subfloors or the specific heat tolerance of materials—can make or break your project. You can even explore contemporary design options by reviewing trending tile designs that complement hardwood
Myths also persist about DIY versus professional work: many believe that self-levelling and tile setting are straightforward tasks. But without a nuanced understanding, DIYers often encounter pitfalls like surface pits, adhesion issues, or contour irregularities. A warning to heed is not to underestimate the importance of surface inspection before installation—skipping this step can lead to hidden dips or debris causing problems later. Remember, even minor imperfections at the prep stage are magnified once overlaying floors or tiles, as outlined in mistakes to avoid for lasting results.
To sum up, let’s dig deeper. Recognize that meticulous attention to detail, understanding the material science behind leveling compounds, and respecting the complexity of each flooring type are what separate professional results from amateur attempts. Have you ever fallen into this trap? Let me know in the comments.
Keeping Your Floors in Prime Condition
To ensure your flooring projects stand the test of time, investing in the right tools and establishing a solid maintenance routine are paramount. I personally rely on a high-quality laser level, such as the Bosch GLL 3-330 C, which provides precise measurements across large surfaces. Its self-leveling feature and Bluetooth connectivity make it indispensable for aligning tiles or hardwood planks accurately, reducing potential future issues. Additionally, a durable, ergonomic notched trowel—preferably with a T-style handle—helps spread adhesives and leveling compounds evenly, preventing dips and voids that compromise long-term durability. When dealing with hardwood floors, I prefer using a microfiber mop for routine cleaning, which effectively captures dust without scratching the surface, preserving the finish for years to come.
Tools like the precision levelers and moisture meters are equally crucial. Moisture meters help monitor humidity levels in subfloors and hardwoods, especially in climates prone to fluctuations, safeguarding against warping or buckling over time. Regularly inspecting these parameters and addressing issues early can dramatically extend your flooring’s lifespan.
How do I maintain my flooring projects over time?
Consistency is key. Regular cleaning with appropriate products tailored to your flooring type keeps dirt from settling into cracks and joints. Avoid harsh chemicals that can degrade finishes; instead, opt for pH-balanced cleaners or those recommended by flooring manufacturers. For hardwoods, periodic buffing and refinishing can restore luster. For tile and grout, resealing every few years prevents staining and moisture intrusion. Moreover, implementing protective pads on furniture legs and controlling indoor humidity levels—ideally between 35-55%—prevent unforeseen damage. Hardwood floor care tips provide excellent guidance, but the main idea is to stay vigilant and proactive.
As trends push towards smarter, more connected homes, integrating sensor-based moisture and humidity monitors can alert you to potential issues before they become costly repairs. This technological approach exemplifies the future of flooring maintenance, making projects more manageable and durable over the long haul.
Scaling Up and Planning for Long-Term Success
Once you master basic maintenance, considering how to scale your efforts becomes essential—especially for large or multi-room installations. Developing a comprehensive plan for tools, routine inspections, and timely upgrades enhances the longevity of your floors. For instance, when expanding a hardwood area, ensuring consistent surface preparation—using techniques like the professional-level leveling—guarantees seamless integration and prevents future dips or unevenness.
In the coming years, I predict that technological innovations, such as robotic cleaning systems equipped with moisture sensors, will revolutionize flooring maintenance. Staying informed about these tools and adopting advanced methods—like automated moisture control systems—will allow you to keep your floors looking impeccable with minimal effort, saving time and money in the long run.
Throughout my journey with flooring projects, I uncovered invaluable lessons that transformed my approach and outcomes. One of the most profound insights was realizing that perfection often lies in the details, especially when it comes to floor leveling and finishing. For instance, I once believed that simply applying a patch and smoothing it out was sufficient, but I soon learned that the technique and timing are just as crucial. Waiting for the right cure time and applying the steel trowel with consistent pressure made all the difference, preventing future dips or cracks. Another lesson was understanding that all surfaces, no matter how small the dip, require meticulous prep — a clean, dry, and dust-free area creates the perfect foundation for a flawless finish. Lastly, I discovered that patience truly pays off; rushing the process compromises the entire project, leading to costly repairs or dissatisfaction. These insights, born from firsthand experience, are the hidden gems that can steer you toward professional quality results, saving time and frustration in the long run.