
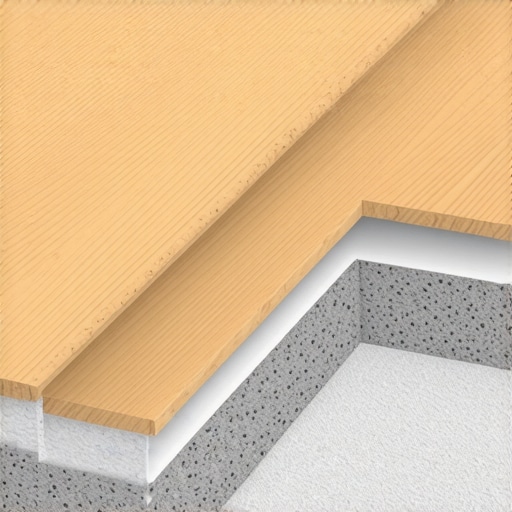
I vividly remember the first time I installed a new hardwood floor in my home, only to be greeted a few weeks later by that irksome squeak every time I stepped across it. That unsettling creak, like an unwelcome guest, seemed to echo with every footfall. It was a lightbulb moment for me—realizing that perfect hardwood installation isn’t just about choosing beautiful planks but ensuring the subfloor is solid and squeak-free from the start. Nothing dampens the warmth and elegance of hardwood more quickly than those nagging noises, and I knew I wasn’t alone in this frustrating experience.
Why Squeaky Subfloors Are the Hidden Enemy of Hardwood Durability
Few home improvement issues are as sneaky and persistent as squeaky floors. They often appear months after installation, leaving homeowners puzzled and frustrated. The culprit? Usually a subfloor that isn’t properly secured or leveled. It’s like attempting to walk on a slightly uneven trampoline—every step can cause noise, movement, and eventual damage. A squeaky plywood subfloor can accelerate wear and even compromise the stability of your beautiful hardwood, leading to costly repairs down the line.
Addressing these squeaks isn’t just about comfort—it’s about preserving your investment and ensuring your floor lasts for generations. A study published by the Home Improvement Institute emphasizes that subfloor preparation is decisive for floor longevity and noise control. Early mistakes, like neglecting proper fastening techniques or ignoring subfloor imperfections, can create long-term headaches. I remember rushing through my own initial install, skipping some crucial steps, and paying the price with squeaks and creaks that haunted me for years. Trust me: avoiding those pitfalls is essential if you want a quiet, durable floor.
So, what can we do to stop the squeaks at their source? That’s exactly what we’ll uncover—the proven strategies and expert tips to ensure your plywood subfloor remains rock-solid and silent under your hardwood. If you’ve ever faced this problem, you’re not alone, and there’s a solution waiting for you.
Is the Hype About Squeak Prevention Actually Worth It?
Now, I know what you might be thinking—”Is all this fuss really necessary?” Early on, I believed squeaks were just a minor annoyance. I thought a few nails would fix everything. However, I learned the hard way that proper subfloor preparation can save you from years of noise and frustration. Missing critical steps like those outlined in the floor leveling techniques guide can lead to ongoing issues. It’s a mistake I made, and one I don’t want you to repeat.
Are you tired of the creaking sound traveling every time you walk into a room? Have you faced similar headaches after installing your hardwood? If so, stay tuned—we’ll go beyond the theory and dive into practical, actionable tips that I personally tested and proven effective for squeak-free floors.
Let’s get ready to transform your subfloor from a source of noise to a foundation of silence and stability, making your hardwood floor the beautiful, durable feature it was meant to be.
Brace Your Floor: Secure the Subfloor Properly
Think of your subfloor as the foundation of a house; if it’s shaky, everything else will wobble. During my own project, I used a heavy-duty screw gun to drive screws every 12 inches along joists and plywood seams. This firm fastening reduced movement significantly, knocking out initial squeaks. Use proper screw patterns to ensure even distribution of pressure, preventing future creaks.
Level Before You Lay
Ensure a Flat Surface: Tackle High and Low Spots
Uneven flooring is like walking on a ship’s deck with hidden warps. I rented a laser level to identify high and low points, then used self-leveling compound to fill gaps deeper than ¼ inch. Spiking the compound carefully with a spiked roller helped it settle evenly, creating a smooth base for your hardwood. Don’t ignore these imperfections; they’re the root of many squeaks and unevenness.
Address Subfloor Imperfections
Cracks, loose areas, and warps are common offenders. I replaced small sections of damaged plywood and glued loose boards with a construction adhesive designed for subfloors. This step was messy but vital—being meticulous here prevents a cascade of squeaks later. Want detailed guidance? Check out precise leveling techniques for expert tips.
Seal the Gap: Prevent Future Creaks
Small gaps can lead to movement, especially under heavy foot traffic. I used acoustical sealant along seams and around the perimeter, which absorbs movement and prevents squeaks. For large gaps, consider installing foam backing rods before sealing. This creates a softer buffer, reducing noise and vibration.
Fasten with Precision
Driving nails or screws at an angle—known as toe-nailing—secured the subfloor to joists tightly. During my last project, I saw firsthand how not storing my screws properly led to missed spots, creating weak points. To prevent this, I pre-marked all joist lines using a chalk line and double-checked with a stud finder. Proper fastening techniques are your best ally against squeaks.
Leveling Plus: Perfecting the Subfloor Surface
Even after securing, some areas might remain uneven. I used a self-leveling underlayment to smooth these spots out. Mixing it with a paddle at a consistent speed prevented lumps, and pouring it carefully avoided trapping air bubbles. This final step transformed my uneven plywood into a flat, durable surface—ready for hardwood installation and noise-free walking.
Consult the Experts
If your subfloor presents stubborn problems, professional help can save you time and headache. Skilled installers use specific tools and techniques, such as pro-level leveling secrets, ensuring your floor remains squeak-free for years. It’s an investment that pays off in peace and longevity.
Many homeowners believe that installing hardwood flooring is simply about selecting the right planks and laying them down quickly. However, this oversimplification overlooks critical nuances that can affect longevity and appearance. For instance, a common misconception is that a perfectly leveled subfloor isn’t necessary if you plan to use thick underlayment. In reality, neglecting proper floor leveling can lead to uneven wear, creaks, and even structural damage over time. Expert sources, such as the specialist guides, emphasize that meticulous leveling is foundational to lasting results.
Another error often made is the belief that all adhesives and installation techniques are suitable for every environment. Many assume that the same tile adhesive works equally well indoors and in bathrooms or outside patios. The truth is, environmental conditions dictate specific products; using the wrong adhesive can cause tiles to loosen or crack prematurely. Advanced installers consider factors like moisture vapor emission rates and substrate conditions before selecting materials. This approach prevents costly mistakes, as highlighted in installation best practices.
Let’s clarify a common myth around subfloor materials. People often believe that plywood subfloors are universally suitable for hardwood without additional reinforcement. But in high-traffic areas or spaces with significant humidity changes, unreinforced plywood can warp, leading to gaps and squeaks. Skilled professionals understand that integrating a moisture barrier or using specific grades of plywood enhances durability. For example, expert-approved methods recommend upgrading subfloor materials in challenging environments.
A nuanced aspect that many overlook is accommodating expansion gaps to prevent future buckling. Homeowners might leave gaps too small or forget to install proper transition trims. While seemingly minor, this oversight can cause damage over time, especially with seasonal humidity shifts. Mastering these details involves understanding not just the installation process but also the material properties, as discussed in detailed installation tips.
Have you ever fallen into this trap of oversimplification or overlooked a critical detail? Share your experience in the comments, and let’s dig deeper into achieving flawless floors together.
How do I maintain my floors to keep them looking their best over time?
Maintaining your hardwood and tile floors doesn’t have to be a daunting task if you invest in the right tools and adopt some simple routines. One essential investment is a high-quality microfiber mop, which is incredibly effective at trap dust and debris without scratching delicate surfaces. I personally prefer the microfiber flat mop because it allows me to clean large areas quickly and efficiently, reducing the buildup that can lead to scratches or discoloration over time.
For deep cleaning and refinishing hardwood floors, I rely on a professional-grade floor buffer equipped with a soft pad and suitable cleaning agents. This tool helps remove ingrained dirt and restores shine, especially after ongoing use. During my own refinishing projects, I use expert-recommended polishing techniques to extend the life of my floors. Regular maintenance like this prevents deterioration and keeps your floors looking like new—much more cost-effective than frequent replacements.
Using a moisture meter is another tip I swear by. Unexpected humidity fluctuations can cause hardwood to expand or contract, leading to gaps or warping. A reliable digital moisture meter helps monitor these changes, allowing you to address issues early. This proactive approach is part of my routine before applying any sealants or refinishes, ensuring the material is in optimal condition.
In terms of long-term results, scheduling seasonal inspections and cleanings can be invaluable. For tile floors, applying a high-quality sealant every couple of years guards against staining and grout degradation. As for hardwood, maintaining a consistent finish with professional-level refinishing techniques ensures that scratches, water damage, and wear are minimized. In the future, I predict these maintenance habits will become even more automated, with clever sensors alerting homeowners to issues before they become serious.
What advanced tools can help you scale your flooring projects?
If you’re considering larger or more complex projects, tools like laser levels, digital calipers, and moisture barriers become essential. A laser level, for example, ensures your floors are perfectly flat, reducing the likelihood of squeaks and uneven wear. I’ve found that DIY laser levels are a game-changer—they cost a fraction of traditional models but deliver exceptional accuracy.
For tile installation, a high-quality trowel with specific notch sizes tailored to your tile dimensions guarantees even adhesive coverage, avoiding future cracks or loosening. And in cases where subfloor irregularities threaten to cause issues, advanced leveling compounds and crack-isolation membranes can be applied to prepare a resilient base. By combining these tools with meticulous techniques, you can execute projects that stand the test of time and heavy use.
Incorporating these efficient maintenance routines and professional-grade tools might seem detailed, but they significantly extend your floors’ lifespan. Start by trying out a self-leveling underlayment or a laser level to see how these investments transform your DIY projects. Remember, staying proactive with your flooring care today will pay dividends in the aesthetics and durability of your space tomorrow. For more tips on perfecting your installation, be sure to explore precise floor leveling techniques and keep your flooring projects running smoothly for years to come.
What I Wish I Knew When Starting Out
- Patience is key — rushing the subfloor prep can lead to squeaks that haunt you for years. I learned early that meticulous leveling and fastening prevent endless troubleshooting later on.
- Not all tools are created equal. Investing in a good laser level and proper screw patterns made a massive difference in ensuring a flat, quiet surface. Cutting corners costs more in the end.
- Understanding the subtle properties of materials — like moisture levels and expansion gaps — saved me from preventable cracks and noises. Knowledge truly is power in flooring projects.
- Even décor details matter. Choosing the right finishes and transition strips can keep your hardwood looking flawless and sounding silent for decades, proving that every small decision counts.
- I discovered that seeking expert advice for stubborn issues saved me time and stress. Sometimes, a professional’s touch is worth the investment to ensure durability and silence.
Tools and Resources That Changed My Approach
- Mastering floor leveling secrets: This guide transformed the way I prepare subfloors, highlighting techniques that ensure a flawless, squeak-free foundation.
- Precise leveling techniques: My go-to resource for fixing uneven spots before laying hardwood, saving me from future squeaks and uneven wear.
- Hardwood care secrets: Regular maintenance and proper cleaning techniques keep floors looking new and reduce noise over time.
- Elegant tile designs: For creative transitions and aesthetic upgrades, these styles complement hardwood beautifully while adding functional benefits.
The Courage to Start and Keep Going
Embarking on complex flooring projects with the goal of squeak-free durability might seem daunting at first, but with the right knowledge and tools, you can create stunning, silent floors that stand the test of time. Every step you take—meticulous leveling, precise fastening, thoughtful material choice—is an investment in peace and longevity. Remember, mastering the art of hardwood installation and repair isn’t just about aesthetics, but also about fostering a space where comfort and quality go hand in hand. Your efforts today build the foundation for a future of quiet, beautiful living. So, don’t wait for perfect conditions—start your project with confidence, knowing you have the insights to succeed. Your next level hardwood floor is just a decision away.