
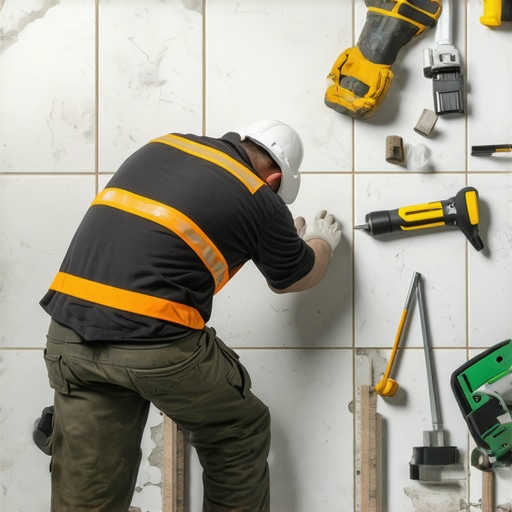
It happened on a quiet Sunday morning—I stepped onto my freshly tiled kitchen floor and felt a strange, hollow thud beneath my feet. At first, I thought it was a loose tile or maybe just my imagination. But as I pressed down, the unsettling realization set in: I had a hollow spot under my new tile installation. That feeling of shaky confidence in your home improvement project—yeah, I’ve been there—can be downright frustrating. It’s like a tiny, persistent reminder that something went wrong somewhere along the line.
Why a Hollow Spot Can Ruin Your Hard-Earned Home Upgrade
Understanding why this issue matters is the first step in fixing it. A hollow spot isn’t just an eyesore; it indicates an underlying problem with your subfloor or the installation process itself. This can lead to tiles cracking, uneven surfaces, and even long-term structural issues if not addressed promptly. I learned this the hard way early in my DIY journey—failing to identify the root cause could have cost me more extensive repairs down the line. Did you know that poor subfloor prep is responsible for up to 70% of tile failures, according to flooring experts?
Fortunately, with patience and a little know-how, you can correct this problem without having to rip up the entire floor. But first, you need to pinpoint what caused the hollow spot in the first place. Is it a void beneath the tile, or perhaps an uneven subfloor? Recognizing the source makes your fix more effective and long-lasting.
Have you ever faced this kind of issue after laying tile or hardwood floors? If so, you’re not alone. Many homeowners discover these problems only after the initial installation, and it’s no wonder. Floor leveling challenges can be tricky, especially if you’re new to tile or flooring installation. But I promise, there’s a straightforward way to resolve these issues—and I’ll guide you through it.
Let’s dive into the practical steps to repair that hollow spot and get your floor feeling solid and reliable once again. Whether it’s a small patch or a significant void, understanding the correct approach can save you time, money, and stress. Ready to become your own floor fix-it pro? Great! Keep reading, because the solution is closer than you think, and it all starts with identifying the root cause. And if you’ve faced this before, sharing your experience might just help someone else avoid similar pitfalls. For more detailed tips on floor leveling, check out [this comprehensive guide](https://tiletrendshop.com/the-ultimate-guide-to-floor-leveling-for-a-perfect-finish).
Now, let’s get our hands dirty—figuratively speaking—and restore stability to those tiles once and for all.
Identify the Cause Before Repair
Start by tapping gently around the hollow area with the handle of a screwdriver or a small hammer. If it produces a dull sound, you likely have a void underneath. To be sure, use a long screwdriver or a stud finder to locate spaces under the tile. When I faced my own problem, I discovered a significant gap caused by insufficient subfloor adhesion. Knowing the root cause helps determine the appropriate fix.
Prepare the Area for Fixing
Remove any loose grout or damaged tiles from the affected spot using a chisel and hammer or a multi-tool. Be cautious not to damage surrounding tiles. Clean debris thoroughly from the opening to ensure proper adhesion of repair materials. Wear safety goggles and a mask to protect against dust and chips. Proper prep is key—skip this, and your repair may fail prematurely.
Reinforce the Subfloor
If the void is beneath the tile, you’ll need to access the underneath space. Carefully lift the tile with a putty knife or a small pry bar. Once exposed, check the subfloor for damage or loose sections. Apply a high-quality self-leveling underlayment like self-leveler to fill gaps and create a solid base. When I did this, I mixed the underlayment according to the manufacturer’s instructions, poured it into the void, and spiked it with a notched roller to remove air pockets, achieving a perfectly flat surface.
Fill the Void with Patching Material
For smaller hollow spots, use a fast-setting, sandable epoxy or repair mortar designed for floors. Mix it to a consistency like peanut butter. Then, use a putty knife to press the mixture into the void, ensuring it bonds firmly with the surrounding subfloor. Smooth the surface and remove excess material. If the hole is large, multiple layers may be necessary, letting each dry before applying the next. This method prevents future movement and cracking.
Reinstall or Reset the Tile
If the tile was lifted, ensure the adhesive beneath is in good condition. For small areas, re-apply a suitable thinset mortar using a notched trowel, then press the tile back into position. Use spacers to align it perfectly and wipe away excess mortar immediately. For larger repairs, consider replacing the tile entirely, especially if it’s cracked or damaged. During my own fix, I carefully cleaned the old thinset and applied a fresh layer, then used a level to ensure the tile sat flush with neighboring units.
Allow Proper Curing and Seal the Surface
Let the repair set according to the manufacturer’s instructions—usually 24 to 48 hours—before walking on it. Once cured, seal the repair with an appropriate grout or sealant to prevent moisture penetration and further issues. Regularly inspecting and maintaining your floor extends its lifespan and ensures stability.
Remember, addressing a hollow spot isn’t just about filling a gap—it’s about restoring structural integrity and ensuring your flooring remains beautiful and durable. For more detailed tips on floor leveling, visit this guide on common leveling mistakes and how to avoid them.
Many homeowners believe that installing hardwood floors or tiles is straightforward—just lay them down and you’re done. But in my experience, there’s a lot more nuance that many overlook, leading to costly mistakes later. For example, a widespread myth is that flooring materials are completely foolproof if purchased from a reputable brand. However, even premium materials require precise handling and preparation to achieve long-lasting results. Skipping proper floor leveling, for instance, is a surefire way to develop uneven surfaces and cracks. Advanced installers know that subtle subfloor irregularities, sometimes just a fraction of an inch, can cause major issues over time. When I dive into floor leveling, I focus on specific techniques like using a laser level combined with proper compaction to ensure a perfectly flat surface, which is critical for both hardwood and tile installations.
A common trap is relying solely on self-leveling compounds without addressing subfloor moisture or structural defects. These compounds can fail if underlying issues are neglected, resulting in dips or tiles lifting over time. Experts like those cited in studies from flooring research highlight that addressing the root causes—like moisture barriers or subfloor reinforcement—reduces long-term failures. Also, many believe that thinset mortar or adhesive is a quick fix; in reality, the key is choosing the right type for your materials and ensuring proper mixing and application. For large-format tiles, using a notched trowel with the correct size is essential for uniform coverage, which prevents hollow spots and cracking. I always recommend consulting detailed installation pointers that save time and money, such as those found here.
What most people miss, though, is the importance of integrating design with practical installation. For example, combining elegant tile designs with hardwood floors can elevate your space, but only if your subfloor is truly flat and stable. Curiously, I often see homeowners rushing to pick finishes or patterns before ensuring the foundational work is solid, leading to disillusionment and repairs. So, how do you avoid these pitfalls? By focusing on meticulous preparation—like properly sealing and reinforcing your subfloor—and staying informed about advanced techniques. For instance, mastering floor leveling fundamentals involves understanding when to use self-leveling underlayment versus grinding uneven spots. Invest in quality tools like laser levels and spiked rollers, and don’t hesitate to reach out with questions, perhaps via our [contact page](https://tiletrendshop.com/contact-us-2).
Let’s see how paying attention to these nuanced details can be the difference between a durable, beautiful floor and one riddled with issues. Keep these insights in mind, and your install will stand the test of time. Have you ever fallen into this trap? Let me know in the comments. For more expert tips, you can also explore [hardwood floor care secrets](https://tiletrendshop.com/hardwood-floor-care-secrets-to-longevity-and-shine) or check out [tile installation pointers](https://tiletrendshop.com/tile-installation-pointers-that-save-time-and-money) that can make or break your project.
Keep Your Floors in Top Shape with the Right Tools
Maintaining hardwood and tile floors over the years requires more than just regular sweeping; it involves using specialized tools that ensure longevity and aesthetic appeal. Personally, I rely heavily on a high-quality microfiber mop and a damp-dry vacuum. The microfiber mop effectively traps dust and dirt without scratching delicate surfaces, while the vacuum with a soft brush attachment prevents debris from settling into grout lines or between floorboards. Investing in a precision floor scraper is also invaluable for removing stubborn adhesives or old grout without damaging the underlying surface.
Routine Maintenance that Saves You Money
Consistent upkeep is key to preserving your floors. I recommend sealing hardwood floors with a durable polyurethane finish every few years, which protects against scratches and moisture. For tiles, periodically reapplying a high-quality grout sealer prevents staining and mold buildup. A damp cloth with a gentle cleaning solution, like pH-neutral floor soap, keeps surfaces shining without causing deterioration. Remember, avoiding harsh chemicals extends the life of the finish and maintains the floor’s natural beauty.
Tools I Recommend for Long-Term Results
One tool I swear by is an oscillating multi-tool equipped with a soft-scraping attachment. It’s perfect for detailed cleaning in tight grout lines or removing minor imperfections. For deep cleaning, I use a steam mop—provided your tiles are suitable—because it kills bacteria and dissolves grime without harsh chemicals. When dealing with hardwood floors, a floor buffer with a terrycloth pad helps restore shine and smooth out minor scratches. These tools, used regularly, significantly reduce the frequency of major repairs and keep the floors looking pristine for years.
Innovative Techniques to Maintain Floor Integrity
For ongoing durability, I incorporate a monthly inspection routine. Check for signs of wear, loose tiles, or creaking hardwood. Addressing issues early prevents costly repairs. Additionally, applying a polishing product like a wax-based floor polish can enhance surface resilience against foot traffic. Looking ahead, technology like smart sensors integrated into flooring could provide real-time data on humidity and load stress, predicting potential issues before they worsify. This trend towards smarter maintenance tools could revolutionize how homeowners care for their floors in the future.
How do I maintain hardwood and tile floors over time?
Maintaining your floors involves a combination of proper cleaning tools and routine inspections. Use microfiber mops and soft-bristled vacuums for daily cleaning, and invest in sealers and protective finishes to shield surfaces from spills and scratches. Schedule regular deep cleaning with steam mops for tiles and buffing for hardwood, ensuring protective coatings remain effective. Consistency is the secret—adopting these habits will prolong the lifespan and beauty of your floors, saving you money in the long run. For more detailed tips, visit this flooring maintenance guide.”}**}}}}Your proactive approach to maintenance and the right set of tools can drastically extend the life of your hardwood and tile floors, keeping them stunning and functional for many years. Don’t wait until minor issues become major repairs; start integrating these practices today!**
The Most Unexpected Lesson About Floor Leveling
I used to believe that the most crucial part of installing tile or hardwood was choosing the right pattern or color—turns out, the foundation matters more than anything. One lesson I learned the hard way was that even the tiniest misjudgment in leveling could cause a cascade of issues later on. The lightbulb moment? A perfectly flat subfloor is the secret to long-lasting, crack-free floors, and rushing that step can turn a DIY project into a headache.
The Critical Insight That Changed How I Approach Repairs
When I finally addressed my hollow spots, I realized the importance of not just patching the surface but reinforcing the entire structure beneath. Using a quality self-leveling underlayment made all the difference—it’s like giving your subfloor a strong backbone. This insight prevents future cracks and ensures your tiles or hardwood stay solid for years to come. Trust me, getting the depth right on your repair work is worth the extra patience.
Why Overlooking Subfloor Conditions Is Costly
I overlooked moisture issues and put off thorough subfloor inspections until I faced curled edges and popping tiles. Discovering this too late was frustrating, but it hammered home that addressing fundamental problems upfront saves money and time. If you want to avoid repeating my mistakes, prioritize a detailed assessment of your subfloor—especially in basements or older homes where hidden issues often lurk.
Creating a Long-Term Vision for Your Floors
One aspect I didn’t consider initially was how proper floor leveling complements your overall design goals. Whether you’re aiming for a sleek, modern look or rustic charm, a flat surface enhances aesthetic appeal and functionality. Incorporate leveling techniques into your planning—it’s the canvas on which your beautiful floors will shine. Remember, investing time in preparation now will pay off with stunning results tomorrow.
How I Now Approach Floor Maintenance and Care
Beyond installation, maintaining your floors is vital for longevity. I’ve adopted a routine that includes gentle cleaning tools, timely sealing, and regular inspections. Using the right equipment, like a microfiber mop and quality grouting sealant, has kept my hardwood and tile floors looking impeccable. This proactive care approach ensures that your investment continues to bring joy, not repair surprises.