
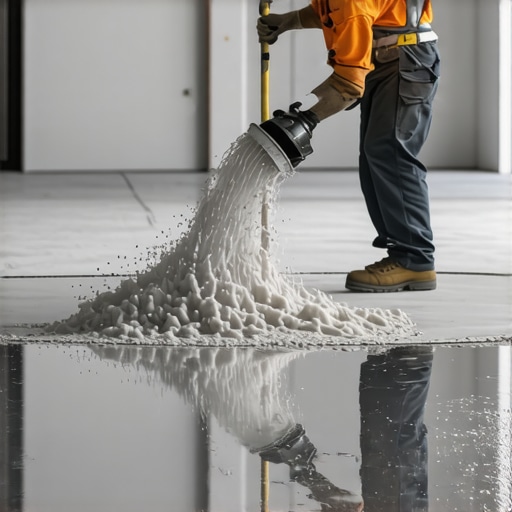
Ever had that sinking feeling when you’re pouring self-leveling underlayment, only to find it forming annoying puddles and pits instead of the smooth, flat surface you envisioned? I remember my first attempt—eager to finish quickly, I sped up my mixing process, only to be greeted by an uneven mess that required redoing the entire job. It was a frustrating, eye-opening moment. I soon realized that rushing through the mixing process can cause the self-leveler to surface with unwanted dips and pits, compromising the entire flooring project.
The Hidden Danger of Mixing Self-Leveler Too Fast
Mixing clocked at warp speed might save you a few minutes initially, but it often leads to significant headaches down the line. When you stir the self-leveling compound too vigorously, air gets trapped within the mixture. Those tiny air bubbles rise to the surface, creating a bubbly, uneven film that doesn’t spread evenly. As the product sets, these bubbles can morph into pits and voids, ruining the flatness of your subfloor.
Not only does this make subsequent flooring installation more difficult, but it also increases the likelihood of cracks and delamination. According to flooring experts, proper mixing techniques are crucial for achieving a seamless, durable finish—skipping this step can jeopardize the entire project. For more detailed tips on mastering the art of floor leveling, you might find our ultimate guide to floor leveling invaluable.
Are You Wasting Time and Money by Rushing?
One common mistake early on was assuming that faster mixing meant quicker results. But in reality, it often led to uneven surfaces that took extra coats or rework. I learned the hard way that patience during mixing is an investment—think of it as setting a solid foundation for a flawless finish. Trust me, taking the time to mix slowly and thoroughly can save hours of frustration and even money in repairs. If you’re interested in more expert insights, check out our precise floor leveling techniques article.
Prepare Your Subfloor with Precision
Start by thoroughly cleaning and inspecting your subfloor. Remove debris, loose particles, and any existing coating that could interfere with adhesion. Use a vacuum and damp cloth to eliminate dust. If there are cracks or holes, fill them with a suitable patching compound, allowing it to cure completely before proceeding.
Ensure moisture levels are within acceptable ranges for your self-leveling compound and flooring type. Use a moisture meter to verify. A dry, stable surface prevents future cracks or delamination, providing a solid foundation for the leveling process.
Mixing the Self-Leveling Compound Correctly
Pour the recommended amount of water into a clean mixing bucket. Gradually add the self-leveling compound powder while stirring continuously with a paddle mixer attached to a drill. Mix at a slow, steady speed—think of stirring like gently folding in ingredients rather than whipping vigorously. This technique reduces air entrapment, which can cause pits and bubbles later.
Pay close attention to the mixing time—about 3-5 minutes—until the mixture is smooth, lump-free, and has a pourable consistency similar to pancake batter. For added clarity, use a technique for flawless surface leveling that emphasizes patience in mixing.
Tip: Spiking the Mix to Remove Air Bubbles
Once mixed, lightly spike the surface with a spiked roller to release trapped air bubbles. If you don’t have a roller, tapping the sides of the container gently helps. This step avoid creating a bubbly film that can lead to surface imperfections. Think of it as popping the bubbles before they harden into pits.
Applying the Self-Leveler with Skill
Begin pouring the mixture at the highest point of your floor, then spread it out using a trowel or a gauge rake. Use a long, straight edge like a level to guide your spreading. Imagine you’re painting a wall—work quickly but methodically to maintain consistency, especially on larger areas.
Work in small sections, overlapping as you go, to prevent seams that might settle at different levels. For corners and edges, use a margin trowel for precision. This ensures a uniform thickness that guarantees flatness across the entire surface.
Tools That Make a Difference
Utilize a spiked roller for de-airing, a long float or trowel for spreading, and a level to confirm evenness. The right tools combined with steady technique reduce the risk of uneven spots, dips, or bubbles.
Watch the Curing Process Like a Pro
Let the compound cure in a stable environment—avoid drafts and direct sunlight. Cover the surface with plastic sheeting if necessary to prevent rapid moisture loss, which can cause cracks. Keep foot traffic away until the drying period (usually 24 hours, depending on the product). During curing, resist the temptation to re-level or make adjustments, as premature handling can cause imperfections.
Remember, patience during this stage ensures your floor remains perfectly flat and ready for the next steps, whether tile or hardwood installation. For detailed insights into the entire process, visit our comprehensive guide to flooring success.
Many DIY enthusiasts and even seasoned pros often fall prey to misconceptions about tile, hardwood floors, and floor leveling, which can lead to costly mistakes and subpar results. One prevalent myth is that all self-leveling compounds are universally suitable for every substrate, but in reality, the compatibility depends on factors like moisture levels and substrate composition. According to industry experts, neglecting these nuances can cause self-levelers to peel or crack over time, highlighting the importance of thoroughly researching your specific products and conditions. Moreover, a widespread misconception is that a perfectly flat floor isn’t necessary for tile installation; however, even minor dips can lead to lippage issues and uneven grout lines. For advanced tips on achieving flawless floors, reviewing our innovative leveling techniques can prove invaluable.
What are the most overlooked steps that can make or break your flooring project?
One often overlooked detail is preparing the subfloor with precision—failing to do so can trap moisture or introduce debris that causes long-term problems. For instance, improper moisture barrier installation can result in warping or cracking, especially with wood-based materials. Additionally, many installers underestimate the significance of tack coat or primer application, which can compromise adhesion and stability. Evidence from the comprehensive installation guide emphasizes that meticulous surface prep correlates directly with flooring longevity. Remember, rushing through these preparatory phases may seem saving time initially but often results in repair or replacement costs later on. Have you ever fallen into this trap? Let me know in the comments.
Why high-precision tools matter more than you think
Advanced flooring projects demand more than just basic tools. Laser levels, moisture meters, and digital probes provide accuracy that far exceeds traditional methods. Relying solely on bubble levels or visual inspection can lead to subtle undulations that become glaring once finished. Experts recommend investing in quality tools for critical measurements, especially for large commercial or intricate residential installations. This approach greatly reduces errors such as overlooked dips or uneven edges, which standard techniques might miss. For instance, utilizing a laser level can dramatically improve flatness, saving time and avoiding costly rework. Would you consider upgrading your toolkit for precision? Explore our recommended tools and techniques to elevate your craft.
Prioritize Precision with the Right Equipment
Maintaining impeccable flooring results over time hinges on the quality of your tools. I personally rely on a high-grade laser level because it offers accuracy beyond traditional bubble levels, especially for large or complex surfaces. Investing in a laser level helps me identify subtle dips or high spots that could cause uneven wear or lippage years down the line. Regular calibration of these tools ensures ongoing precision, which is crucial as floors settle or materials shift over time.
How do I maintain my equipment for durability?
Clean your laser levels and moisture meters after each use and store them in protective cases. Periodic calibration as per manufacturer instructions preserves their accuracy. Reliable tools are an investment that can save you from costly repairs or rework in the future, especially when planning to scale projects or upgrade your flooring system.
Adopt Effective Maintenance Routines
Long-term flooring care isn’t just about cleaning; it involves proactive scheduling of inspections for signs of wear, moisture intrusion, or substrate movement. I recommend establishing a seasonal check that includes verifying the stability of tiles or hardwood planks and addressing minor issues before they escalate. For hardwood floors, secrets to longevity and shine include regular polishing, refinishing, and humidity regulation. These steps preserve the surface and prevent issues from developing, ultimately extending the lifespan of your floors.
Scaling Up with Confidence
As your projects expand, consistency becomes essential. Standardizing materials, tools, and methods across multiple sites minimizes discrepancies and maintains quality. For example, using a calibrated moisture meter across all locations ensures your substrates meet the same specifications, reducing the risk of future warping or delamination. Leveraging advanced techniques such as mastering floor leveling at scale can streamline workflows and yield uniform results. Additionally, documenting best practices and lessons learned helps improve your process over time.
Prepare for What’s Next in Flooring Technology
The future of flooring maintenance is leaning toward automation and smart systems. Devices that monitor moisture levels, temperature, and even subfloor integrity in real-time are on the horizon, promising to revolutionize long-term upkeep. Staying informed and investing in these innovations now can position your efforts ahead of the curve. For instance, implementing a precision leveling technique today increases your readiness to adopt future smart tools seamlessly.
Extend Your Flooring Investment with Expert Tips
Incorporate these expert strategies—like maintaining calibrated equipment and adopting proactive inspection routines—to ensure your flooring stands the test of time. I challenge you to try out one advanced tip, such as calibrating your laser level before your next project, and see the difference in long-term results. Regular maintenance and smart planning are your best tools in delivering floors that not only look great initially but age gracefully. Remember, consistent care today saves you from costly repairs tomorrow.
Inside the Mind of a Flooring Enthusiast: Hidden Lessons From My Journey
- One of the biggest surprises was realizing that speed doesn’t save time—it costs it. Rushing the mixing process caused air bubbles and pits, leading to rework. Patience and slow, steady mixing truly make a difference in achieving a flawless surface.
- I once underestimated the importance of tools like laser levels and moisture meters. Investing in high-quality, calibrated equipment was a game-changer—ensuring accuracy and peace of mind during large-scale projects.
- Discovering that surface preparation is everything came as a revelation. Proper cleaning, crack-filling, and moisture control created a solid foundation, preventing future problems like cracking or delamination.
- Getting hands-on with de-airing techniques, like spiking and tapping, taught me that small steps prevent big imperfections. These patience-driven methods keep surfaces smooth and ready for the next phase.
- Finally, I learned that the curing environment controls the final quality more than I thought. Protecting the curing self-leveler from drafts, sunlight, and rapid drying preserved flatness and durability.