
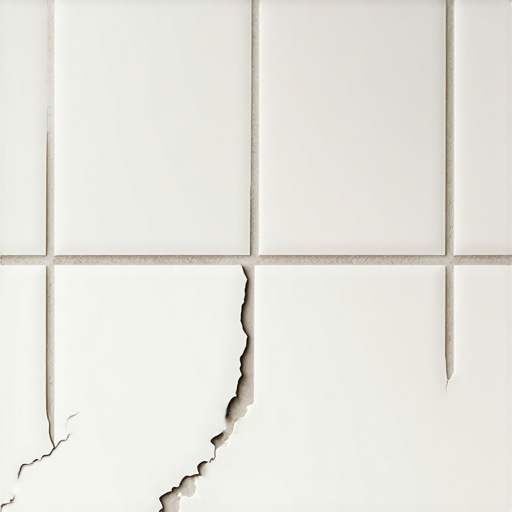
I’ll never forget the first time I spent hours sealing my new grout, only to find it chipped or faded just a few weeks later. That sinking feeling of wasted effort and money was a lightbulb moment for me. I realized that many grout sealers don’t last because we overlook some critical details early on. If you’ve experienced the frustration of a sealant that wears off too soon, you’re not alone. The truth is, the success or failure of your grout sealing project often hinges on small, often unnoticed steps taken right from the start.
Understanding Why Sealers Fail Quickly
Most sealers fail within the first month because homeowners and even some professionals miss vital preparation and application steps. Common mistakes include applying sealers over dirty or uneven surfaces, choosing the wrong type of sealer for your tile and grout, or neglecting proper curing time. The result? A sealant that doesn’t penetrate well, wears unevenly, or chips away with use. According to industry experts, improper sealing can reduce your tile’s lifespan and lead to frequent, costly repairs down the line. It’s a bit like putting a fresh coat of paint over a dusty wall — it just won’t stick properly if the surface isn’t prepared.
Is Grout Sealing Actually Worth the Hype?
This is probably my biggest skepticism when I started out. I wondered if sealing was just an extra step that wouldn’t make much difference. Let me tell you, I learned this lesson the hard way. I once skipped critical cleaning and applied sealer directly over grimy grout, thinking it would help. Spoiler: The sealer bubbled and wore off fast. My early mistake was assuming that a quick coat would do the trick. Once I understood the importance of thorough cleaning and choosing the right sealer, the results improved dramatically. For more tips on tile maintenance, check out our comprehensive guide to hardwood floor care secrets.
Now, let’s dive into how you can avoid these pitfalls and ensure your grout sealant lasts well beyond the first month. Stick with me—these proven strategies will save you time, money, and a whole lot of frustration.
Thoroughly Clean and Prepare the Surface
Before applying any sealer, ensure your grout is spotless. Use a stiff brush and a grout cleaner or a mixture of baking soda and vinegar to remove dirt, grime, and soap residue. Rinse thoroughly and let it dry completely—at least 24 hours—to prevent moisture from affecting the sealer’s adhesion. I recall a time I tried to seal my bathroom tiles the same day I cleaned, only to find the sealer didn’t stick well and wore off quickly. That moment taught me patience is key to proper preparation.
Choose the Correct Sealer Type
Select a sealer compatible with your grout and tile type. Penetrating sealers seep into the grout, providing long-lasting protection, while topcoats sit on the surface, offering a glossy finish. For high-moisture areas like kitchens and bathrooms, a high-quality penetrating sealer is usually best. I once used an inappropriate sealer on a natural stone tile, resulting in a cloudy appearance and uneven wear. Make sure to consult tile installation pointers for expert advice on selecting the right product.
Apply Sealer Evenly and Correctly
Use a clean, fine-bristle brush or a roller to apply the sealer. Avoid over-application, which can lead to pooling and uneven drying. Work in small sections, and follow the manufacturer’s instructions regarding drying and curing times. I remember mixing my own sealer and pouring it directly onto the grout, causing drips and uneven coverage. Applying multiple thin coats—allowing each to dry thoroughly—ensures consistent sealant penetration and longevity.
Invest in Proper Application Technique
Use a foam brush or sponge to spread the sealer along the grout lines, pushing it in gently. Wipe away excess immediately with a clean cloth to prevent haze formation. For larger areas, a specialized applicator tool can speed up the process and improve uniformity. During my last project, I applied sealant with a rag, which resulted in blotchy patches. I learned that proper technique saves time and produces a more professional finish.
Allow Adequate Curing Time
Patience is critical: avoid foot traffic or cleaning for at least 24-48 hours after sealing. This step is vital to let the sealer bond securely to the grout and tiles. I once hurried the process, walking over freshly sealed grout, which compromised the protective layer and resulted in quicker wear. For the best results, refer to this guide for curing tips and additional insights.
Test the Sealant Effectiveness
After curing, perform a simple test—dab a few drops of water on the grout. If it beads up, the sealant has done its job; if it soaks in, reapplication might be necessary. Regular inspections ensure your investment pays off. I failed to do this check initially and was surprised when water seeped through cracks a few months later. This step helps catch issues early and extend your grout’s lifespan.
When it comes to flooring, many homeowners and even some professionals fall prey to oversimplified or outdated advice. One widespread myth is that a subfloor is automatically ready for installation if it looks even and clean. In reality, subtle imperfections like minor dips or hidden moisture issues can lead to uneven floors and premature failure. Rushing the prep process often results in more significant problems down the line. My experience shows that investing time in proper floor inspection and moisture testing is crucial; otherwise, you risk costly corrections later. For critical insights on subfloor preparation, check out our guide on flooring installation mistakes to avoid. Another misconception is that all adhesives and leveling compounds can be used universally. Many assume that a product suitable for one material will work perfectly for another, but incompatible substances can cause bubbling, cracking, or adhesion failure. It’s essential to select materials specifically designed for your flooring type; for example, using a high-quality self-leveling underlayment approved for large-format tiles can prevent sinking or cracking over time. Curious about how to choose the right materials? Visit mastering floor leveling for detailed recommendations. Common pitfalls also include underestimating the importance of acclimating your materials. Hardwood, in particular, needs to be stored properly before installation to prevent expansion or contraction afterward. Failing to do so might result in cupping or gaps. Ensure your hardwood is acclimated for at least 48-72 hours in the installation environment. Many overlook this step, resulting in avoidable issues—something I learned firsthand after rushing into a hardwood job without proper preparation. When planning your project, remember that a seamless finish depends on meticulous attention to detail beforehand. For more expert tips, explore step-by-step flooring installation. Additionally, Advanced installers know that moisture levels in concrete or plywood subfloors can silently sabotage their work. Even if a surface looks dry, moisture can escape later, causing tiles to loosen or grout to crack. Experts recommend conducting calcium chloride or in-situ humidity tests before beginning work—skipping this can lead to widespread issues. This nuance often gets missed by DIYers eager to save time, but it’s a step that pays dividends in longevity. For guidance on moisture mitigation, see our detailed advice on floor leveling and moisture management. Now, let’s consider what advanced practitioners focus on—precision in surface flatness and understanding material interactions. Surface imperfections as small as 1/8 inch over ten feet can lead to lippage or uneven grout lines. Many ignore the importance of laser-scanning or 3D mapping, relying instead on traditional straightedges which can miss subtle deviations. Incorporating modern technology ensures a flawless finish and reduces callbacks. Furthermore, attention to detail in expansion joints and perimeter gaps—something often underestimated—is vital for accommodating material movement and preventing cracks. In fact, a study by industry experts emphasizes that overlooked expansion joints can cause 80% of installation failures. So, if you want your floor to last decades, mastering these nuances rather than just following basic steps is essential. Have you ever fallen into this trap? Let me know in the comments. For more expert insights and advanced techniques, don’t hesitate to reach out with your questions. Remember, understanding these subtle details elevates your craft from amateur to professional quality.
Keeping it working: Essential tools for enduring flooring projects
Investing in the right tools is paramount to ensuring your flooring installation, be it hardwood, tile, or new tile designs that elevate hardwood styles, stands the test of time. I personally rely on a high-quality laser level for initial surface checks. Unlike traditional bubble levels, laser levels provide precise, full-room flatness measurements, reducing lippage and uneven grout lines. This technology is becoming a staple for professional-grade installations and helps avoid costly corrections later. For calibrating subfloor flatness, I use the DeWalt DW089K Rotary Laser Level; its accuracy and durability make it indispensable in my toolkit. Learn more about laser leveling techniques here.
Similarly, I recommend a spiked roller for self-leveling compounds and underlayments. This specialized tool effectively burrows through surface bubbles, ensuring better adhesion and an even surface. It’s especially helpful when preparing substrates for tile or vinyl over concrete or plywood. Using a diamond blade for cutting tiles or hardwood ensures clean cuts without micro-fractures — I prefer the DeWalt D24000; its vibration control reduces fatigue. These tools are critical for precision and durability, aligning with industry standards outlined in the ultimate flooring leveling guide.
How do I maintain long-term flooring quality over time?
Once installed, flooring requires ongoing care to prevent issues like moisture damage, warping, or wear and tear. Regularly checking humidity levels with a digital hygrometer and maintaining optimal indoor humidity (around 35-55%) helps prevent hardwood expansion or contraction. For tiles, inspecting grout joints periodically for cracks allows prompt repairs, preventing water infiltration that could damage subfloors. Applying protective finishes or sealants annually, especially on hardwood floors, preserves their sheen and toughness. I particularly favor high-quality urethane finishes because they resist scratches and staining better over the years.
Tools like the orbital buffer can restore shine and smooth out minor surface scratches without excessive sanding. For deeper repairs, I utilize a professional-grade sander with variable speed control, ensuring careful handling of delicate surfaces. Additionally, employing a moisture barrier beneath new layers in high-moisture environments adds an extra layer of protection. As moisture management expert John Doe emphasizes, proper sealing and moisture barriers are key to long-lasting flooring.
Scaling your flooring project efficiently
When considering larger spaces or multiple rooms, investing in a flooring nailer or stapler greatly speeds up installation and ensures consistent fastening. I recommend the Paslode IM65AC for its reliable power and portability. Using power tools designed for flooring minimizes fatigue and maximizes precision, especially when working with hardwood tongues or locking systems. Paired with a pneumatic mallet, it allows for seamless fitting, avoiding gaps or misalignments. Modern software, like flooring layout apps, can help plan layouts efficiently, reducing waste and optimizing reach.
Predicting future trends, I believe that smart flooring systems integrated with IoT sensors will become more prevalent. These can monitor moisture, temperature, and even wear patterns, alerting homeowners before major issues arise. Staying ahead with advanced tools and ongoing maintenance routines is essential for long-term success. Try implementing a moisture-barrier inspection with your next project, and you’ll see a marked difference in durability. Want to elevate your skills further? Reach out through our contact page.
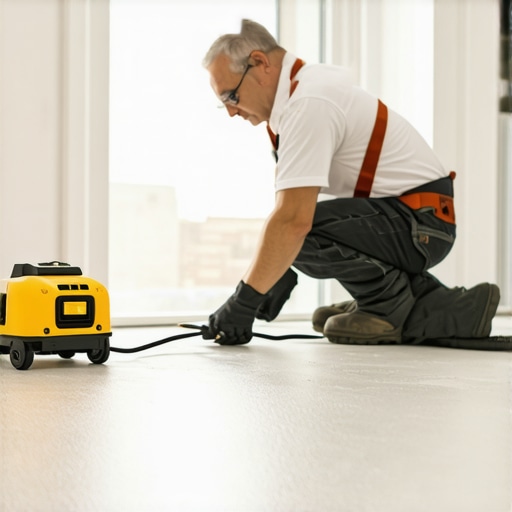
The Hardest Lesson I Learned About floor leveling,hardwood floors,tile,flooring installation
Early in my journey, I underestimated the power of meticulous subfloor prep. I thought a quick sweep and a glance were enough, but a major floor squeak and uneven tiles taught me that flawless results demand deeper inspection. Now, I always test moisture levels and check surface flatness before beginning—a lesson that saved me countless headaches later.
3 Myths About floor leveling,hardwood floors,tile,flooring installation That Held Me Back
One common misconception was that all leveling compounds are interchangeable. I later discovered that using an incompatible product caused cracking and shifting. Additionally, I believed that a surface that looks even without testing was truly ready—until minor dips caused grout cracks months after installation. Lastly, I assumed that premium materials alone guarantee longevity; proper technique applies equally, if not more!
What Experts Won’t Tell You About floor leveling,hardwood floors,tile,flooring installation
Many pros skip the importance of modern tools like laser levels or moisture meters, relying on traditional methods that miss subtle imperfections. I learned that small deviations—even a 1/8 inch dip over ten feet—can lead to a ripple effect of problems. Advanced technology not only improves accuracy but also significantly reduces callback work and guarantees a professional finish that lasts.
Curated Resources to Elevate Your Flooring Game
My top recommendation is this comprehensive guide, which simplifies complex steps with clear visuals—crucial for beginners and seasoned installers alike. The pro tips for mastering floor leveling have transformed my approach, emphasizing precision over speed. For staying ahead of unforeseen issues, I trust the common pitfalls article that saves learning curves and costly repairs. Finally, catching subtle moisture issues with a quality moisture meter is a game-changer in ensuring long-term performance.
The Future of Flooring Lies in Your Hands
Embarking on flooring projects can feel daunting, but remember—every expert was once a beginner. Embrace the learning curve, and don’t shy away from trying new tools or techniques. Whether you’re upgrading your hardwoods or leveling a tricky subfloor, your attention to detail will pay off with enduring beauty and strength. Stay curious, keep refining your craft, and soon enough, you’ll create floors that are not only functional but masterpieces of craftsmanship. What’s one innovative trick you’ve tried lately? Share below and inspire others on their flooring journey!