
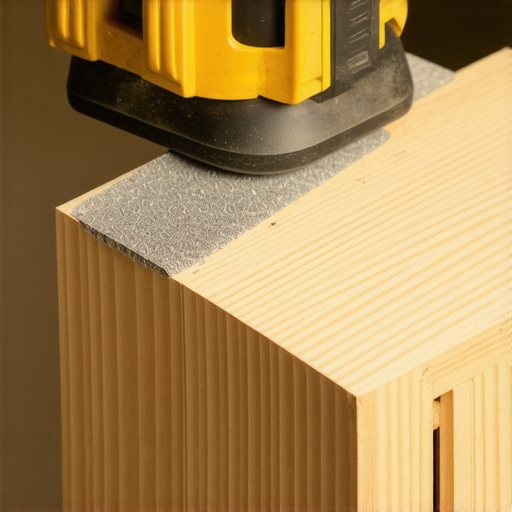
It was a moment of quiet frustration. I had just finished sanding my hardwood floors, eager to achieve that flawless, mirror-like finish everyone dreams of. As I stepped back to admire my work, my eyes landed on the corners—those stubborn areas where the sander refused to cooperate. Instead of smooth, pristine edges, I was greeted with unsightly swirl marks that seemed impossible to remove. I realized I had made a rookie mistake early on—failing to understand the subtle nuances of sanding corners properly—and it was costing me dearly.
The Secret to Flawless Corners That Won’t Leave Swirl Marks
As a home improvement enthusiast and seasoned DIYer, I’ve learned that perfecting those tight, awkward corners is less about brute force and more about technique. The good news? Once you master this, your floors will look professionally refinished, without those ugly swirl marks that ruin the entire look. Today, I’ll share my proven tips and tricks, gathered from personal experience and industry best practices, to help you achieve professional-quality results right in your own home.
Is Sanding Corners Actually Worth the Hype?
In the early days of my DIY journey, I thought I could skip the detailed work on corners and focus solely on the broad surfaces—big mistake. I learned the hard way that neglecting these small areas leads to an uneven finish, exposing flaws that could have been easily avoided. The truth? Proper corner sanding is the secret ingredient to a smooth, professional finish that clearly shows you care about the details. It pays off in the end, offering a truly polished look without the need for costly rework. If you’re unsure whether investing time in corners is worth it, I assure you—your floors will thank you. And for more insights on maintaining your hardwood, check out [hardwood floor care secrets](https://tiletrendshop.com/hardwood-floor-care-secrets-to-longevity-and-shine).
Navigating this aspect of floor refinishing can seem daunting, especially with so many tools and techniques available. But trust me, with the right approach, you can avoid the dreaded swirl marks that make your project look amateurish. In the upcoming sections, I’ll walk you through step-by-step strategies to sand corners flawlessly, even in the most challenging spots. Ready to transform your floors into a showstopper? Let’s dive in and uncover the secrets to achieving a perfectly smooth finish—corner by corner, without swirl marks.
Prep Your Tools for Precision
Start by selecting the right tools: a detail sanding block or a small oscillating multi-tool with a corner-appropriate sanding attachment. I recall a time when I used a standard sander in tight corners, resulting in uneven rough patches. Switching to a detail sander improved my control and finish.
Clean and Protect the Workspace
Clear the area of debris and lay down masking tape along adjacent surfaces to prevent accidental scratches. Protect nearby walls with painter’s tape. I once overlooked this step, which led to unintended scuff marks that took extra time to fix.
Technique: The Small, Controlled Movements
Think of sanding as carving with a chisel—small, deliberate strokes yield the best results. Position the sanding tool in the corner, angling it slightly to reach tight spaces without pressing too hard. During my first attempt, applying excessive pressure created deep scratches that mimicked swirl marks—something I had to sand out later.
Mirror the Edge, Then the Center
Begin by gently sanding along the edge of the corner, as if tracing a line. Then, move inward toward the center. This method ensures even abrasion without creating dips or gouges. I remember progressing from the edge inward, noticing a significant improvement in the smoothness of the surface.
Manage the Sandpaper Grit Carefully
Start with a fine-grit paper—around 120 grit—for initial smoothing. Progressively move to finer grits like 220 if needed. In a past project, jumping straight to the finest grit resulted in insufficient material removal, prolonging the process. Proper grit management speeds up the work and improves the final look.
Check Your Progress Frequently
Use a flashlight at low angle to highlight scratches and swirl marks. I learned this the hard way—initially, I relied solely on sight, missing subtle imperfections that would later be visible under finish. Regular inspections guide your sanding and prevent over-sanding.
Finish with a Soft Touch and Clean Up
End by passing over the corners with a clean, soft cloth or vacuum to remove dust—the enemy of a smooth finish. I once skipped this step, which caused small particles to settle into the new finish, marring the look. Ensuring a clean surface is crucial for professional results.
Incorporate Proper Sanding Into Your Workflow
Remember, patience and attention to detail are key. Begin with the right tools, adopt precise technique, and always double-check before moving to next steps. When you master corner sanding, you’ll notice your floors transforming from amateurish to stunningly refined—spotless corners included. For additional insights into maintaining your hardwood floors, explore hardwood floor care secrets.
Many homeowners enter the world of hardwood flooring with a set of misconceptions that can lead to costly mistakes and subpar results. One widespread myth is that choosing the most expensive materials guarantees durability and perfect appearance. However, experts emphasize that proper installation, correct subfloor preparation, and understanding the nuances of each wood species are far more critical to longevity than price alone. For example, a study published in the Journal of Building Engineering highlights that improper subfloor leveling is a leading cause of floor failure, underscoring the importance of meticulous preparation before installation.
Why Do People Leave Money on the Table When It Comes to Floor Leveling?
Commonly, DIYers and even some professionals underestimate the complexity of achieving a perfectly leveled subfloor. They tend to rely solely on self-leveling compounds without addressing underlying issues like deep cracks or uneven subfloor patches. This oversight might seem insignificant initially, but over time, it leads to cracks, squeaks, and uneven wear patterns. Good leveling is not just about filling gaps but about understanding the inherent challenges posed by different subfloor materials, such as concrete or wood. For detailed approaches and pitfalls to avoid, explore this comprehensive guide to floor leveling.
A common trap involves misaligning or mismatching flooring types. For instance, many believe that installing laminate over uneven concrete will work fine with a thin underlayment. In reality, even minor unevenness can cause visible seams, buckling, or squeaking. Here, understanding the detailed requirements of each flooring material—be it hardwood, tile, or luxury vinyl—is essential. Sometimes, adding a layer of concrete grinding or a high-quality leveling screed can make a substantial difference, preventing future issues and enhancing aesthetic appeal. Don’t forget, the choice of underlayment material influences not only comfort but also moisture control and sound insulation, so select wisely by reviewing this article on leveling challenges.
The pitfalls don’t stop at leveling; many overlook the detailed aspects of tile installation that distinguish professional results from amateur botches. For example, inconsistent thinset application and improper tile spacing are sneaky errors that often go unnoticed until grout is sealed, revealing uneven surfaces or lippage. For large-format tiles, this becomes even more critical, as any slight imperfection is magnified. An advanced tip involves using a laser level to establish a perfect grid, thus minimizing unevenness. The importance of these techniques is backed by industry professionals who suggest meticulous work pays off in longevity and appearance. To master these finer points, consider reviewing this detailed guide to precise leveling.
Have you ever fallen into this trap? Let me know in the comments how you’ve handled challenging floor installations. Remember, understanding these hidden nuances can save you time, money, and regret, elevating your project from average to exceptional.
Keep It Working: Tools I Recommend for Perfect Floors
Maintaining hardwood, tile, and leveled floors requires the right tools that make upkeep efficient and effective. I personally swear by a high-quality vacuum with a soft brush attachment for daily cleanup—this minimizes dust settling into grain or grout lines, preserving the surface over time. For deeper cleaning, a microfiber mop paired with pH-neutral cleaner ensures no residue builds up, which can dull finishes. Remember, using abrasive cleaners or harsh brushes can damage delicate wood finishes or grout surfaces, so invest in tools that are gentle yet effective.
When it comes to addressing uneven surfaces or for ongoing maintenance, a contour gauge becomes indispensable. I use mine regularly to monitor floor dips or high spots that could cause wear or squeaks, especially in older homes. Additionally, dedicated floor scraper tools help gently remove debris or old finishes from small areas before applying new coats—saving time and achieving a smoother result. For tile maintenance, a grout rake is essential to remove stained or cracked grout before reapplying for a seamless look.
Choosing the Right Polishing and Refinishing Equipment
For hardwoods, I recommend a floor polisher with variable speed settings—particularly one with soft pads—allowing refinishing without the hassle of sanders that can damage the wood if misused. A buffer, like the Bona Premium Floor Polisher, provides a controlled way to apply finish coats evenly. In the long run, these tools help maintain a glossy, protected surface that resists scratches and stains, especially when combined with proper cleaning routines summarized in hardwood floor care secrets.
For tile, a good-quality grout sealer applicator ensures even coverage, preventing staining and moisture infiltration—critical for longevity. I prefer a squeeze bottle applicator with a narrow tip for precision. Don’t skimp here; proper sealing is key to avoiding cracks and discoloration that can ruin the appearance over time.
Looking Ahead: The Future of Floor Maintenance Tools
Advancements in sensor technology and smart home integration are set to revolutionize floor care. Imagine devices that automatically detect dust build-up or grout degradation and then alert you via your smartphone, prompting cleaning or touch-ups before issues escalate. Emerging robotic vacuums with advanced mapping now offer edge cleaning modes tailored for hardwood and tile, minimizing manual effort and optimizing maintenance frequency. Staying ahead involves embracing these innovations and tailoring your toolkit with versatile, future-proof equipment—from robotic cleaners to IoT-enabled moisture sensors—that will keep your floors pristine for years to come.
How can I maintain my floors’ appearance over time?
Consistent cleaning, timely resealing, and using gentle, suited tools will extend your floors’ life considerably. Incorporate regular inspections using tools like a contour gauge to spot early signs of uneven wear, and keep up with professional cleaning routines to prevent grime buildup. For hardwood floors, periodic refinishing with a soft buffer can restore shine and protect against scratches. For tiles, reapplying grout sealer every few years helps prevent discoloration and water damage. Investing in the right equipment from reputable brands ensures longevity and reduces the need for costly repairs down the line. Remember, proactive maintenance is always more cost-effective than repair or replacement—so start today by integrating one high-quality tool into your routine, like a microfiber mop or a grout sealer applicator.
The Unexpected Wisdom That Changed My Approach to Floor Finishing
One of the most valuable lessons I learned is that patience trumps speed when it comes to corner sanding. Rushing through tight spots often leads to uneven surfaces and swirl marks, no matter how powerful your sander. Taking the time to use smaller, controlled motions results in a smoother, professional finish that really stands out.
Secondly, I realized that every corner has its own personality. Some are accessible with a detail sander; others require a combination of tools and techniques. Adapting my approach to each unique space has significantly improved my results and boosted my confidence in tackling complex areas.
Another lightbulb moment involved dust management. Keeping the workspace clean during sanding not only prevents debris from settling into the finish but also makes the task less frustrating. Investing in good dust extraction tools made a noticeable difference in the final appearance of my floors.
Tools and Resources That Elevate My Floor Restoration Skills
- Detail Sanding Blocks: I trust high-quality detail sanding blocks for tight corners because they provide superior control and leave minimal marks, helping achieve that mirror-like finish.
- Laser Level: A laser level is invaluable for establishing straight lines and ensuring even sanding and tile installation. It’s a game-changer for maintaining accuracy over large areas.
- Guides from Industry Experts: I highly recommend the website The Ultimate Guide to Floor Leveling—it offers practical advice that has saved me time and headaches during complex leveling projects.
- Hardwood Floor Care Secrets: Regular maintenance tools and tips from Hardwood Floor Care Secrets keep my floors looking their best long after the initial refinishing.
Keep Moving Forward and Perfect Your Craft
Remember, every floor you finish is a testament to your perseverance and attention to detail. Mistakes are just stepping stones on the path to mastery. So, embrace each project with enthusiasm, apply what you’ve learned, and don’t hesitate to experiment with new techniques and tools. Your floors will thank you for it, and your skills will only improve with time. For more insights into achieving flawless floors, explore precise flooring techniques.
What’s been your biggest challenge when sanding corners? Share your experiences below—I’d love to hear your stories and tips!