
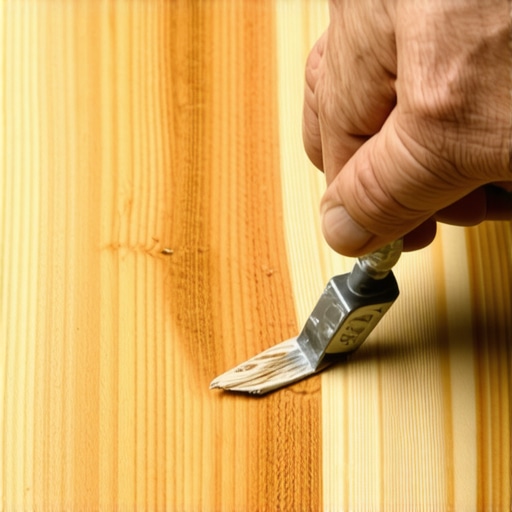
I remember the exact moment I stepped onto my pristine hand-scraped hardwood floor and immediately regretted it. A careless foot or a dropped tool can quickly turn the beautiful, textured surface into a battleground of scratches and gouges. That deep gouge felt like a personal insult, stabbing into my proud craftsmanship. It’s a sinking feeling—knowing that your flooring, which set the tone for your entire living space, is now marred and imperfect.
If you’ve ever faced a similar dilemma, you know how frustrating it can be. Hardwood floors are an investment, a statement of style and durability. But accidents happen, and deep gouges are among the toughest blemishes to repair, especially on the textured, rustic look of hand-scraped flooring. Early on, I learned that many DIY remedies just didn’t cut it. Relying solely on superficial fixes can lead to uneven patches or, worse, further damage.
Today, I want to share a proven approach that restores the beauty and integrity of your hardwood, without the need for costly professional refinishing. Whether it’s a deep scratch, an ugly gouge, or an area where the finish has been compromised, I’ll walk you through practical, neighborly advice that works.
But first, let me ask—have you ever tried to fix a gouge, only for it to look even worse afterward? If so, you’re not alone. Many homeowners make the mistake early on of rushing into patching without understanding the nuances of hand-scraped hardwood. One common error I made was choosing the wrong filler or over-sanding the area, which made the repair obvious and unmatching in texture.
According to experts, a key to successful restoration lies in understanding the unique texture of hand-scraped floors and selecting the right materials that blend seamlessly. Using inappropriate fillers or neglecting to match the finish can turn a simple repair into a noticeable tragedy. That’s why I recommend a step-by-step method that respects the original look.
In the next sections, I’ll guide you through the essential steps—cleaning, filling, matching the finish, and blending—so that your floor looks as good as new. Ready to bring back that rustic charm? Let’s get started with assessing the damage and prepping the surface for repair.
Assess and Prepare the Damage
Start by inspecting the gouge closely to determine its depth and texture. Use a dust brush or vacuum to remove debris and loosen any loose splinters. For example, I once noticed a deep gouge near the door and cleared the area thoroughly with a soft brush. Proper assessment ensures you select the right materials and techniques, preventing further damage.
Choose the Right Filler for Texture Match
Select a high-quality, flexible wood filler that can be molded to match the hand-scraped texture. A product like epoxy-based fillers or texture-matched wood putty works well. During my repair, I mixed a darker stain into the filler to match the rustic, distressed look. Test the filler on a scrap piece or hidden area beforehand to confirm color match.
Apply the Filler Precisely
Use a putty knife or a small spatula to press the filler into the gouge, overfilling slightly to account for shrinkage as it dries. Work carefully to avoid smudging onto undamaged wood. I once applied filler in stages, pressing and feathering to blend seamlessly with the surrounding texture. Patience here prevents uneven surfaces.
Sand and Shape the Repaired Area
Once the filler is fully cured—usually after a few hours or as per manufacturer instructions—lightly sand the area with fine-grit sandpaper (around 220 grit). Use a small, block sander or sanding sponge, gently feathering the edges to match the original hand-scraped texture. As I experienced, a light touch avoids flattening the wood’s natural texture.
Match the Texture and Finish
To replicate the hand-scraped texture, use a fine wire brush or a specialty texturing tool. Gently abrade the surface in the direction of the original grain. I found that twisting a small wire brush across the filler created a convincing distressed appearance. Always test on a scrap or hidden spot first.
Stain and Seal for Consistency
Apply a matching stain, blending it into the surrounding finish. Use a fine brush for precision and feather the edges to prevent a visible repair line. After the stain dries, apply a compatible clear finish—urethane or oil—matching the existing sheen. During my last repair, layering thin coats and buffing between applications yielded a seamless look.
Final Blending and Inspection
Once the finish cures, lightly buff the area with a soft cloth or buffer to ensure smoothness. Check under different lighting to verify uniformity. If needed, add touch-up stain or finish to achieve perfect blending. This meticulous process restores your flooring’s beauty without the need for full refinishing.
When it comes to flooring installation, many homeowners and even pros focus heavily on the obvious aspects—material choice, tools, and layout. However, a critical nuance often gets overlooked: the importance of meticulous substrate preparation and understanding material-specific nuances. Contrary to popular belief, choosing premium materials alone doesn’t guarantee flawless results if the subfloor isn’t perfectly prepared. This oversight can lead to issues like uneven surfaces, tension cracks in tile, or premature wear in hardwood, which are costly and time-consuming to fix.
Are You Accounting for Subfloor Variability in Your Project?
Many assume that the subfloor is uniformly level and stable, but in reality, even tiny imperfections can cause major problems down the line. For example, installing tile over a subfloor with slight humps leads to lippage issues, which are not just cosmetic but also pose safety risks. According to expert insights, such as those from flooring specialists, precision in leveling and understanding subfloor properties—like moisture content and composition—is crucial. Just as in flooring fundamentals, neglecting this step can undermine the entire project’s integrity. For tile, the mastery of floor leveling techniques becomes your best friend, ensuring a seamless, durable finish. Even for hardwood, the choice of a proper underlayment and moisture barrier makes all the difference in preventing gaps or warping. So, before you lay material, always evaluate and prepare the substrate with the utmost care. If you’re interested, check out expert tips on proper subfloor prep.Maintaining your flooring and tile installations is crucial to ensure long-term durability and beauty. One tool I rely on heavily is the laser level, such as the Bosch GLL 3-80, which provides pinpoint accuracy when checking for flatness and alignment during leveling processes. I personally prefer laser levels over traditional bubble levels because they offer rapid, precise measurements over large areas, saving time and reducing errors, especially when dealing with uneven subfloors. Another must-have is a high-quality oscillating multi-tool equipped with a sanding attachment. This versatile tool allows me to perform delicate sanding, detail work, or even cut-in repairs around edges and tight spaces without damaging surrounding surfaces. I recommend models like the Fein MultiMaster, renowned for its durability and precision, making it invaluable for fine finish work and touch-ups after installation or repairs.
How do I maintain my hardwood floors over time?
Regular maintenance involves more than just sweeping and mopping. I suggest applying a high-quality, micro-fiber dust mop daily to pick up abrasive particles that can scratch the surface. Additionally, periodic use of a wood floor cleaner that is pH-balanced, such as the Bona Hardwood Floor Cleaner, helps preserve the finish without buildup. To protect your floors from long-term damage, placing felt pads under furniture legs and avoiding excess moisture are key. If you notice signs of wear or scratches, consider professional refinishing to restore the wood’s luster, a process detailed in expert guides like hardwood floor care secrets. Furthermore, implementing a regular inspection routine—checking for loose tiles, grout cracks, or uneven spots—can prevent minor issues from escalating into costly repairs. For seamless repairs, investing in tools like a grout saw or a color-matching epoxy filler can make your maintenance routine more effective. In the future, I believe the trend will move toward smart maintenance systems, with IoT sensors tracking humidity and wear, alerting homeowners proactively before issues become serious. Try integrating a simple schedule of regular checks and cleaning routines, and upgrade your tools as needed for best results—your floors will thank you for the long-term care!
What I Wish I Knew When Fixing Deep Gouges in Hand-Scraped Hardwood
One of the most eye-opening lessons I learned was that matching the original hand-scraped texture is crucial for an invisible repair. Using the right textured filler and tools made all the difference—avoiding the trap of flat patches that scream “DIY gone wrong.”
Building Confidence Beyond Basic Repairs
It’s tempting to think that a quick swipe of filler is enough. However, taking the time to assess the damage deeply and carefully re-create the textured surface not only preserves the rustic charm but also boosts your skills for future projects.
Preserve the Beauty with Thoughtful Choices
From selecting the appropriate stain to applying a sealant that matches your finish, every decision influences the final look. I discovered that layering thin coats and testing everything on hidden spots prevents surprises and keeps the floor looking authentic.
Insider Wisdom for Long-Lasting Results
- Don’t underestimate the importance of proper substrate preparation—an uneven base can undermine any repair effort, leading to future cracking or detachment. This parallels the need for precise floor leveling techniques before installing new tiles or hardwoods.
- Choosing versatile tools like a fine wire brush or textured roller allows you to match the original scratches and carvings, making the repair indistinguishable. Resources like floor leveling guides can help master these subtle techniques.
- Patience during curing and finishing stages ensures lasting beauty. Rushing these steps often results in peeling or uneven color—trust me, a slight wait is well worth the flawless finish.
My Secret Arsenal for Perfect Floor Work
- Laser levels like the Bosch GLL 3-80—essential for checking subfloor flatness before laying tiles or sanding hardwoods.
- Oscillating multi-tools such as Fein MultiMaster—perfect for delicate detail work and reaching tight spots.
- Texture-matching fillers and stains that blend seamlessly, saving you from costly refinishing later.
Unlock the Future of Flooring Maintenance
As I look ahead, I see a trend toward smart tools and sensors that monitor humidity, wear, and even identify early signs of damage. Investing in good diagnostics now can save a lot of headaches in the long run.
Remember, every scratch or uneven patch is an opportunity to learn. With patience and the right techniques, your hardwood floors can remain gorgeous for decades. Trust the process, respect the material, and your space will thank you.
Your Turn to Try
Have you ever struggled with matching the texture of a hardwood repair? Share your story or ask questions below—Let’s learn from each other’s experiences!
,