
It was a morning like any other when I finally had that lightbulb moment. I remember standing in a boutique flooring store, eyeing a beautiful reclaimed Heart Pine floor. The price tag made me do a double take. Then it hit me—why does this stuff cost so much more than regular hardwood? I had to dig deeper because I knew there had to be a reason, and I sure didn’t want to get ripped off.
**
Unveiling the Truth Behind Reclaimed Heart Pine Pricing
**
Reclaimed Heart Pine often costs more because of the rarity and the process involved. Unlike standard hardwood, reclaimed pine has been salvaged from old buildings, barns, and factories—giving it character and history. But that process isn’t just picking wood out of a dumpster; it’s a meticulous effort to ensure quality, authenticity, and sustainability. Early in my flooring journey, I made the mistake of assuming all reclaimed wood was created equal, which led me to buy fakes masquerading as genuine reclaimed Heart Pine. Trust me; if you’re not careful, you could end up paying premium prices for something that’s nothing more than new, repackaged imitation.
**
Is Reclaimed Pine Worth the Extra Cost?
**
Many skeptics wonder whether the price difference justifies the value. Honestly, it depends on what you’re looking for. Reclaimed Heart Pine brings warmth, history, and a story to your home that modern flooring simply can’t match. Plus, it’s environmentally friendly, reducing demand for virgin timber. But here’s the deal—if you’re just after a fancy look without the authenticity, cheaper alternatives might tempt you. What’s important is knowing how to spot the genuine article. A quick tip—authentic reclaimed pine will show signs of aging like nail holes and weathered grain, which are difficult to fake convincingly.
I remember installing a reclaimed Heart Pine floor for a client, and the process was anything but smooth because I jumped into it without knowing how to distinguish real from fake. It cost me extra time and effort, and worse, I learned a hard lesson about the importance of vetting your supplier. Don’t let my mistake be yours. To get the best results and avoid wasting money, you need to understand the telltale signs of authentic reclaimed pine.
Curious about how to choose the right reclaimed wood? Check out some [flooring installation fundamentals](https://tiletrendshop.com/flooring-installation-fundamentals-leveling-for-a-seamless-look) to ensure your floor goes down flawlessly. Now, let’s dive into how you can tell the real deal when you’re out shopping.
Prepare Your Subfloor with Precision and Care
Before laying down your hardwood or tile, ensure the subfloor is solid, clean, and free of debris. Use a moisture meter to detect excess moisture, which can cause future warping or buckling. If moisture levels are high, address the issue before proceeding. Sweep and vacuum thoroughly to remove dust and loose particles, preventing uneven surfaces and ensuring good adhesion.
Identify and Fix Subfloor Bumps and Humps
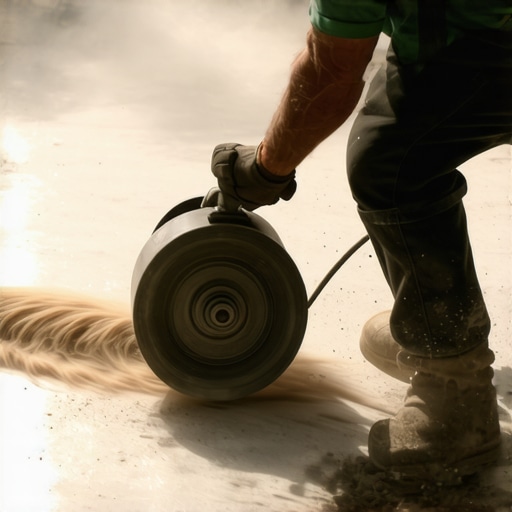
Inspect the subfloor for any humps or dips. A simple trick is to slide a 4-foot level or straightedge across the surface; any gaps indicate uneven spots. Mark these areas. For bumps, grind them down with a concrete grinder or sand them smooth using a sturdy grinder attachment. This step is crucial—imagine trying to lay a perfectly flat rug over a wrinkled mattress; the result will be uneven and unstable flooring.
Apply a Reliable Floor Leveling Compound
Choose the Right Self-Leveling Underlayment
Select a high-quality self-leveling compound compatible with your subfloor material. For concrete, an acrylic or cement-based formula works best. For plywood or wood-based subfloors, make sure the compound adheres well without causing swelling or buckling. Remember, using a subpar product can lead to peeling and adhesion failure later, similar to building a sandcastle with weak sand.
Mix and Pour with Technique
Follow the manufacturer’s instructions precisely—measure components carefully and mix thoroughly using a paddle mixer attached to a drill for consistency. To prevent air bubbles, pour the mixture slowly into the prepared areas, starting from the highest point and working towards the lowest. Use a spiked roller to eliminate trapped air and create a smooth, flat surface. This step is like smoothing out a pancake; an uneven cake won’t hold toppings well.
Ensure Proper Curing and Testing
Allow the leveling compound to cure fully—usually 24 to 48 hours—before proceeding with flooring installation. During this period, keep the area free of foot traffic and avoid excessive humidity fluctuations. Once cured, re-check with a straightedge or level to confirm flatness. If any small dips remain, reapply the leveling compound in those areas, just as a chef tweaks a sauce for perfect consistency.
Final Preparation Before Flooring Installation
After ensuring the surface is level, clean it again with a vacuum or a damp cloth. If installing tile, check the slope of your floor to prevent water pooling, using a level or laser line. For hardwood, verify the surface is smooth and ready for adhesive or nails. Remember, the quality of your subfloor directly impacts the durability and appearance of your new floor, making this meticulous preparation step non-negotiable.
For more detailed techniques on achieving flawless surfaces, explore precise floor leveling techniques or how to achieve flawless leveling. Proper preparation may seem tedious, but it guarantees a smooth, long-lasting finish that enhances your home’s value and aesthetic appeal.
 When it comes to installing tile, hardwood, or leveling your floors, many homeowners and even professionals fall prey to misconceptions that can lead to costly mistakes. Let’s dig deeper into some of the most prevalent errors and unveil the nuanced truths behind them.
First, a widespread belief is that **you can skip detailed subfloor inspections**. However, ignoring unevenness or moisture issues can compromise your entire flooring. For instance, even minor humps or dips can cause tile lippage or squeaking hardwood over time, leading to uneven surfaces that are both unsightly and unsafe. A common trap is relying solely on visual cues—use precise tools like moisture meters and straightedges to detect underlying problems. For comprehensive guidance on this, check out expert-level floor leveling techniques.
Next, there’s the myth that all self-leveling compounds are interchangeable. In reality, selecting the wrong product for your specific subfloor material can cause failure, such as delamination or peeling. The key lies in understanding the composition of your subfloor—concrete versus plywood—and choosing a compatible primer or mix accordingly. An advanced mistake is applying a thin layer without proper priming, which can lead to bubbling. To avoid this, consult this ultimate guide to floor leveling.
Additionally, many believe that once the surface looks flat, it’s suitable for flooring. But surface flatness is just part of the job.
Why does perfect flatness sometimes still lead to installation problems?
The answer is moisture imbalance. Even a slight variance in moisture content across your subfloor can cause expansion or contraction, leading to cracks or gaps later. Experts emphasize using an in-depth moisture analysis, especially if working over concrete slabs or in high-humidity areas. According to a recent study published by the Building Science Corporation, proper moisture assessment significantly reduces flooring failures.
Another common misconception is that professional installation guarantees perfection. While seasoned pros have the experience, they are only as good as their preparation. Skipping steps like detailed cleaning, priming, or proper acclimation can undermine even the best craftsmanship. For example, not allowing hardwood to acclimate properly before installation can cause warping or gaps down the line. Explore masterful installation secrets to ensure your project hits that high standard.
Finally, don’t overlook the importance of understanding your specific flooring material’s nuances. For instance, wide plank hardwoods are more sensitive to humidity swings than narrow ones, making seasonal adjustments crucial. This is why selecting the right material and method is more complex than it appears. For style guides that match your taste and climate considerations, visit the right hardwood choices for your home.
Have you ever fallen into this trap? Let me know in the comments. Mastering these nuances can elevate your space from amateur to expert territory, ensuring lasting beauty and durability of your floors.
Keep It Working: My Top Tools for Flooring Excellence
When it comes to flooring installation, maintenance, and long-term durability, having the right equipment makes all the difference. I rely on a set of specialized tools that not only streamline the process but also ensure professional-quality results. One essential item I swear by is a high-accuracy moisture meter, which I use to assess subfloor moisture levels before installation. This small device prevents future issues like cupping or buckling, especially important when working with hardwood or tile. For detailed guidance on levelness and surface preparation, I recommend reviewing floor leveling techniques.
Another invaluable tool is a spiked roller, which I use after applying self-leveling compounds. It helps release trapped air bubbles and creates a uniformly flat surface, crucial for long-lasting, crack-free flooring. I prefer rollers with steel spikes for their durability and effectiveness. Precision is key here; even tiny imperfections can transfer into visible issues years down the line. Proper surface preparation is an ongoing process, and investing in quality equipment is essential to keep floors functioning beautifully over time.
To manage ongoing maintenance and cleaning, I recommend a reputable hardwood floor care kit that includes microfiber mops and gentle cleaning solutions. Regular upkeep not only preserves the look but also extends the lifespan of your floors. Additionally, I keep a spray underlayment and sealant handy to promptly address minor damages or wear and tear, preventing minor issues from escalating.
How do I maintain floors over the years?
Consistent inspection and proper cleaning are the backbone of maintenance. For hardwood floors, periodic refinishing can rejuvenate their appearance, especially if you notice dullness or scratches. Consulting care tips for hardwood longevity offers detailed strategies. For tile, sealing grout annually helps prevent staining and deterioration, keeping your investment looking sharp far into the future. Using tools like a grout sealer with an applicator sponge ensures thorough coverage and longevity.
Looking toward the future of flooring, I anticipate smarter technology entering the realm of maintenance tools: sensors that monitor environmental conditions or VOC levels and alert homeowners before issues arise. Investing now in high-quality tools and techniques provides a solid foundation for adapting to these advancements. I highly recommend trying out an advanced moisture meter or a professional-grade leveling compound with the expert-level leveling techniques. These investments will pay off by keeping your floors not only in shape but also maintaining their aesthetic appeal for years to come.
The Hidden Gems of Floor Craftsmanship That Changed My Perspective
One of the most profound lessons I learned was the importance of patience and meticulous preparation. Rushing through subfloor inspections or neglecting moisture testing often led to costly mistakes. Discovering the subtle differences between genuine reclaimed Heart Pine and its imitations transformed not only my projects but also my appreciation for craftsmanship. A lightbulb moment came when I realized that every tiny nail hole or weathered grain tells a story—a story worth respecting and preserving.
Another insight was understanding the real value behind premium materials. Investing in authentic reclaimed pine might seem expensive initially, but it pays dividends in durability, beauty, and environmental impact. I wish I had known earlier that quality is an investment, not just an expense, especially when it comes to flooring that lasts for decades. These lessons have redefined my approach to flooring—prioritizing authenticity, thorough preparation, and ongoing education.
Lastly, I learned that embracing cutting-edge tools and techniques—like advanced moisture meters and self-leveling compounds—empowers homeowners and installers alike. Their proper use can make the difference between a flawless finish and a disastrous one. Upgrading my toolkit and continuously seeking knowledge has been a game-changer, encouraging me to push boundaries and deliver exceptional results.
Tools and Resources That Elevate Your Flooring Game
My essential toolkit includes a high-accuracy moisture meter, which I rely on to prevent future buckling—trust me, it’s a small investment for peace of mind. For understanding floor leveling deeper, I often consult the expert techniques guide. A quality spiked roller is non-negotiable for releasing trapped air and achieving a perfectly flat surface; I prefer those with durable steel spikes for consistent results. When selecting a self-leveling compound, I look for products recommended specifically for my subfloor material, ensuring bonding and longevity. To stay ahead of maintenance, I keep a hardwood floor care kit on hand, with microfiber mops and gentle cleaners, following advice from hardwood care experts. These tools and resources have helped me deliver floors that stand the test of time, combining beauty and functionality.
Your Next Step in Flooring Mastery Starts Here
Every project is an opportunity to elevate your home and skills. With the right knowledge, tools, and patience, you can create stunning, durable floors that tell a story of craftsmanship and care. Remember, mastery isn’t about perfection—it’s about continuous learning and taking pride in your work. So, whether you’re choosing authentic reclaimed Heart Pine or perfecting your leveling technique, trust in your journey and make each step count. Your dream floors are within reach, and every effort you make today brings you closer to that beautiful, enduring space.