
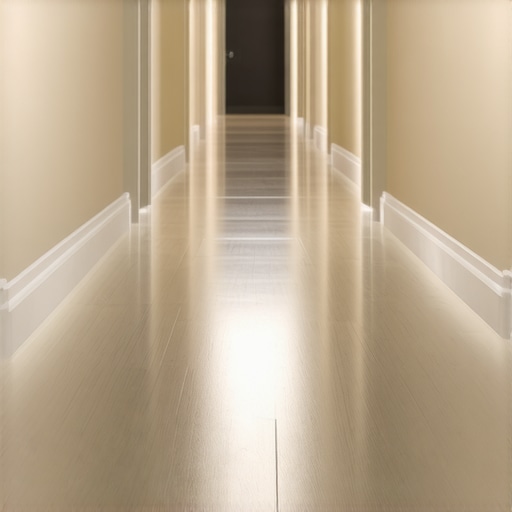
I remember the exact moment I realized my vinyl flooring wasn’t holding up like I’d hoped. It was a quiet Sunday, and I was walking down my hallway when I suddenly heard that unmistakable clicking sound—it was my vinyl planks separating and shifting apart. Frustration yanked my mood down faster than I could blink. That lightbulb moment made me realize how common—and surprisingly tricky—this issue can be.
Dealing with Gaps and Separated Planks in Your Hallway
If you’ve ever experienced your vinyl flooring pulling apart at the seams, you’re not alone. This sneaky problem can sneak up over time, especially in high-traffic areas like hallways. I want you to know that there’s a way to tackle this head-on. Today, we’ll uncover the reasons behind these gaps and, more importantly, how to keep your vinyl planks tightly sealed for good.
Is This Issue Really Worth the Effort? You Better Believe It
I used to think that a few separated planks were just cosmetic, not worth worrying about—until I saw my entire hallway start to look uneven. Trust me, ignoring this problem can lead to bigger issues, like water damage or a trip hazard. One mistake I made early on was installing my vinyl during a humid day without allowing for expansion. That oversight caused my planks to shift and separate more quickly. If you’re curious about the fundamentals of proper installation, check out flooring installation fundamentals. Understanding these basics can save you from costly repairs down the line.
Now, before we jump into the how-to’s, it’s crucial to understand why vinyl planks separate in the first place. Often, it’s a mix of improper acclimation, inadequate subfloor preparation, or environmental changes like humidity and temperature fluctuations. Studies show that climate swings can cause vinyl to expand and contract, leading to those unwanted seams (source: self-leveler issues).
So, have you faced this problem in your home? If yes, don’t worry—I’ve been there. The good news is that most separation issues are fixable with the right strategies.
In the next sections, I’ll guide you step-by-step through diagnosing the root cause and applying practical solutions to ensure your vinyl flooring stays seamless and beautiful for years to come. From leveling the subfloor to choosing the right adhesive, I’ve learned what works and what doesn’t—so stick around for the expert tips that will restore your hallway’s charm.
Start with a Thorough Inspection
Before diving into repair, carefully examine your hallway to identify the size and pattern of gaps. Use a flashlight to check for uneven subfloor areas or protruding nails that might be causing the separation. Mark problematic zones with painter’s tape for easy reference. I once spent an afternoon mapping out each gap, which saved me time during the actual fix.
Level the Subfloor to Prevent Future Shifts
A major cause of vinyl separation is an uneven subfloor. Think of it like laying a bed of uneven pillows—your flooring will always be bumpy. To address this, use a self-leveling compound. Mix the compound according to the manufacturer’s instructions, then pour it into the low spots, spreading it evenly with a trowel or a spiked roller. Allow ample drying time. I applied self-leveler in my hallway after watching a tutorial from this guide, which made a noticeable difference in stability.
Clean and Prepare the Surface
Ensure the surface is dust-free and dry. Use a vacuum or a damp cloth to remove debris, as particles can hinder adhesion. For stubborn dust, a damp microfiber cloth works wonders. I once tried to skip this step and ended up with poor bonding. Proper prep is essential for long-term fixes.
Apply Appropriate Adhesive or Seam Sealant
If gaps are near the seams, a high-quality vinyl seam sealer is your best friend. Apply a thin bead along the length of the seam, pressing the planks together firmly. For larger gaps, use a vinyl filler paste. It’s crucial to choose the right product; consult the manufacturer’s recommendations or opt for an adhesive designed explicitly for vinyl flooring. I learned this the hard way when I used a generic sealant that didn’t stick properly, leading to repeated repairs.
Use Clamps or Weights During Setting
After applying adhesive or sealant, clamp the planks or place weights on them to ensure full contact while drying. Think of it like pressing a sandwich—you want everything to stick tightly. Cover the weights with a cloth to prevent indentations. I used old books as weights, which worked surprisingly well and prevented movement during curing.
Acclimate Vinyl Before Installation or Repairs
To prevent future gaps, always let your vinyl acclimate in the room for at least 48 hours before installation or repair. This allows the material to adjust to the room’s temperature and humidity. Remember, rapid environmental changes are a common culprit behind shifting planks. I kept my vinyl in a climate-controlled room for a couple of days prior to fixing, resulting in fewer issues down the line.
routine Maintenance and Monitoring
Regularly inspect your flooring for new gaps or shifting and address them promptly. Use minimal water when cleaning and avoid high humidity environments. Incorporate these habits to prolong your vinyl flooring’s lifespan and appearance. I check my hallway monthly, catching small shifts before they become bigger problems.
When it comes to flooring, many professionals and DIY enthusiasts alike focus on the basics—choosing the right material, measuring precisely, and following manufacturer instructions. However, true mastery involves understanding the subtle nuances that can make or break a flawless installation. Contrary to popular belief, simply laying down tiles or hardwood without accounting for environmental factors and proper preparation can lead to costly mistakes down the line.
Myth Busting: Is It Enough to Just Level the Floor?
A common misconception is that achieving a level subfloor is the ultimate goal. While essential, the process is more complex than just applying a self-leveling compound and crossing your fingers. For example, the type of underlying substrate, moisture content, and ambient temperature during installation play vital roles. Skipping detailed assessments can result in future issues like cracking, uneven surfaces, or tiles popping loose. For comprehensive insights, check out fundamentals of floor leveling to avoid these pitfalls.
Another mistake I often see is undervaluing the importance of acclimation. Many overlook that wood or vinyl flooring needs to adjust to room conditions—ideally for at least 48 hours. Neglecting this step can lead to dimensional changes post-installation, creating gaps or buckling. Experts agree that environmental stabilization is a critical, often underestimated step in successful flooring projects, as highlighted in a study by the National Wood Flooring Association.
Let’s talk about the advanced intricacies that can trip you up when installing tile or hardwood. Selecting the appropriate thinset mortar or adhesive is not as simple as picking the most affordable option. The adhesive’s chemistry must match the tile material and environmental conditions; otherwise, it can cause delamination or moisture issues. For example, using a standard thinset in a humid basement can lead to mold or bond failure. Dive deeper into professional-grade strategies with step-by-step installation guides that cover these nuances.
Environmental factors extend beyond humidity and temperature. Think about seasonal humidity swings that cause hardwood floors to swell in summer and shrink in winter, which most ignore until it’s too late. Proper expansion gaps and acclimation processes are your best defense—skipping these details can lead to squeaks, gaps, or even warping. Remember, a meticulous approach during preparation can save you big headaches later.
Finally, the importance of substrate testing cannot be overstressed. Many skip the moisture test or ignore subfloor contamination, which can cause bonding issues or mold growth. Using a moisture meter or performing the plastic sheet test can reveal hidden problems that, if left unaddressed, compromise your entire project. For advanced techniques on assessing substrates, consult expert substrate evaluation methods.
In closing, excellence in flooring installation requires attention to these hidden details that are often dismissed. Understanding and respecting these nuances can elevate your work from good to great, ensuring durability and a stunning finish. Have you ever fallen into this trap? Let me know in the comments and share your experiences.
Investing in the Right Equipment for Long-Term Flooring Durability
When it comes to maintaining high-quality flooring installations, possessing the proper tools is as crucial as the materials themselves. I personally rely on a set of specialized equipment that ensures precision, efficiency, and longevity in every project. For leveling subfloors, I swear by a high-grade laser level, specifically the Bosch GCL100-50G, because it provides exact horizontal and vertical alignment over large areas, drastically reducing errors that can cause long-term issues like warping or uneven gaps. Using such professional-grade tools makes a tangible difference in the final outcome, especially when working on expansive or complex spaces.
To prepare surfaces effectively, I use a spiked roller to thoroughly embed the self-leveling compound. This device removes air bubbles that could compromise adhesion and create future imperfections. I’ve found that a 1/4-inch nap paint roller isn’t sufficient for this purpose—nothing beats the precision of a dedicated spike roller. It’s a small investment that pays off by minimizing levelling mistakes and ensuring the surface is primed rightly for tiles or hardwood.
For detailed measurements within tight spaces, I utilize a digital caliper. This tool helps verify precise thicknesses when installing underlayment, ensuring proper flooring height transitions, and preventing squeaks or uneven surfaces down the line. Maintaining accuracy with digital tools like the Mitutoyo ABSOLUTE Digimatic Caliper reduces guesswork, leading to a cleaner, more professional finish that endures weather changes and daily wear.
Beyond the physical tools, I incorporate software like flooring installation fundamentals tutorials, which serve as invaluable references during complex tasks such as achieving flawless level surfaces. Combining digital guidance with top-tier hardware positions you for success, especially in challenging scenarios like uneven concrete or old subfloors.
How do I keep my tools and techniques performing over time?
Regular maintenance of your equipment is essential. Clean laser lenses with microfiber cloths, lubricate moving parts of manual tools, and calibrate digital devices periodically. This routine ensures consistent accuracy, helping your work withstand the test of time. For example, I calibrate my laser level monthly using a known reference to prevent drift, which could otherwise lead to misalignments that surface as long-term flaws.
Looking ahead, the trend points toward smarter, more integrated tools—like laser levels that connect via Bluetooth to smartphones—allowing real-time adjustments and data logging. Staying updated with these innovations can significantly improve your workflow and results, making your installations more reliable and scalable in the future.
How do I maintain my flooring over time to prevent issues like gapping or buckling?
Beyond tools and initial installation, consistent upkeep plays a pivotal role. Regular inspections, especially in changing seasons, enable you to catch early signs of movement or damage. Maintaining proper humidity levels with dehumidifiers or humidifiers minimizes expansion and contraction that can cause long-term issues.
For ongoing success, I recommend always using high-quality, compatible sealants and adhesives periodically to reinforce seams and prevent moisture intrusion. Additionally, employing precise tools during repairs—like a digital caliper—ensures your fixes integrate seamlessly with the existing flooring, avoiding noticeable patches that could compromise the entire floor’s integrity.
If you haven’t already, try integrating a laser level into your next project. Its precision will dramatically improve the long-term durability of your work. Remember, investing in the right tools and maintaining them is an investment in your craftsmanship, helping to prevent costly repairs and ensuring your floors stay flawless for years to come. For more advanced insights, explore mastering floor leveling.
Lessons Only Experience Can Teach in Flooring Mastery
- Never underestimate the importance of environmental acclimation—skipping this step led me to install vinyl during a humid spell, causing noticeable gaps months later. Patience here saves headaches down the line.
- Proper subfloor testing is a game-changer. Using a simple moisture meter or performing the plastic sheet test revealed hidden issues I would have otherwise ignored, preventing future bond failures.
- Investing in quality tools like laser levels and spike rollers dramatically improves precision. I learned that cheap equipment often results in costly corrections, whereas reliable gear yields perfect results.
- Understanding the intricacies of adhesives and sealants makes all the difference. Choosing the right product tailored for your specific flooring ensures longevity and a seamless finish, as I discovered after experimenting with incorrect products.
- Regular maintenance, including monitoring seasonal shifts and resealing seams, prolongs your flooring’s lifespan and maintains its aesthetic appeal. Small proactive steps today can prevent catastrophic repairs tomorrow.
Tools and Resources That Changed My Approach
- The Bosch GCL100-50G laser level became my go-to for flawless leveling; its accuracy keeps long-term issues at bay. Reliable measurements are the backbone of professional-looking floors.
- A high-quality spike roller from a reputable supplier like Tile Trend Shop ensures perfect self-leveling compound application, minimizing air bubbles and imperfections.
- For substrate evaluation, a digital moisture meter—specifically the Mitutoyo ABSOLUTE Digimatic Caliper—lets me verify thicknesses during repairs, guaranteeing seamless integration with existing flooring.
- And for in-depth guidance, the comprehensive tutorials on floor leveling fundamentals help me troubleshoot complex issues, making every project smoother.
Forge Your Path in Flooring with Confidence
Remember, mastering flooring installation and repair isn’t about shortcuts; it’s about embracing the details that ensure durability and beauty. Each project is a step towards refinement and craftsmanship mastery. If you’ve faced challenges or have tips of your own, I’d love to hear about them—share your experience below and let’s grow together in this journey of flooring excellence!