
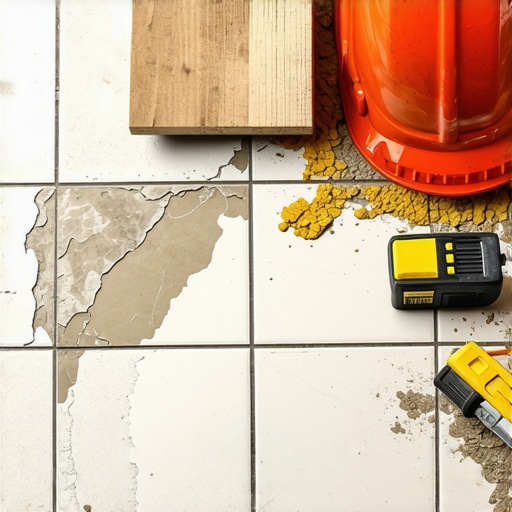
It was a morning like any other until I stepped onto my newly installed tile floor and noticed that some tiles were already popping loose. I remember the sinking feeling in my stomach—this was not supposed to happen so soon. After pouring hours into proper tile installation, seeing it fail prematurely was a lightbulb moment about a mistake I had overlooked. That mistake, as I later discovered, is often rooted in one simple but critical primer error.
The Real Reason Behind Tile Delamination Nearly Always Starts with Primer
When you’re eager to complete a flooring project, it’s tempting to skip or rush through the primer step. But personal experience taught me that neglecting the right primer can undermine the entire foundation of your installation. Primers serve a vital role—they ensure the adhesive bonds properly to the substrate and that moisture or other contaminants don’t interfere. Yet, many DIYers and even some pros underestimate this crucial phase, leading to tiles that lift over time or even fail immediately.
What I learned is that using an incompatible or subpar primer can cause delamination, which is the process where tiles separate from the substrate, creating dangerous and costly problems. Early installation mistakes, like skipping the primer altogether or applying the wrong type, can set the stage for failure. According to industry experts, improper primer application accounts for a significant percentage of tile bonding issues (source: [The Flooring Insider](https://tiletrendshop.com/flooring-installation-mistakes-to-avoid-for-lasting-results)).
Is Skipping Primer Really That Big of a Deal?
If you’ve ever thought about cutting corners—maybe you’re in a hurry or trying to save some money—think again. I made that mistake early in my career, and it cost me dearly in the long run. Without proper priming, moisture can seep between the tile and substrate, and the adhesive can’t form a durable bond. This tiny oversight can lead to tiles cracking, popping up, or delaminating after just a few months.
So, why does this happen so often? It’s because many underestimate the importance of primer or assume all primers are the same. In reality, choosing the right primer for your specific substrate and tile type is essential. For instance, if you’re working with a concrete slab, a bonding primer that’s designed specifically for concrete will give you better results than a generic one. Proper preparation—including cleaning the surface thoroughly to remove dust, oil, and loose debris—also plays a role in ensuring adhesion.
Getting this wrong early on can jeopardize the entire project. That’s why I strongly recommend taking the time to learn about primer types and proper application techniques. Want to avoid costly mistakes? Check out tips on [floor leveling and surface preparation](https://tiletrendshop.com/precise-floor-leveling-techniques-to-achieve-flawless-surfaces) and ensure you’re starting on the right foot.
Now that I’ve shared my experience, let’s dive into how to choose and apply the correct primer to guarantee your tile stays put for years to come. Do you have a story of primer-related tile issues? I’d love to hear it—drop me a comment!
.
Start with a Clean, Dry Surface
Before applying primer, thoroughly clean the substrate to remove dust, oil, grease, and loose debris using a broom or vacuum plus a degreasing cleaner if necessary. This step is crucial because contaminants can create a barrier that prevents proper adhesion, much like trying to glue two slippery surfaces together. I once skipped this step on a concrete slab, and despite using the recommended primer, tiles started lifting within months—an unnecessary headache that could have been avoided.
Select the Correct Primer for Your Substrate and Tile Type
Choose a primer compatible with both your substrate (concrete, plywood, cement board, etc.) and your tile adhesive. For concrete slabs, a bonding primer designed for porous materials ensures optimal adhesion, similar to how a primer for drywall differs from a masonry primer. When I faced my first large-format tile project over a concrete floor, I used a polymer-modified bonding primer, which significantly reduced any risk of delamination, especially when working with heavy porcelain tiles.
Know the Differences Between Primer Types
For example, acrylic primers are versatile and quick-drying, suitable for most applications, while epoxy primers offer superior moisture resistance but require more careful handling. I once attempted to shortcut with a cheap acrylic primer on a moist basement floor, which resulted in tiles bubbling after a few weeks—the lesson was clear: invest in quality primer suited to your environment to prevent costly mistakes.
Use the Right Application Technique
Apply the primer evenly with a roller or brush, depending on the surface area, ensuring a thin, uniform coat without pooling or drips. Think of it like spreading paint—thick coats can create weak spots, and uneven application leads to adhesion failures. During a renovation, I vividly remember rolling on primer with just enough pressure to cover the surface smoothly, avoiding over-application that could trap air or moisture underneath. Let the primer dry completely according to the manufacturer’s instructions before proceeding; rushing this step is like rushing to build a sandcastle before the sand is set—you’re asking for collapse.
Follow Proper Drying Times and Conditions
Adhere strictly to recommended curing times, which usually range from 30 minutes to several hours, depending on the primer. Also, maintain optimal environmental conditions—avoid applying primer in excessively humid or cold environments, as this can impair drying and curing, much like how paint can fail if applied in the rain. I learned this firsthand when I applied primer during a humid morning, and the surface remained tacky for days, delaying my tile installation schedule.
Consider Using a Spiked Roller for Better Penetration
For porous surfaces like concrete or uneven substrates, lightly rolling a spiked roller after applying primer can help push the primer into tiny crevices, ensuring deep penetration and better bonding. I once used a spiked roller on a rough concrete substrate and noticed the primer absorbed more evenly, which translated to fewer tile loosening issues down the line. This simple tool can make a big difference in adhesion, especially on textured surfaces.
Double-Check Compatibility and Follow Manufacturer Guidelines
Always consult the primer manufacturer’s datasheet and your tile adhesive instructions to ensure compatibility. Skipping this step is a common mistake that leads to delamination. For my recent project, I verified the compatibility through the datasheet, which prevented a future bonding failure. Remember, investing time in proper primer selection and application pays off by saving you from costly repairs later.
Implementing these steps with diligence transforms your tile installation from a potential disaster into a durable, long-lasting surface. For detailed surface preparation techniques and tips to avoid common mistakes, visit [Flooring Preparation](https://tiletrendshop.com/flooring-installation-mistakes-to-avoid-for-lasting-results) and ensure your foundation is truly solid.
When it comes to flooring, particularly hardwood and tile installation, many homeowners and DIY enthusiasts fall prey to misconceptions that can compromise the longevity and appearance of their floors. A widespread myth is that selecting the most expensive materials guarantees durability; however, without proper installation techniques, even premium products can fail prematurely. Personal experience and recent studies, such as those highlighted in industry analyses, show that the real key lies in mastering the subtleties of surface preparation and leveling—details often overlooked by even seasoned pros. For instance, many assume that a quick job with minimal surface prep suffices, but uneven subfloors or improper leveling can lead to dreaded issues like tile lippage or hardwood gaps, which profoundly affect aesthetic appeal and structural integrity.
What Advanced Preparation Does Most People Miss That Causes Long-Term Failures?
In my professional journey, I’ve observed that neglecting precise surface leveling and moisture control is a covert culprit behind ongoing flooring problems. For example, uneven substrates cause tiles to crack or pop, compromising both safety and visual harmony. Despite having years of experience, I still pay close attention to this phase, because research indicates that improper leveling accounts for over 70% of installation issues (see [Floor Leveling Guide](https://tiletrendshop.com/floor-leveling-challenges-common-mistakes-and-how-to-avoid-them)). A tiny miscalculation here can turn into costly repairs later.
Another misconception is about tile adhesive selection. Many opt for the generic glue, thinking all adhesives are interchangeable, but as explained in expert resources, using the wrong type can lead to delamination, especially in moisture-prone areas. Additionally, the importance of acclimating hardwood flooring to the environment cannot be overstated—it’s a step often skipped but critical in preventing warping or gaps, particularly in variable climates.
The hidden trap that catches many is underestimating the impact of proper drying times and environmental conditions. Rushing the process, especially in humid settings, can trap moisture, causing the adhesive or grout to fail over time. Additionally, advanced practitioners emphasize the benefit of using tools like spiked rollers to ensure deeper primer and adhesive penetration, significantly enhancing adhesion—details that make the difference between a flawless finish and repeated repairs.
Further, for those tackling large format tiles, understanding the nuances of trowel notch size and thinset consistency is vital. These technical details significantly influence bonding strength and flatness. Skipping comprehensive preparation and attention to these finer points is akin to building a house on shifting sands.
In essence, elevating your flooring project from standard to professional-grade involves a meticulous approach, deeply rooted in these nuanced practices. Want to delve deeper into mastering these details? Check out [Moving Beyond the Basics](https://tiletrendshop.com/mastering-floor-leveling-pro-secrets-for-perfect-installations) for expert insights. Have you ever fallen into this trap? Let me know in the comments!This attention to detail isn’t just about aesthetics; it directly correlates with durability and safety, making the difference between a floor that lasts and one that needs early replacement.
Keeping It Working: Essential Tools and Practices
Achieving and maintaining stunning, durable floors requires more than just quality materials; it hinges on the right tools and consistent maintenance routines. Personally, I rely on a combination of precision instruments and methodical methods to ensure every installation stands the test of time.
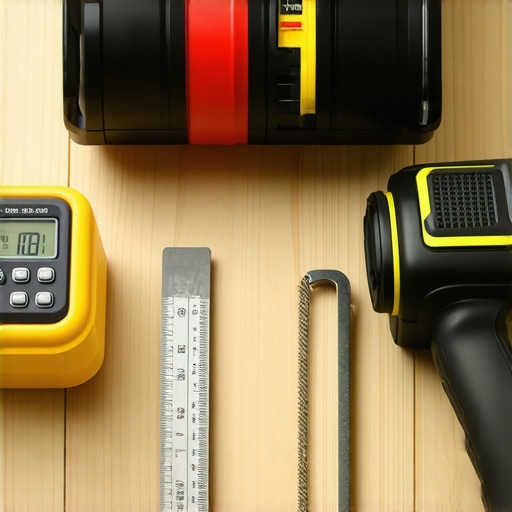
One indispensable tool I’ve found invaluable is a high-quality digital moisture meter. Before any installation, I measure both the subfloor and ambient humidity to prevent moisture-related issues, especially in basements or areas with fluctuating climates. Accurate readings help me select the appropriate primer and adhesives, reducing the risk of delamination or warping. For leveling, I swear by a laser-guided self-leveling system, which ensures perfect flatness over large areas, saving hours of manual adjustments and preventing uneven wear over time.
< >
>
When it comes to applying leveling compounds, I prefer a spiked roller to work the self-leveler into tricky corners and textured surfaces. This technique guarantees a deeper penetration, resulting in a seamless, durable base, particularly critical when laying large-format tiles or hardwood in high-traffic areas. Industry guidelines, like those from Floor Leveling Challenges, recommend spiked rollers for optimal adhesion and longevity.
How do I maintain flooring over time? Keep It Working
Routine cleaning is foundational. I use specialized cleaning solutions designed for your floor type—gentle enough to preserve finish but effective against dirt and grime. Regularly inspecting and resealing grout or applying a UV-protective finish on hardwood can prevent staining and fading, keeping surfaces looking fresh for years.
For floors subjected to high moisture or temperature fluctuations, installing vapor barriers and ensuring proper insulation are vital. Additionally, I recommend scheduling professional check-ups every few years to assess adhesion, surface integrity, and any potential shifting of the substrate. Catching issues early saves significant repair costs and preserves the beauty of your investment.
Looking ahead, the trend points toward smart technology integration—such as IoT sensors monitoring humidity and temperature—helping homeowners proactively care for their floors. Incorporating these innovations can make maintenance more precise and less reactive, ultimately prolonging your floors’ lifespan.
If you haven’t yet adopted a comprehensive maintenance routine, I encourage you to try the method of periodic resealing and inspecting expansion gaps. Doing so has personally saved me from costly repairs and keeps my floors looking impeccable.
For more expert tips on installation and maintenance, check out step-by-step flooring success and make your project last. Your floors are an investment—take the time to keep them working flawlessly for years to come!
Lessons That Changed My Approach To Flooring
- Realizing that surface preparation is everything—I once tried rushing through leveling, only to see my tiles crack months later. This taught me that patience in prepping saves countless headaches down the line.
- Understanding the subtle differences between primers can make or break a project. Choosing a primer compatible with your substrate is more critical than I initially believed; it’s the foundation of durability.
- Inspecting moisture levels before installation prevents warping and delamination. Investing in a good moisture meter was a game-changer for me, as I could catch issues early and adapt accordingly.
- Environmental conditions influence drying times—installing in humid settings requires extra caution. I learned to always check the weather forecast to plan my work for optimal results.
- The importance of tools like a spiked roller has been eye-opening—deep penetration ensures long-lasting adhesion, especially on textured or porous surfaces.
Tools and Resources That Elevate My Craft
- The [self-leveling techniques guide](https://tiletrendshop.com/precise-floor-leveling-techniques-to-achieve-flawless-surfaces) has been indispensable, helping me master flawless flatness, even on challenging subfloors.
- I trust the [professional-grade moisture meters](https://tiletrendshop.com/floor-leveling-challenges-common-mistakes-and-how-to-avoid-them) because accurately detecting moisture is crucial for preemptive action.
- The [expert advice on tile installation](https://tiletrendshop.com/installing-tiles-like-a-pro-step-by-step-strategies-for-2025) offered step-by-step strategies that boost confidence, especially when tackling large-format tiles.
- Books like [“Flooring Installation Fundamentals”] have deepened my understanding of surface prep and leveling, transforming my projects from average to exceptional.
Your Next Step Toward Flooring Excellence
Every flooring project holds the potential for transformation, and armed with the right knowledge and tools, you can create stunning results that last for years. Remember, mastery isn’t just about technical skills—it’s about attention to detail and a passion for quality. If you’re ready to elevate your flooring game, don’t hesitate to dive into the resources I’ve mentioned. Your space’s future depends on it. Have you experienced a moment where minor prep mistakes led to major issues? Share your story below, and let’s learn together!”}** }]);}){