
Ever walked into a room where your click-lock flooring feels like it’s about to bounce right off the subfloor? I’ve been there too—standing on a seemingly perfect floor only to feel that unsettling give under my feet. That lightbulb moment hit me hard: I realized that despite following all the installation instructions, my floors still wobbled in the middle. Why does this happen? More importantly, how can I fix it before the problem worsens?
Understanding Why Your Floors Bounce
When I first installed my click-lock hardwood floor, I thought I had everything perfect. The subfloor was level, the planks were correctly spaced, and I followed every recommended step. Yet, after a few weeks, I started noticing a gentle bounce in the middle of the room. It was subtle at first, almost like I was imagining it—but eventually, it became an uncomfortable feature under my feet.
This issue isn’t as uncommon as you’d think. In fact, according to experts, improper floor leveling is often the culprit behind bouncing hardwood floors, especially with click-lock systems. A study from the National Wood Flooring Association highlights that even slight discrepancies in subfloor flatness can cause flexing and bouncing over time – a problem that might seem minor but can lead to significant damage if left unaddressed.
Is Bouncing Floors a Dealbreaker or Just an Aesthetic Nuisance?
At first, I wondered whether my floors were doomed or if this was just an aesthetic annoyance. I made one early mistake—assuming that a perfectly installed click-lock system would automatically hide minor subfloor imperfections. That assumption cost me dearly. It wasn’t until I dug into proper floor leveling techniques that I realized how much unevenness could impact long-term stability.
Taking the time to ensure a flawlessly level surface can save you from future headaches. Whether you’re dealing with hardwood, laminate, or tile, proper subfloor preparation is crucial. For example, mastering {https://tiletrendshop.com/precise-floor-leveling-techniques-to-achieve-flawless-surfaces|these precise floor leveling techniques} can dramatically improve your installation outcome. Don’t forget—skipping this step is a rookie mistake. For a comprehensive guide on avoiding common pitfalls, {https://tiletrendshop.com/floor-leveling-challenges-common-mistakes-and-how-to-avoid-them|check out these tips}.
As I delved deeper, I found that addressing the root causes of bouncing can even prolong the life of your floors. If you’re wondering whether your bouncing is minor or a sign of a more serious issue, keep reading. We’ll explore the core reasons behind this problem and, more importantly, how to fix it quickly and effectively. And yes, you’ll be able to walk across your floors without that unsettling bounce—guaranteed.
Smoothing Out the Subfloor
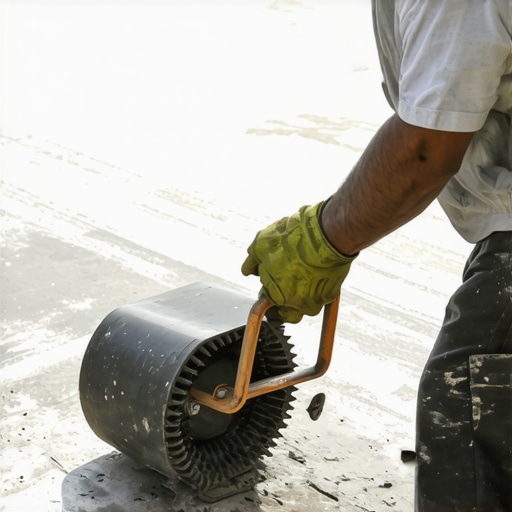
Start by thoroughly inspecting your subfloor for uneven spots. Use a long level or a straight 2×4 to identify high and low areas. If you find irregularities, mark them clearly. For minor dips, applying a self-leveling underlayment can fill gaps and create a FLAT surface. I once used a spiked roller to spread the self-leveler evenly across my garage floor, and it dramatically reduced bounce—an essential step before laying hardwood.
Preparing the Surface Properly
Before pouring any leveling compound, clean the subfloor thoroughly. Remove all debris, dust, and grease that could prevent adhesion. Sand down any high spots. For concrete subfloors, a quick acid etch helps improve bonding. Remember, surface prep is like priming a canvas—skip it, and your finish won’t be smooth or durable. I learned this the hard way when I skipped cleaning, resulting in a self-leveling wipeout that took hours to fix.
Applying and Spreading Leveler Correctly
Mix your self-leveling compound according to manufacturer instructions. Use a trowel or a gauge rake to distribute the mixture uniformly, avoiding puddles or thin spots. The goal is a smooth, level surface across the entire area. When I did my first self-leveling run, I found that a notched trowel helped control thickness, preventing excessive pooling. Spiked rollers are invaluable here—they eliminate air bubbles and smooth out the compound for a flawless finish.
Allowing Adequate Curing Time
Don’t rush the curing process. Most self-levelers require at least 24 hours to set before walking on or installing flooring. I once hurried this step after a weekend project and ended up with minor cracks. Use this time to double-check your work—look for any dips or uneven spots and sand or reapply if necessary. Patience now avoids costly repairs later, especially with click-lock flooring systems that demand a perfectly flat surface to prevent bouncing.
Verifying Your Surface is Ready
Once cured, perform the ‘drag test’—drag a heavy object or a damp cloth across the surface. If it slides smoothly without catching, your surface is sufficiently flat. For best results, double-check with a long level or laser level tool. When I finally mastered this step, my installation became smoother, and I eliminated the bounce that once plagued my living room.
< >Many homeowners and even some novice contractors believe that following standard procedures guarantees a perfect floor. However, in my experience, several nuanced mistakes trip up even seasoned DIYers, leading to costly corrections. One widespread misconception is that a level subfloor alone suffices to prevent problems like bounce or creak. While levelness is vital, the overall structural integrity and material compatibility truly determine long-term success. For example, using subpar underlayment or ignoring moisture barriers with hardwood can cause warping or gaps over time, contradicting the myth that quality finishing alone will hide foundational flaws. Advanced installers understand that addressing the entire system—subfloor, climate control, material choices—is essential for a flawless floor. A common trap is oversimplifying the leveling process; many assume that a quick patch with self-leveling compound can compensate for severe subfloor irregularities. However, studies show that relying solely on leveling compounds without proper subfloor preparation can result in surface delamination or unevenness that manifests as bounce years later. For sophisticated projects, it’s advisable to refer to authoritative guides like [these expert leveling techniques](https://tiletrendshop.com/precise-floor-leveling-techniques-to-achieve-flawless-surfaces) to avoid such pitfalls. Also, many underestimate the importance of site-specific factors like humidity, which influence how materials expand or contract—a critical aspect often overlooked. For instance, installing hardwood without considering seasonal humidity fluctuations can lead to gaps or buckling; this is why acclimation and climate control are non-negotiables. One of the most overlooked advanced mistakes is improper tile surface preparation, such as inadequate cleaning or incorrect thinset application, which can cause tiles to crack or loosen prematurely. Experts suggest mastering [these professional secrets](https://tiletrendshop.com/mastering-floor-leveling-pro-secrets-for-perfect-installations) to truly elevate your installation quality. Have you ever fallen into this trap? Let me know in the comments. Remember, superior results come from attention to detail beyond the basics—embrace the nuances, and your floors will stand the test of time.
Keeping Your Floors in Prime Condition
Achieving a flawless and durable floor isn’t a one-and-done task; it requires ongoing maintenance, the right tools, and strategic planning. As someone who’s spent years installing and maintaining hardwood, tile, and leveled floors, I can attest that investing in quality equipment makes all the difference. The first tool I swear by is a high-precision laser level. It ensures your subfloor remains perfectly flat over time, preventing issues like bounce or squeaks. For softwood floors, I rely on a moisture meter to monitor humidity levels, as fluctuations can cause gaps or warping, especially in climates with seasonal changes.
When it comes to cleaning and upkeep, a soft microfiber mop paired with pH-neutral cleaners preserves the finish without stripping protective sealants. Regularly checking expansion gaps with a feeler gauge helps prevent buckling or cracking due to temperature or humidity shifts. Don’t underestimate the importance of a quality, adjustable flooring pull bar—it’s invaluable for tightening loose planks or tiles without damaging neighboring surfaces.
Future Trends in Flooring Maintenance and Tools
Looking ahead, I predict smart tools and integrated digital sensors will become standard for floor care. Imagine devices that emit alerts when humidity exceeds optimal ranges or when subfloor irregularities begin to develop—saving homeowners a lot of hassle and costly repairs. Apps that guide you through maintenance routines tailored to your specific flooring material are already in the works, making upkeep more proactive and less reactive.
How do I keep my floors looking new over the years?
Long-term care begins with applying a professional-grade sealant during installation, like those discussed in these expert sealing techniques. Regular cleaning, prompt repair of any chips or cracks, and controlling humidity with dehumidifiers or humidifiers help preserve the integrity of hardwood and tile surfaces. Remember, prevention is easier and more cost-effective than major repairs. Consider scheduling seasonal inspections—think of it as equivalent to a car tune-up for your floors. For precision leveling and repair, tools like a self-leveling compound pump with variable flow rates can significantly streamline the process. I personally recommend the [spiked roller](https://tiletrendshop.com/the-spiked-roller-secret-for-glass-smooth-self-leveler) for smoothing out fresh self-leveler; it’s a game changer for achieving that truly seamless surface.
Keep durability in mind when scaling your flooring projects. Whether you’re renovating a small bathroom or outfitting a whole-house installation, select tools and techniques designed for long-term success. For in-depth guidance on maintaining perfect floor levels, don’t forget to review these precise leveling methods. Now, I challenge you to grab a quality moisture meter and take humidity readings in your space—you might just uncover an issue lurking beneath the surface that could affect your entire flooring investment.
What I Wish I Knew Before Starting
- Prioritize subfloor inspection over choosing the perfect flooring material—without a solid base, everything else is secondary. Skipping detailed leveling led me to revisit my entire project weeks later.
- The tiniest dips matter more than I thought. Using a laser level or long straight edge revealed hidden flaws that, if uncorrected, caused bounce and creaks over time.
- Patience with curing times is non-negotiable. Rushing the process resulted in cracks and uneven spots that could have been avoided by waiting a full 24 hours or more after leveling compound application.
- Proper surface preparation is underrated. Cleaning thoroughly and roughening high spots with a sander or grinder made a difference in adhesion and overall stability.
Tools and Resources That Elevated My Results
My secret weapons include a high-quality laser level, which ensures consistent flatness throughout the project. The [precise floor leveling techniques](https://tiletrendshop.com/precise-floor-leveling-techniques-to-achieve-flawless-surfaces) I learned from experts transformed my understanding of subfloor prep. A reliable self-leveling compound pump made application smoother and saved hours. For detailed guidance, I highly recommend reviewing [these expert secret tips](https://tiletrendshop.com/mastering-floor-leveling-pro-secrets-for-perfect-installations). Investing in quality tools and reputable resources truly pays off, making a challenging project feel manageable.
Embracing the Journey, Not Just the Result
Achieving a perfect, bounce-free floor is as much about patience and attention to detail as it is about tools and techniques. Remember, setbacks are learning opportunities that bring you closer to mastery. Each step—whether it’s leveling the subfloor, selecting the right materials, or maintaining the finish—plays a role in your success story. Stay curious, keep refining your skills, and don’t hesitate to seek expert advice when needed. Your improved floors are well worth the effort, and in the end, nothing beats the confidence of knowing you built something durable and beautiful. Now, I challenge you: What’s your biggest flooring challenge right now, and how do you plan to tackle it? Share your thoughts below.