
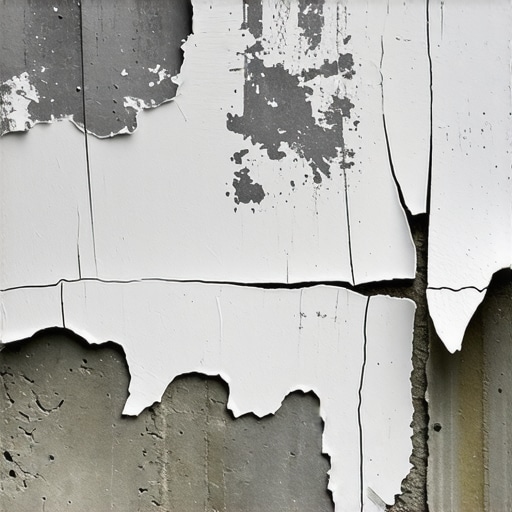
Have you ever carefully poured self-leveling compound over your concrete floor, only to find it peeling off just weeks later? I remember the sinking feeling in my stomach—the frustration of watching my hard work turn into a mess, all because of something I overlooked. That lightbulb moment hit me hard: I had fallen into common traps without even realizing it, and now my entire project was at risk.
Why Self-Leveler Peels Off the Concrete: The Hidden Culprits
If you’re like I was, this issue might seem perplexing. After digging through countless resources and talking to experts, I discovered that peeling self-leveler isn’t just a fluke—it’s often caused by a combination of overlooked factors, like moisture in the subfloor, improper surface prep, or incompatible materials. Understanding these causes is essential if you want a lasting, smooth finish. Interestingly, according to flooring industry experts, moisture-related problems are among the leading causes of self-leveler failure, accounting for over 60% of issues reported.
Is Self-Leveling Compound Actually Worth the Hype?
One of my early mistakes was assuming that all self-leveling compounds are created equal. I used a generic product without checking if it was suitable for my concrete’s moisture levels or my intended flooring surface. This oversight led to cracks and peeling down the line. The truth is, if you skip proper preparation or choose the wrong product, you’re setting yourself up for disappointment. Want to avoid my mistake? Make sure to read this comprehensive guide on floor leveling techniques to get it right the first time.
If you’re tired of wasting time and money on repairs that don’t last, don’t worry—we’ll walk through the common pitfalls and practical solutions so you can achieve a durable, perfectly leveled surface. Ready to transform your space with confidence? Keep reading, and let’s get started.
Start with a Thorough Subfloor Inspection
Before you even think about mixing that self-leveling compound, embark on a detailed inspection of your concrete slab. Molehills and dips resemble tiny hills on a landscape, and leaving them unsculpted will cause your project to crack or peel. Use a long 4-foot level or a straightedge to identify high and low spots. If you spot any humps or valleys, mark them clearly with chalk. In my own project, I once ignored this step and ended up with an uneven floor that caused my tiles to crack within six months. This initial step sets the stage for a seamless finish.
Proper Surface Preparation Is Critical
Clean and Degrease
Remove all dust, dirt, grease, or paint residue. Sweep, vacuum, and scrub with a concrete cleaner if necessary. Remember, a dirty or greasy surface acts like a barrier preventing the self-leveler from bonding properly. I once skipped cleaning and noticed bubbles forming under the compound, leading to uneven spots. Cleaning isn’t glamorous, but it’s essential.
Etch the Surface Correctly
Use a concrete etcher or acid wash as per manufacturer instructions to roughen the surface slightly. This enhances adhesion. Think of it as giving the primer a rough road to stick to, much like making a velcro surface even more sticky. When I neglected this step, my self-leveler failed to bond in areas, causing peeling. Follow the product’s instructions precisely for best results.
Manage Moisture Levels Rigorously
Moisture is the silent killer of successful floor leveling. Use a moisture meter to test your slab—ideally, the moisture content should be below 4%. If it’s high, lay a vapor barrier or wait until the concrete dries further. For my basement project, I tested and found high moisture levels, which I addressed with a breathable moisture barrier, ultimately saving me from early peeling.
Select the Right Self-Leveling Compound
Don’t assume all products are equal. Match your choice to your environment—consider moisture levels, intended flooring type, and load-bearing requirements. Consult the ultimate guide to floor leveling for detailed product recommendations. I once used a thinset for leveling, which was a mistake because of its different setting properties, leading to weak spots. Choose wisely and follow the manufacturer’s instructions meticulously.
Mix and Pour with Precision
Follow the exact water-to-compound ratio specified on the label. Use a clean mixing bucket and a paddle drill to avoid lumps. When pouring, do so in small sections, starting at a low spot and allowing the compound to flow into low areas naturally. Use a spiked roller to remove air bubbles—much like rolling out bread dough to prevent pockets of air. I once hurried the pouring and missed the step, which caused air pockets and uneven surface after drying.
Allow Proper Curing Time
Patience is key. Let the self-leveler cure fully, usually 24 to 48 hours, before walking on or installing flooring. Cover with plastic if necessary to retain moisture. Rushing this step caused surface irregularities in my earlier attempts. Patience here guarantees a smooth, durable surface that will serve as a perfect base for your new flooring.
By meticulously following these steps, you transform a messy, uneven slab into a flawless canvas. For more detailed techniques, visit the precise floor leveling techniques guide. Remember, each step is integral—skipping one can compromise the entire project, leading to peeling and cracks down the line. Pay attention to detail, stay methodical, and your new floor will stand the test of time.Even experienced contractors often fall prey to misconceptions about flooring and tile installation. A pervasive myth is that choosing the thickest tile adhesive guarantees a durable bond; however, according to industry experts, adhesive suitability depends more on substrate conditions and proper application techniques than on thickness alone. Relying solely on product specs without understanding substrate compatibility can lead to tiles slipping or cracking over time. For instance, using a standard thinset on a damp substrate without proper priming is a recipe for failure. Ensure you’re selecting the right materials for your specific environment by consulting detailed guides like tile installation pointers to avoid costly mistakes.
Another common oversight is underestimating the importance of substrate flatness. Many believe that a slightly uneven subfloor is acceptable if it’s within the manufacturer’s tolerances. But in my experience, even minor humps or dips can cause lippage in tiles or cracks in the finished floor. Advanced techniques, such as thorough floor leveling and moisture testing—which should always be done with proper tools—are critical for a flawless result. For more on how to achieve this, see floor leveling strategies.
Hardwood flooring installation is equally fraught with misconceptions. Many assume that acclimating wood for just 24 hours is sufficient, but experts recommend a minimum of 72 hours in the environment where the flooring will be installed. This prevents issues like cupping and gaps later on. Furthermore, some installers ignore the significance of proper underlayment choices, which directly impact the floor’s longevity and performance. For in-depth guidance, check selecting the right hardwood floors and installation tips.
Now, a pressing question for advanced practitioners: How does substrate moisture variance impact long-term tile and wood installations? Studies indicate that uneven moisture levels can cause substrate expansion or contraction, leading to bonding failures or finish defects. The key is comprehensive moisture management—using moisture barriers and detailed testing to prevent internal movement. This nuance is often overlooked but can save you from extensive repairs down the line.
Have you ever fallen into this trap? Let me know in the comments. Remember, mastering these hidden intricacies ensures your flooring projects last for decades, avoiding common pitfalls and myths that trap even seasoned pros.
Investing in the Right Equipment Makes All the Difference
When it comes to flooring installation and maintenance, having the proper tools ensures precision, efficiency, and durability. I personally rely on equipment that combines accuracy with ease of use, which ultimately saves me time and reduces costly mistakes. For example, a high-quality laser level like the Bosch GSL2 has revolutionized my approach to floor leveling, providing accurate readings over large areas and highlighting subtle dips that might be missed with traditional bubble levels. This precision helps me achieve a perfectly flat surface, crucial for especially large tiles or hardwood planks.
Another essential tool is a spiked roller. Unlike standard handheld rollers, a spiked roller actively removes air bubbles and helps the self-leveling compound settle evenly into low spots. I always prefer one with a comfortable grip and adjustable handle to reach tight corners comfortably. Using the right roller prevents air pockets, which can cause uneven surfaces or peeling over time. Pairing this with a well-maintained trowel calibrated to the tile size ensures consistency in thinset application and improves adhesion.
Why I Swear By Proper Moisture Meters
Before laying down any flooring, testing subfloor moisture levels is non-negotiable. I trust the Protimeter Surveymaster for its dual hygrometer and pinless sensors, which give a quick, accurate reading without damaging sensitive surfaces. It’s an investment I recommend because moisture issues are often silent culprits behind peeling or buckling. As noted by industry experts, managing moisture is key to long-term stability, especially when installing on concrete or in humid environments. Regular testing with accurate moisture meters like this helps me plan appropriate vapor barriers or drying times, avoiding costly repairs later.
Predicted Trends for Future Proofing Your Flooring
Looking ahead, technology is making its way into flooring tools. Digital moisture meters, combined with IoT connectivity, can now log readings over time, allowing for better moisture management, especially in large-scale projects. Additionally, cordless power tools with brushless motors and improved battery life enable faster, safer work, even in tight or elevated spaces. As automation and smart technology advance, expect more integrated systems that streamline entire installation processes, making long-term maintenance and scaling easier for both professionals and DIYers.
How do I maintain my flooring tools over time?
Proper maintenance prolongs the life of your equipment and ensures consistently reliable results. After each project, I thoroughly clean my tools, especially power mixers and rollers, removing any residual compound or debris. For hand tools like trowels and levels, I inspect edges for damage and calibrate or replace parts as needed. Storing devices in a clean, dry place prevents corrosion and damage. Moreover, occasional lubrication of moving parts and calibration checks for digital devices keep them functioning accurately. Keeping your tools in optimal condition means you’ll be better prepared for future projects and scaling efforts, such as expanding your hardwood floors or installing additional tiles. For comprehensive maintenance tips, you can refer to our detailed guide.
Don’t underestimate the value of quality tools—investing wisely now will pay off with flawless, durable floors that stand the test of time. Try integrating a premium laser level or a moisture meter into your next project—you’ll notice the difference right away. Ready to step up your flooring game? Explore our recommended equipment at our contact page and get started today.
The Hardest Lesson I Learned About Tile, Flooring Installation, Hardwood Floors, Floor Leveling
One of the most valuable lessons I gained was realizing that skipping thorough surface prep can lead to costly failures later. The temptation to rush through measurements or ignore moisture testing almost always results in peeling or cracking. Now, I prioritize every step—meticulous inspection, proper cleaning, and accurate testing—to ensure durability and a flawless finish.
3 Myths About Floor Leveling That Held Me Back
I believed that a slight dip was acceptable or that using a thicker self-leveler would fix any issue. These misconceptions led to uneven surfaces and long-term problems. The truth is, precision and choosing the right materials matter more than shortcuts. For comprehensive insights, check out this detailed guide on floor leveling.
What Experts Won’t Tell You About Achieving Perfect Floors
Many try to cut corners on surface preparation or underestimate the importance of moisture management. I learned that even the smallest overlooked detail can compromise the entire project. Investing in quality tools like a reliable moisture meter and laser level transforms the process, providing confidence that your floor will stand the test of time. For trusted equipment recommendations, visit our contact page.
Curated Gems for Your Flooring Journey
My essential toolkit includes a high-grade laser level, a durable moisture meter, a spiked roller, and a quality trowel. These tools have revolutionized my approach, making my work more precise and less stressful. Additionally, reading books such as Flooring Installation Made Simple has deepened my understanding beyond just practical steps. Remember, investing in the right resources elevates your capabilities and results in a lasting, beautiful floor.
Your Next Step Toward Flawless Floors
The path to durable, perfectly leveled floors involves patience, attention to detail, and learning from both mistakes and successes. Now, it’s your turn to apply these lessons—embrace the process, equip yourself properly, and take pride in transforming your space. With dedication, you’ll create surfaces that remain stunning and intact for decades to come. Ready to tackle that project? Share your experience below—I’d love to hear what’s holding you back or what’s worked for you so far.
,