
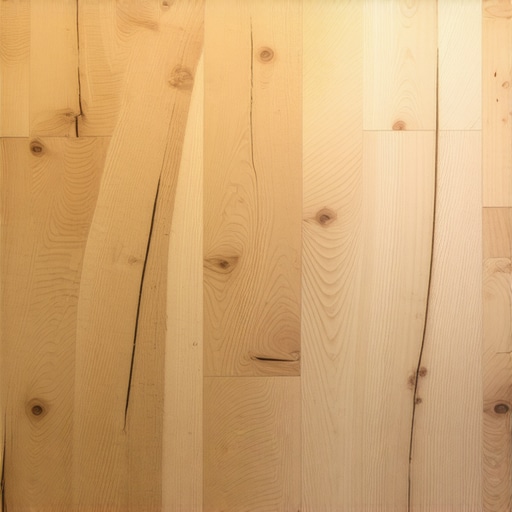
I vividly remember the moment I stepped into my newly renovated living room, expecting sleek, perfectly aligned hardwood floors. Instead, I was greeted by wavy, warped planks that seemed to warp and lift overnight. It was a gut punch—after pouring time and money into my project, the floors looked worse than when I started. Turns out, I had fallen into the notorious 48-hour acclimation trap. I believed that simply letting hardwood sit in the room for two days was enough to prevent warping, but I soon learned that this common misconception can cause lasting damage.
Why Your Hardwood Floors Might Warp Despite Your Best Efforts
This realization sparked my curiosity—why do so many homeowners and even pros still struggle with warped floors even after following supposed ‘best practices’? The answer is more complicated than a quick acclimation period. Wood is highly sensitive to changes in moisture and temperature, and if these environmental factors shift even after installation, the wood can start to warp. Early on, I made a mistake I see many others repeating: I thought that a 48-hour window was sufficient for acclimation. Spoiler alert—it’s not.
Skeptical? Here’s Why Shortcuts Backfire
One of the most common myths I encountered was that leaving hardwood in an unconditioned space for just two days would suffice. Actually, recent research from the National Wood Flooring Association indicates that acclimation needs vary based on specific conditions and the type of wood. Forgetting to account for humidity levels, or assuming that only time matters, can lead to disastrous warping down the line. I learned this the hard way when I skipped detailed moisture testing, thinking I could ‘just get it done quickly.’
Prepare Your Environment for Success
Start by controlling humidity and temperature in the room to match your flooring or tile specifications. Use a hygrometer to monitor moisture levels—aim for a consistent range suitable for your material. This step is crucial to prevent future warping. During my renovation, I set up portable dehumidifiers and heaters, cross-referencing with manufacturer guidelines, which kept moisture stable for over a week before installation. This proactive measure proved invaluable in avoiding costly issues later.
Ensure Proper Subfloor Conditions
Inspect your subfloor thoroughly for levelness, dryness, and structural integrity. Use a long spirit level and moisture meter—any deviation beyond 3/16 inch over 10 feet can cause problems. When I encountered a slightly uneven concrete slab, I employed self-leveling underlayment, following precise mixing ratios and application techniques from this guide. Accurate leveling creates a stable base, ensuring the flooring’s longevity and aesthetic appeal.
Address Existing Issues Before Installation
Eliminate moisture leaks, remove old adhesive residues, and repair cracks. This step prevents moisture ingress and ensures proper bonding. In a past project, I patched minor cracks with epoxy and cleaned the surface meticulously. Skipping these steps risks uneven settling or future warping, especially in areas prone to moisture.
Master the Acclimation Process
Acclimate flooring materials appropriately—typically 48 to 72 hours—inside the installation space. Place planks or tiles in the room, stacking unopened boxes, and avoid stacking directly on concrete or uneven surfaces. My own experience shows that folding back the protective plastic on hardwood opened up better moisture exchange, avoiding gaps and buckling post-installation. Use a moisture meter to verify moisture levels match those of the subfloor before proceeding.
Follow Precise Installation Techniques
Adopt techniques aligned with your specific flooring type. For hardwoods, leave expansion gaps around the perimeter—generally 1/4 to 1/2 inch—and install transition strips where necessary. When I installed wide-plank hardwoods, I used spacers to ensure uniform gaps, then sealed the perimeter with molding. For tiles, use proper thinset mortar, apply with the right trowel notch, and don’t forget to back-butter large tiles for better adhesion. Check out this article for tile-specific tips.
Control Moisture During and After Installation
Seal all joints and expansion gaps with the appropriate sealant. In my project, I applied a high-quality grout sealer to prevent water penetration and staining. Consistently monitor humidity in the room afterward—using a dehumidifier or humidifier as needed—to maintain optimal conditions and prevent warping or cracking over time. Proper sealing and moisture control protect your flooring investment for years to come.
A common mistake many homeowners make is believing that floor leveling is a simple, one-size-fits-all process. However, this oversimplification overlooks critical nuances that can make or break your flooring project. For example, the misconception that applying self-leveling compounds on an uneven subfloor guarantees a perfect finish is widespread. In reality, many such compounds peel or sink if proper priming and moisture barriers are not used, leading to costly repairs down the line. A recent study from Building Science Corporation emphasizes that substrate preparation and material compatibility are vital for long-lasting results.
When it comes to hardwood floors, a trap I see often is assuming that acclimation only involves leaving wood in the room for a couple of days. This ignores the importance of stable environmental conditions and moisture content matching, which are crucial for preventing gaps and cupping. Modern research indicates that some hardwood species require up to two weeks of acclimation in controlled environments—failing which, the wood may expand or contract after installation, causing uneven floors.
Many believe that tile installation is mostly about the adhesive and grout, but the real secret lies in the preparation of the substrate and appropriate application techniques. For large-format tiles, for example, the usage of back-buttering with the right thinset is essential to avoid lippage. Skipping this step often leads to uneven tile surfaces and cracked grout lines. As outlined in the comprehensive guide on tile installation, precise leveling and proper mortar application are non-negotiable.
**Why do so many installers still overlook the importance of moisture testing before floor installation?** Because they assume that standard procedures are enough or underestimate how variable moisture content can be, especially in basements or concrete slabs. Moisture issues are a leading cause of flooring failure, and ignoring proper testing can result in warping, buckling, or mold growth. According to a recent industry report, employing accurate moisture measurement tools and adhering to manufacturers’ guidelines significantly reduces these risks.
Beware of shortcuts like skipping environmental controls or neglecting subfloor condition assessments. A small oversight here can lead to major headaches later. For instance, failing to check for levelness using a long straightedge or ignoring minor cracks can result in uneven surfaces and tile cracking. Proper leveling techniques, such as those detailed in this comprehensive guide, are essential to achieve flawless results and prolong your floor’s lifespan.
Have you ever fallen into this trap? Let me know in the comments. By understanding and respecting the intricacies of floor leveling, hardwood acclimation, and precise tile installation, you can avoid costly mistakes and enjoy a beautiful, durable floor for years to come.
Invest in Precision Tools for Better Results
To keep your flooring installations flawless over time, having the right tools is essential. I always rely on a high-quality moisture meter like the Protimeter Surveymaster, which offers instant and accurate moisture readings. This allows me to monitor subfloor and material moisture levels consistently, preventing warping or buckling down the line. Additionally, a laser level is indispensable for ensuring that each row of tiles or planks stays perfectly aligned and level during installation, reducing the need for costly corrections later. Remember, precision at this stage saves significant headaches later.
Prioritize Proper Maintenance Habits
Consistent cleaning is basic but crucial. Use a microfiber mop and pH-neutral cleaner tailored for your flooring type—whether hardwood or tile—to avoid damaging the finish or grout. Regularly inspect expansion gaps and sealed joints for signs of dirt buildup or damage, which can impede the floor’s ability to expand and contract naturally. Implementing a routine self-inspection can spot issues early before they escalate into costly repairs. For hardwood floors, a once-a-year refinishing or sealing session helps maintain their lustrous appearance and guards against scratches or UV damage.
Embrace Technology for Long-Term Care
Looking ahead, smart sensors embedded in flooring are emerging as game-changers. These sensors continuously monitor moisture, temperature, and even structural shifts, alerting homeowners or contractors via smartphone apps if conditions drift outside optimal ranges. Though still evolving, this technology promises proactive maintenance—saving money and prolonging your floors’ lifespan. I predict that integrating IoT devices will become standard practice in high-end flooring care, making maintenance both smarter and more efficient.
How do I keep my floors looking new after installation?
The secret lies in proactive care—regular cleaning with appropriate supplies, using tools like a soft microfiber mop, and keeping relative humidity in check with humidifiers or dehumidifiers. Applying protective pads on furniture legs and avoiding high-heel traffic also prevents unnecessary damage. For tiles, resealing grout every few years maintains stain resistance and prevents moisture infiltration. Remember to schedule periodic inspections—catching minor issues early ensures long-term durability. To get the most out of your flooring, try implementing a moisture monitoring routine with a reliable meter, as discussed in this article. Proper tools combined with consistent maintenance habits are your best defense against long-term wear and tear, ensuring your floors stay pristine for years to come.
Funny How The Smallest Mistakes Hit Hardest
One revelation that struck me was how overlooked details, like moisture levels during acclimation, can cause lasting damage. I once assumed a brief acclimation was enough, only to face warped hardwood that took weeks to rectify. This taught me that patience and precise environmental controls are the backbone of durable flooring.
The Hidden Costs of Cutting Corners
Skipping detailed subfloor inspections seemed harmless at first, but I encountered uneven surfaces that led to tile lippage and cracked grout. Investing time in thorough prep saves money and headache in the long run, and I always recommend cross-referencing with authoritative guides like this comprehensive leveling guide.
Why Your Tools Make or Break Your Success
From moisture meters to laser levels, I realized that quality tools empower precise work. For example, my Protimeter moisture meter saved me from installing over damp concrete, preventing future buckling. Confidence in your measurements translates directly into flooring that lasts decades.
Solutions That Keep Floors Beautiful Over Time
Consistent maintenance routines, like resealing grout lines and checking expansion gaps, can extend your flooring’s lifespan. Implementing a moisture monitoring routine with trusted tools, as discussed in this article, is a game-changer for preserving beauty and integrity.
The Way Forward for Your Flooring Journey
Continuing to learn about environmental controls, proper installation techniques, and maintenance strategies will set you apart as a homeowner or professional. Remember, the effort you invest today pays dividends with floors that stand the test of time. Don’t hesitate to seek expert help when needed—knowledge makes the difference.
Transform Your Space with Confidence
Every perfect floor begins with understanding the nuances and committing to quality. Believe in the process, equip yourself with the right knowledge and tools, and your home will reflect that dedication for years to come. Ready to tackle your next flooring project with renewed insight?