
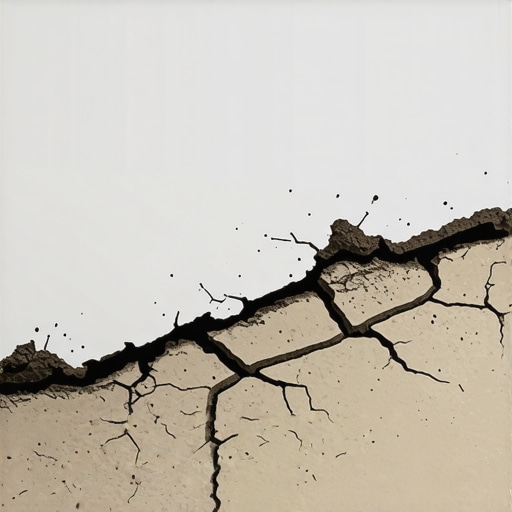
I’ll never forget the first time I poured self-leveling underlayment, expecting a flawlessly smooth surface. Instead, I watched in disbelief as the mixture sank unevenly into the gaps in the subfloor, leaving me with a lumpy, uneven mess. It was a frustrating moment that made me question everything I thought I knew about flooring installation. Have you ever faced this sinking dilemma? You’re not alone. Many DIY enthusiasts and seasoned pros alike stumble upon the issue of self-leveler disappearing into subfloor gaps, jeopardizing the entire project.
Understanding Why Self-Leveler Sinks and How to Prevent It
Why Is My Self-Leveler Disappearing? The Hidden Culprit
The main reason self-leveling compounds sink into gaps is often due to improper preparation or choosing the wrong formulation for your specific subfloor conditions. When the substrate isn’t properly cleaned, primed, or if the mixture’s consistency isn’t right, the leveler won’t bond effectively, causing it to settle into gaps rather than forming a smooth, even surface. Early in my projects, I made the mistake of skipping the primer — a mistake that significantly contributed to poor bonding, as highlighted in The Ultimate Guide to Floor Leveling. learning from that experience, I now always ensure my subfloor is meticulously prepared.
Imagine pouring a thick pancake batter onto a blank canvas of floor — if the surface has cracks or gaps, the batter will seep into those spaces, creating uneven patches. The same principle applies to self-leveling compounds. So, how do we combat this sinking? The key lies in understanding the right techniques and materials to use, along with thorough surface prep.
By addressing these core issues, you’ll set yourself up for a flawless finish that stands the test of time. Intrigued? Let’s explore concrete strategies to prevent your self-leveler from sinking into those troublesome gaps, ensuring a perfectly level foundation for your flooring project.
Prepare the Surface Thoroughly
Clear and Clean the Subfloor
Begin by removing all dust, debris, and loose materials from the subfloor. Use a vacuum and a damp sponge to ensure every crevice is spotless. I once skipped this step and ended up with patches where the leveler failed to bond, leading to uneven spots that resembled a lunar landscape. Proper cleaning creates a consistent surface, much like prepping a canvas before painting.
Address Gaps and Cracks
Next, fill any sizable gaps or cracks with a suitable patching compound or a DIY mixture of sawdust and wood glue. This step prevents the self-leveler from pooling into voids, which causes sinking. I remember using a homemade filler in a small hallway; it was cheap, quick, and prevented me from having to relevel the entire floor later. Filling these gaps is akin to filling potholes before paving a road, ensuring a smooth ride for your flooring material.
Apply Primer for Better Bonding
Choose the Right Primer
Use a primer designed specifically for your subfloor material, whether concrete, wood, or a hybrid. Applying primer enhances adhesion, reducing the risk of delamination or sinking. I once overlooked this step when working over a concrete slab, and the leveler didn’t bond properly, sinking into tiny pores. Primer acts as a bridge, much like primer on walls ensures paint adheres evenly and smoothly.
Follow Manufacturer Instructions Accurately
Ensure you apply the primer evenly and wait for the recommended drying time. Rushing this step can compromise bonding and cause sinking issues. Once, I hurried through primer application and faced a bubbling surface. Patience here pays off, similar to letting glue cure fully before pressing tiles for a perfect bond.
Mix and Pour with Precision
Create the Ideal Consistency
Mix the self-leveling compound according to the manufacturer’s instructions, avoiding overly thick or thin mixtures. A common mistake is adding too much water, which causes the leveler to flow too quickly into gaps. I once added a bit extra water to speed up mixing, only to find the mixture spread unevenly, creating dips and ridges. Think of this like making pancake batter – too runny, and it will spread thin and uneven; too thick, and it won’t flow properly.
Pour Strategically and in Small Sections
Pour the mixture in manageable sections, starting from the farthest corner and working your way out. Use a gauge rake to spread the compound evenly. I recall starting in the middle of a room and pouring outward; the leveler pooled unevenly, leading to dead spots. Strategic pouring ensures gravity assists in spreading the mixture uniformly, much like pouring a thin layer of paint evenly across a wall.
Use Proper Tools and Techniques
Employ a Spiked Roller
After pouring, immediately roll over the surface with a spike roller to release trapped air and encourage the compound to settle evenly. This step is crucial; I once skipped it and noticed air pockets forming beneath the surface, which later caused tiny bubbles. Rolling is akin to popping bubbles in a cake batter before baking, resulting in a smoother final surface.
Maintain Controlled Environment
Ensure the room is at a stable temperature and humidity level. Extreme conditions can cause the mix to cure unevenly, leading to sinking. I faced issues when working in a cold, damp garage; the cure was slow and uneven. Like drying paint, proper climate control ensures a even, level finish.
Allow Adequate Curing Time
Finally, patience is key. Let the self-leveler cure fully as per manufacturer instructions before walking on or installing flooring. Rushing this step can disturb the surface, causing imperfections. Once, I walked on a still-curing layer, leaving footprints that marred the smoothness. Think of this as letting concrete set before driving over it—timing is everything for a flawless result.
Many think that achieving a perfectly level floor is just about pouring the right amount of self-leveling compound and waiting. However, this oversimplification hides nuanced mistakes that can compromise your entire project. One widespread misconception is that over-priming or skipping surface preparation saves time. In reality, neglecting thorough cleaning and gap filling beforehand leads to sinking and uneven surfaces, regardless of the amount of primer or compound used. Experts stress that the subtle details—like filling large gaps with appropriate patching materials and ensuring the substrate is free of dust—are what differentiate a professional finish from amateurish results. An often-overlooked nuance is the choice of primer; using a generic or wrong formulation can cause bubbling or peeling, undermining the bond (source: The Primer Mistake That Causes Self-Leveler to Bubble).
Keep Your Flooring Projects Running Smoothly with the Right Tools
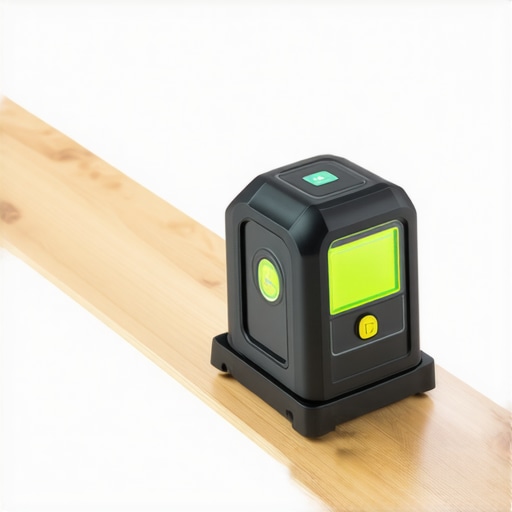
Having the right equipment is crucial to ensure your flooring installation, whether tile or hardwood, stands the test of time. I rely heavily on a high-quality laser level for precise alignment, especially when laying out large tile sections or ensuring even hardwood planks. A laser level like the Bosch GLL 3-80 serves as an indispensable tool, providing accurate reference points that eliminate guesswork and reduce errors, which can be costly over time. Additionally, a robust moisture meter such as the Tramex CME5 helps me verify subfloor dryness—preventing future issues like warping or delamination that can occur if moisture levels are underestimated, aligning with best practices discussed in Moisture Meter Importance. Using reliable, calibrated tools not only streamlines the process but also boosts confidence in achieving a flawless, long-lasting finish.
Maintain Your Floors for Long-Term Beauty
Routine maintenance extends the life of your flooring. I recommend establishing a regular cleaning regimen—using a damp microfiber mop and avoiding harsh chemical cleaners—to prevent dirt buildup and surface deterioration. For hardwood floors, applying a quality floor polish every few months rejuvenates the finish and adds a protective layer against scratches and wear. Tile floors benefit from sealing grout lines annually, which seals out moisture and stains, preserving their vibrant look. Moreover, paying attention to environmental conditions like humidity and temperature maintains stability, preventing expansion or contraction that could cause gaps or buckling. In higher humidity climates, installing a dehumidifier can prevent excessive moisture absorption, prolonging the integrity of your investment. Ultimately, consistent care ensures your beautiful floors retain their appeal and value over decades.
Strategies for Scaling Your Flooring Projects
If you’re considering expanding your space or tackling larger projects, investing in advanced tools such as automatic tile cutters and digital measuring devices becomes increasingly valuable. For instance, a digital caliper provides precise measurements when custom fitting tiles or hardwood planks, reducing waste and fitting errors. As projects grow in scope, integrating software like 3D design programs can help visualize layouts and identify potential challenges before physical work begins. This proactive approach not only saves time and money but also enhances the overall quality of your installation. Remember, scaling isn’t just about bigger spaces; it’s about elevating your technique and tools. For comprehensive guidance, check out Expert Installation Tips to prepare for your next big project.
How do I maintain the quality of my flooring over time?
Maintaining the longevity of your floors involves more than routine cleaning. Regularly inspect for signs of wear or damage, and address issues promptly. For hardwoods, sanding and refinishing every 7-10 years can restore their original luster and patch minor imperfections. Tile floors may require grout re-sealing and crack repairs to prevent water ingress and deterioration. Additionally, using protective pads under furniture and implementing entry mats helps minimize scratches and dirt tracking. Staying vigilant and proactive preserves your investment, ensuring your floors remain stunning for years to come. The future trend points toward smart flooring maintenance systems integrating IoT sensors that monitor humidity and wear—making long-term care more automated and precise. Implementing these strategies now will set a solid foundation for enduring beauty and performance.
Lessons the Pros Don’t Always Share About Floor Leveling
- My biggest revelation came when I realized that surface preparation isn’t just about cleaning; it’s about creating a dedicated, etched landscape for the self-leveler to bond securely, much like preparing a canvas for masterpiece painting.
- Filling gaps and cracks beforehand was a game-changer—using a simple mixture of sawdust and wood glue taught me that small, proactive steps save time and prevent sinking issues later.
- Choosing the correct primer isn’t just a recommendation—it’s a priority. I learned the hard way that an improper primer can cause bubbling and peeling, undermining the entire project.
- Consistency in mixing isn’t trivial; adding the right amount of water and avoiding shortcuts makes the difference between a smooth, level surface and an uneven mess worthy of a lunar landscape.
The Tools That Elevated My Flooring Practice
- A high-quality laser level, like the Bosch GLL 3-80, has become my trusted partner for precision—eliminating guesswork and aligning tiles or hardwood planks flawlessly.
- Moisture meters such as the Tramex CME5 are indispensable—they prevent future issues by ensuring the subfloor is properly dried before installation.
- Reliable, calibrated tools are investments that pay off, turning a potentially tedious job into a straightforward, confidence-boosting process.
Embrace the Challenge: Your Floor’s Bright Future Awaits
Remember, mastering floor leveling is a journey—full of learning, patience, and rewarding results. By applying these insider insights and investing in the right tools, you’re well on your way to achieving stunning, long-lasting floors. Have you faced any unexpected hurdles in your flooring projects? Share your experience below, and let’s grow together!
,