
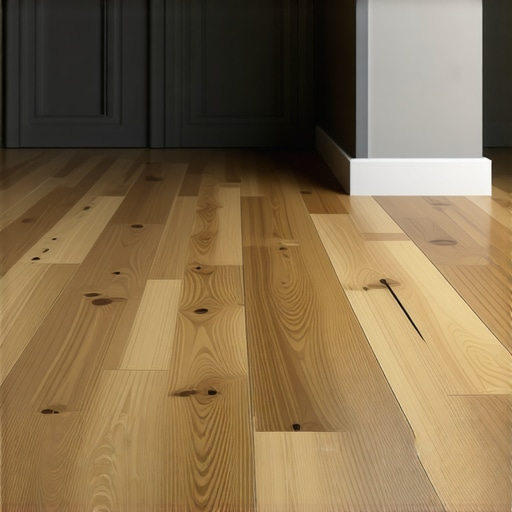
I remember the exact moment I realized my solid oak basement floor was a recipe for disaster—walking across the room, only to hear a loud creak and then a sudden bounce underfoot. That sinking feeling hit me: I was dealing with a bouncy, unstable surface that threatened to ruin my furniture and, more importantly, my peace of mind. It was a lightbulb moment—solid oak, beautiful as it is upstairs, was never meant to thrive in our damp, fluctuating basement environment.
Choosing the Right Flooring: A Basement Game Changer
Many homeowners face the same dilemma: how to select flooring that withstands basement conditions without sacrificing style or durability. The promise I want to share today is that understanding why engineered wood is a superior choice for basements can save you time, money, and frustration. When I switched from solid oak to engineered wood, the difference was night and day. Engineered wood’s layered construction offers remarkable stability against moisture and temperature shifts, making it a smart, resilient choice.
Is Engineered Wood Really Better Than Solid Oak for Basements?
Early on, I made the mistake of assuming that more traditional solid hardwood was always better. I didn’t realize that moisture and humidity in basements could cause solid oak to warp or cup over time. According to industry experts, engineered wood’s cross-layered design minimizes this risk—it’s built to handle the challenges of below-grade environments. If you’re still skeptical, think about how much moisture can seep into a basement, leading to structural issues if the flooring isn’t designed for it. That realization prompted me to reevaluate my options.
Have you ever faced a similar issue with flooring in your basement or damp areas? If so, you’re not alone. Deciding on the right flooring is crucial, and making an informed choice can be the difference between enjoyable, long-lasting floors and frequent headaches. Stay tuned as we explore why engineered wood delivers the performance and style you’ve been seeking—without the pitfalls of solid oak in challenging environments.
Prep Your Subfloor Like a Pro
Before laying any flooring, ensure your subfloor is clean, dry, and level. Start by removing all debris, dust, and loose particles, using a shop vacuum and damp cloth. For moisture issues, employ a moisture meter to verify the subfloor’s dryness—see this guide on moisture testing techniques. If you detect high moisture levels, address them with a proper vapor barrier or consult a specialist. When the surface has residual unevenness, apply a self-leveling compound—a crucial step that can make or break your project. Mix the compound following the manufacturer’s instructions, using a bucket and a drill with a paddle attachment, kind of like a cake batter—only more precise. Pour the mixture within the recommended time frame, then spread evenly with a trowel or squeegee, ensuring a smooth, flat surface. For detailed techniques, visit this resource. Accurately leveling prevents future problems like tile lippage or uneven hardwood installation.
Leveling the Surface for Success
Achieving a flawless surface involves more than just pouring a leveling compound. Use a straight edge or a laser level to check for high and low spots—think of it as a giant ruler across your floor, revealing the tiny humps and dips. Mark these areas with a pencil to guide your sanding or additional compound application. When sanding, wear a mask and use a pole sander or hand sanders—imagine hoofing it in a stable, but here, you’re smoothing out imperfections. For larger issues, apply more leveling compound in separate layers, allowing each to cure fully before proceeding. Remember, patience is key: rushing results in uneven floors or cracks later. For complex scenarios, professional advice can be invaluable; contact experts via this link. Proper leveling guarantees a perfect base, preventing issues during the actual flooring install.
Perfecting Floor Adhesion and Placement
Now that your surface is ready, focus on the correct application of adhesive and layout planning. When installing tiles, apply thinset mortar with a notched trowel—think of this as spreading frosting evenly, but with a purpose. Use a ¼-inch notch for standard tiles and a larger notch for large-format or heavy tiles. Work in manageable sections; too much thinset dries out quickly, leading to weak bonds, similar to trying to spread cold butter on a hot day. When it comes to floor leveling and installation, many homeowners and even professionals fall victim to widespread myths that can compromise the quality and longevity of their floors. One prevalent misconception is that achieving a perfectly level subfloor is solely about adding more leveling compound. In reality, excessive use of self-leveling underlayments can lead to problems such as cracking or pebbled surfaces, especially if the existing substrate isn’t properly prepared. For an in-depth look at proper techniques, visit this guide. Another often-overlooked nuance is the importance of understanding the substrate’s moisture content—skipping moisture testing is a common mistake that can result in tile or hardwood floors delaminating prematurely. According to industry experts, using a high-quality moisture meter and addressing moisture issues upfront can save you from costly repairs later—more details can be found here. Many assume that bigger tiles are easier to install, but in fact, larger tiles require more precise leveling and substrate flatness, or they can chip or crack. Precise surface preparation and layout planning are critical. Additionally, there’s the myth that underlayment choice is trivial; however, selecting the wrong underlayment—such as low-density foam for a heavy porcelain tile—can cause movement, cracking, and grout issues. Expert advice about underlayment selection can be found here. An advanced mistake often overlooked by even seasoned DIYers involves the sequencing of the installation process. Installing tiles or hardwood before ensuring that the concrete slab or subfloor has completely cured and off-gassed can cause future buckling or unevenness. The research emphasizes waiting at least 28 days after concrete pour; for detailed curing standards, see this article. Finally, understanding the intricate details of proper adhesive application—like the importance of not over-spreading thinset in high humidity conditions—can significantly influence bond strength and overall floor durability. For expert tips on adhesive application techniques, explore this resource. So, have you ever fallen into this trap of oversimplifying or overlooking critical nuances? Let me know in the comments. Remember, meticulous preparation and understanding the subtle details can make the difference between a floor that lasts and one that needs replacing sooner than expected.Maintaining your flooring system is just as critical as installing it correctly in the first place. To keep your floors looking pristine and performing well over time, investing in the right tools and adopting routine practices is essential. One tool I personally swear by is a high-quality moisture meter, which reliably measures the moisture content in your subfloor and hardwoods. Accurate readings, such as those available from the Tramex CME4, help prevent issues like cupping or buckling caused by hidden moisture problems. Regularly checking moisture levels—especially in climates with high humidity—is key to early detection, and it allows you to implement preventative measures like proper ventilation or vapor barriers before problems escalate.
Another indispensable tool is a professional-grade floor polisher with adjustable pads, which I use monthly to maintain the shine and evenness of hardwood surfaces. Specifically, I prefer orbital polishers with variable speed settings, like the FLEX HR 17. It provides gentle yet effective polishing without damaging the finish. Routine cleaning with microfiber mops and pH-neutral cleaners keeps dust and dirt from abrading the surface, extending your floor’s lifespan.
For tile installations, a grout sealer sprayer simplifies the process of protecting grout lines from stains and moisture ingress. Applying a penetrating sealer using a pump sprayer ensures even coverage and saves time over brush applications. I recommend doing this every 1-2 years, depending on traffic levels, to uphold the integrity of your tiles.
Supplementing your toolkit with accessories like shims, leveling compounds, and laser levels ensures your surfaces remain flat and well-aligned. For example, using a laser level during periodic inspections helps detect subtle shifts and unevenness, prompting timely corrections. Over time, small imperfections can compromise the adhesion between layers or lead to cracking, so early intervention is worthwhile.
Looking ahead, the trend favors automation and smarter tools for floor maintenance. Devices equipped with IoT technology could monitor environmental conditions and alert you when service is needed, making Long-term upkeep more manageable.
**How do I maintain hardwood floors over time?** Regular polishing with orbital polishers, combined with periodic moisture testing and sealing, will go a long way in preserving their beauty and durability. I encourage you to try the advanced tip of using a moisture meter like the Tramex CME4 to catch hidden issues early—this can save the cost of major repairs down the line. Curious about more techniques? Visit [this detailed guide](https://tiletrendshop.com/the-ultimate-guide-to-floor-leveling-for-a-perfect-finish) to explore comprehensive maintenance strategies and tools tailored for lasting perfection.
The Hidden Costs of Overlooking Subfloor Preparation
One of the biggest mistakes I made early in my flooring journey was rushing into installation without giving my subfloor the attention it deserved. I learned the hard way that skipping proper moisture testing or neglecting to level the surface can lead to buckling and cracks down the line. Taking the time to thoroughly prep your subfloor, using tools like a moisture meter and laser level, might seem tedious, but it saves you from costly repairs and headaches later. Investing in a high-quality moisture meter, such as the Tramex CME4, has been a game-changer for me, allowing early detection of hidden moisture issues that can sabotage your project—trust me, knowing is better than discovering warping months later.
My Top Trusted Resources for Flawless Flooring
Over years of refinishing and installing floors, I’ve found a handful of sources that truly guide me to success. This detailed guide on floor leveling techniques has been invaluable for understanding how to prepare surfaces effectively. Another favorite offers comprehensive tips on leveling, ensuring a smooth foundation every time. For maintaining hardwood’s beauty, I turn to this care guide, which helps me keep my floors looking pristine for years. These resources have consistently elevated my approach — having the right knowledge and tools makes all the difference.
Step Into Your Flooring Confidence Today
Remember, the journey to beautiful, durable flooring begins with informed decisions and diligent preparation. Whether you’re tackling a DIY project or coordinating with pros, understanding the nuances of subfloor prep, moisture control, and proper installation techniques ensures lasting results. Don’t let common mistakes hold you back from transforming your space into the sanctuary you envision. Embrace the process, use trusted tools, and stay curious — your perfect floor is within reach. Ready to take that first step with confidence? Share your experiences or ask questions below — I’d love to hear your story and help you navigate your next flooring project with ease.