
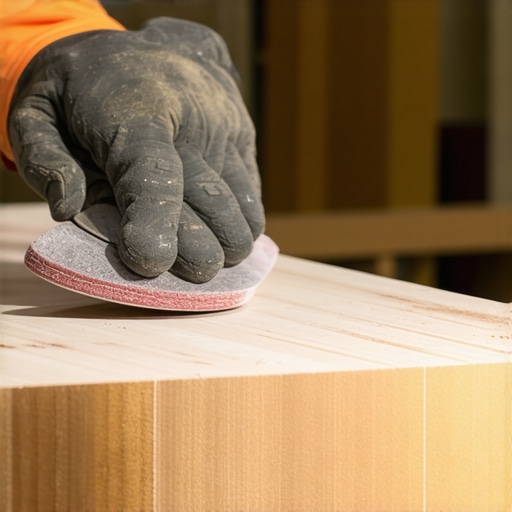
You know that sinking feeling when you step back after installing or refinishing hardwood floors and spot those stubborn, unsightly scuff marks right along the edges? It’s frustrating — a real eye sore that steals the beauty from your entire room. I remember my first attempt at sanding around those tricky corners. I thought I had all the right tools and techniques, only to be greeted by uneven patches and deep swirl marks that seemed impossible to fix. That lightbulb moment hit me hard: sanding hardwood edges without leaving ugly marks is an art, not just a skill.
If you’ve ever felt the sting of wrecking your hard work with poorly executed edge sanding, you’re not alone. Many DIY enthusiasts and even seasoned pros stumble here. The truth is, the edges are often the most challenging part of a floor finish or refinish. Smooth, seamless edges are what truly elevate the overall look, but achieving that perfection without causing damage can feel like walking a tightrope.
Today, I promise to share proven tips and techniques I’ve learned from painful mistakes and successful projects. We’ll explore how to sand hardwood edges effectively, avoiding those dreaded scuff marks that can ruin hours of effort. Whether you’re installing new flooring or refinishing existing wood, mastering this skill will save you from countless touch-ups and give your space a polished, professional appearance.
Why Clean, Smooth Edges Make All the Difference
Edges are where your floor meets the wall, baseboard, or other flooring materials. These zones often require special attention because standard sanding tools can be too aggressive or imprecise, leading to those visible swirl marks and dull patches. The key is to understand the nuances of proper technique and to select the right tools, like specialized detail sanders or fine-grit abrasives designed for edges.
One mistake I see often is rushing through edge finishing, thinking it’s just a minor detail. But that oversight can compromise the entire look, making the surface appear uneven or poorly finished. As I learned early on, patience combined with the right approach transforms a rough job into smooth perfection. If you’re curious about the finer details of floor sanding, I recommend checking out comprehensive guides like those found at [The Ultimate Guide to Floor Leveling for a Perfect Finish](https://tiletrendshop.com/the-ultimate-guide-to-floor-leveling-for-a-perfect-finish). It’s packed with insights that can elevate your DIY game.
Now, I want to hear from you — have you faced this exact problem with edge sanding? Or maybe, like me, you’ve learned the hard way? Drop your experience in the comments; sharing stories helps us all learn faster.
In the sections ahead, we’ll dive into specific techniques to sand hardwood edges flawlessly, avoiding those ugly marks and delivering a professional finish that stands out. Ready to get started? Let’s make those edges look as good as the rest of your floor.
Choose the Right Tools for Precision
Start with a detailed orbit sander fitted with fine-grit sandpaper (220 grit or higher). Think of it as using a gentle paintbrush rather than a crowbar; it allows for controlled, smooth work around edges. I learned this when I attempted to hand-sand a tricky corner with coarse paper—fury and scratches followed, leading me to a frustrating redo. Using a small detail sander, like a delta or corner sander, helps reach tight spaces without gouging the wood.
Prep the Surface Properly
Before you start sanding, clear the area of debris and vacuum thoroughly. Dust particles are like tiny stones that can scratch and leave marks. I once skipped this step, and the resulting rough spots forced me to start all over. Use a tack cloth after vacuuming to eliminate fine dust lingering in the grain.
Work in Controlled, Overlapping Movements
Set your sander to a low vibration setting for edges and move in slow, overlapping circles or figure-eights. This method ensures even removal of finish and prevents gouges. When I first tried rushing through, my edges turned uneven with swirl marks that were hard to mask. Patience here makes the difference—think of caressing the surface rather than erasing it.
Be Gentle and Avoid Excessive Pressure
Let the sander do the work; pressing down can cause dips and uneven patches. Imagine trying to sand a glass surface with too much force—it creates scratches and dulls the shine. I learned this the hard way when my grasping hand caused gouges that took hours to correct. Light contact combined with consistent motion yields a smooth finish.
Handle Corners and Edges with Care
For precise corners, use a hand block or a detail sander fitted with fine abrasive paper. Wrap the paper tightly around the block, and gently sand the edges, maintaining the same polishing motion. I once tried to use a larger sander on tight corners, which resulted in over-sanding or slipping. Manual control is key here; treat these areas like tiny sculptures requiring finesse.
Fine-Tune the Surface with Finish Sanding
After the initial pass with a coarser grit, switch to a finer grit and lightly go over the edges again. This ensures all scratches are minimized and prepares the surface for sealing or finishing. Remember, this step is similar to polishing a gemstone—each finer pass adds to the luster and smoothness.
Avoid Common Mistakes to Keep Edges Crisp
Don’t rush the process—patience prevents accidental gouges. Avoid applying excessive pressure; let the sander glide gently. Never skip surface prep or finish with coarse grit last, which can leave visible scratches. In my early projects, neglecting these details resulted in uneven edges that stood out like sore thumbs, costing me extra touch-up time.
Track Your Progress and Adjust Technique
Pause frequently to check your work visually. Use a hand-held flashlight at shallow angles to reveal any scratches or uneven patches. I found this tip invaluable—spotting imperfections early allows for targeted correction before applying finish. Think of it as shining a spotlight on your masterpiece—details matter.
Even seasoned contractors can fall prey to misconceptions when it comes to floor leveling and installation. A common myth is that a perfectly leveled subfloor guarantees flawless tiles or hardwoods, but the reality is far more intricate. Many believe that simply pouring self-leveling compound and squeegeeing it out will produce a smooth surface, yet this overlooks vital nuances like substrate compatibility and curing techniques. Forgoing these can result in subtle, yet costly, imperfections that become glaring once the tile or wood is laid.
One often-overlooked aspect is the importance of moisture content in substrates. Excess moisture can cause levelers to peel off or crack over time, undermining the entire installation. According to industry expert Tom Silva, “Skipping moisture testing can lead to fundamental failures that are invisible during the initial pour but disastrous months later.” Always ensure your substrate’s moisture level is within optimal ranges; otherwise, your effort may be wasted.
Another misjudged factor is the adhesion of leveling compounds to existing surfaces. Surfaces like old adhesives, paint, or dust residues can create a non-porous layer that inhibits proper bonding. The mistake? Rushing the prep work or neglecting a proper etching or priming. This can leave you with a surface that looks smooth but is fundamentally unstable, prone to cracking and shifting. For advanced insights, I recommend reviewing detailed guides like Precise Floor Leveling Techniques. It’s essential to recognize that flawless results demand meticulous prep, not just a good pour.
Now, let’s tackle a crucial question for the discerning professional: How do you detect and correct micro-variations in floor flatness that are invisible to the naked eye? High-precision laser levels and straightedges are invaluable tools, but even then, understanding the compatibility of materials and curing schedules is vital. For an in-depth breakdown, check out Ultimate Guide to Floor Leveling. These advanced considerations can make the difference between a good job and a spectacular finish.
Don’t forget: even small mistakes in the initial leveling stage ripple through the entire project, leading to uneven tiles, cracked hardwood, or uneven grout lines. The devil is in the details. Have you ever fallen into this trap? Let me know in the comments, and share your experiences—your story might save someone else from costly errors.To ensure your flooring remains pristine and to facilitate smooth scaling of your projects, investing in the right tools is essential. One of my top choices is a high-quality moisture meter, such as the Tramex Moisture Encounter, which provides rapid and accurate readings of moisture content in subfloors and wood. This helps prevent future issues like warping or delamination, aligning with the advice found at Why Moisture Meters Are the Most Important Tool in a Wood Install. Regularly measuring moisture levels allows you to proactively address potential problems before they become costly repairs, especially when scaling up your projects. For leveling large areas, I recommend a good self-leveling compound with a robust mixing drill attachment, like the Dewalt DCD771, which ensures a thorough mix and application. Proper mixing and application of leveling compounds are critical for achieving flawless surfaces, as detailed in Ultimate Guide to Floor Leveling. When it comes to sanding, a random orbital sander with variable speed control, such as the Makita BO5041K, helps manage delicate edge work and prevents damage, promoting long-term durability. As projects grow in size and complexity, maintaining consistency becomes challenging. I see this trend moving toward integrated digital planning tools—software like PlanGrid or CoConstruct—that streamline project management and documentation, ensuring every detail is accounted for, reducing errors, and saving time. How do I maintain these tools over time? Regularly updating software, backing up project data, and proactively training yourself and your team on new features keep everything running smoothly. For instance, staying current with firmware updates for your machinery can improve efficiency and lifespan. I highly encourage you to try implementing a regular schedule for calibration and maintenance of your core tools, like moisture meters and levelers. This small step can significantly extend their usability and your project quality, especially as you scale your operations. And remember, embracing advancements in technology will keep your workflow efficient and your results consistent as your projects grow in scope.
Why I Nearly Dug Myself Into a Hole with Edge Sanding
One of the biggest obstacles I faced early in my flooring journey was the fear of leaving unsightly swirl marks on hardwood edges. I learned that rushing or neglecting small details could turn a smooth finish into a patchy mess, costing me time and money. The lightbulb moment? Patience and precision are your best friends—using the right tools and techniques can make all the difference.
3 Secrets That Elevate Your Edge Finishing Game
– Invest in a Quality Detail Sander: A dedicated corner or delta sander with fine-grit sandpaper allows you to reach tight spots without gouging the wood, making your edges look as seamless as the center.
– Prep and Patience are Key: Clean the surface thoroughly and work in controlled, overlapping motions. Rushing leads to swirl marks and uneven patches, as I painfully discovered.
– Use Finishing Grits for the Final Touch: Transition from coarse to fine grit sandpaper gradually, ensuring scratches are minimized and the surface is smooth enough for sealing or finishing.
These lessons came from hard experience, but now they form the backbone of my edge-sanding routine. Revisit your approach, and you’ll see your hardwood floors transform from good to spectacular.
Feeling inspired? Remember, perfecting these small details elevates your entire project. For a comprehensive guide on surface prep and finishing, check out this resource. Share your own edge-sanding victories or struggles in the comments below — your story might just help someone else master their craft.