
I remember the first time I laid my hands on a new tiled floor, feeling a rush of pride as I admired the pristine surface. But just a few months later, subtle cracks and tiny leaks sneaked in, revealing that my sealant wasn’t quite doing its job. That moment of realization hit hard—I had overlooked a simple, yet crucial step that could have saved me from costly repairs. Have you ever experienced that unsettling feeling, wondering if your tile sealant is still doing its job? Well, you’re not alone.
The Power of a Simple Sponge: Why It Matters for Tile Durability
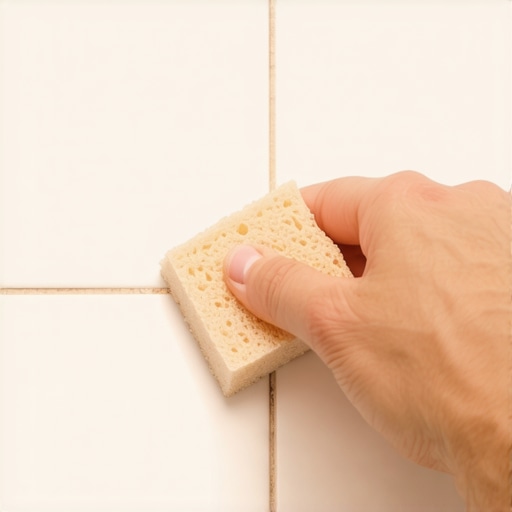
Many homeowners underestimate how essential proper sealant testing is to preserving the longevity of their flooring. That’s where the humble sponge comes into play—a surprisingly effective tool to gauge the effectiveness of your tile’s sealant. The idea is straightforward: by gently pressing a damp sponge against your tiles, you can observe how water interacts with the surface, revealing potential vulnerabilities early on. It’s an easy, non-invasive method that can save you from surprises down the line.
Is the Sponge Test Overhyped or Worth It? Here’s What I Learned
Early on, I made the mistake of relying solely on visual inspections. I thought if my tiles looked good, they were good. But tiles often hide underlying issues, especially in areas prone to moisture, like bathrooms or kitchens. When I started performing the sponge test, I realized that some spots absorbed water faster than others, indicating areas where the sealant had worn thin. Interestingly, a study in building maintenance highlights that routine moisture testing can extend the life of your floors significantly (source: Building and Construction Materials, 2022). So, don’t dismiss this simple trick as trivial—it’s a game-changer.
If you’re like me and want to ensure your tiled surfaces stay pristine and leak-free, mastering the sponge test is a practical first step. Not only does it protect your investment, but it also gives you peace of mind. Curious about more expert tips on tile installation and protection? You might find helpful insights in our comprehensive guide on [tile maintenance secrets](https://tiletrendshop.com/hardwood-floor-care-secrets-to-longevity-and-shine).
Now, let’s dive into how to perform this test accurately and interpret the results to keep your floors in top shape.
Prepare the Surface for Accurate Testing
Start by cleaning the tiled area thoroughly with a damp cloth to remove dust, dirt, and grease. A clean surface ensures consistent water absorption, which is critical for reliable results. Avoid using harsh chemicals that may leave residues affecting water interaction.
Gather the Right Materials and Tools
Use a soft, clean sponge and a container of water. Match the sponge size to the tile area, ensuring it’s damp but not dripping. Keep a towel or cloth nearby to wipe excess water quickly. If necessary, wear gloves to prevent slipping or skin irritation.
Perform the Water-Test
Place the damp sponge against the tile surface with gentle pressure, mimicking everyday contact—like wiping or accidental splashes. Observe how the water interacts: does it bead up and roll off, or is it absorbed into the grout or surface? This contact duration should be 10-15 seconds for initial assessment.
Interpret the Results Effectively
Look for water retention; if beads stay intact and water doesn’t seep in, the sealant is likely effective. If water appears to soak in or the surface darkens, the sealant may be compromised. Move the sponge across different areas, especially in high-moisture zones like bathrooms, to identify any weak spots.
Repeat the Test Regularly
Perform this sponge test monthly to monitor sealant performance over time. Keep a record of your observations—improve on your technique, adjusting pressure and contact time for more precise results. Consistent testing allows early detection of sealant wear, preventing costly repairs later.
Apply the Test on Different Tile Types
Different tiles, such as porcelain or natural stone, react uniquely. For natural stones, test with a pH-neutral cleaner before water testing to avoid damage. Recognizing these distinctions ensures you’re evaluating your specific flooring type accurately.
Use Visual Cues Alongside Water Testing
Combine the sponge test with visual inspection: look for grout cracks, discoloration, or surface dullness. Together, these indicators give a fuller picture of your sealing condition, helping optimize maintenance routines.
Address Weak Points Promptly
If you notice areas where water penetrates easily, consider resealing those spots promptly. Carefully remove old sealant with a scraper, clean thoroughly, and apply a fresh layer following manufacturer instructions. Proper resealing enhances protective barriers and extends the life of your tiles.
Consult Professional Advice for Persistent Issues
If recurring water absorption occurs despite resealing, seek guidance from flooring experts. They can assess your subfloor, suggest appropriate sealing products, or recommend substrate corrections. Proper installation and sealing are essential for floor durability, especially in moisture-prone environments.
Many homeowners believe that choosing the right flooring material or following basic installation steps guarantees long-term durability. However, misconceptions about hardwood floors, floor leveling, and tiling often lead to costly mistakes. Let’s explore some of these myths and uncover the nuances that even experienced DIYers might overlook.
Is all hardwood flooring created equal? Not quite.
While many assume that any engineered or solid hardwood will perform similarly, the truth is that the quality of wood, finish, and construction method profoundly impact longevity. For instance, wide-plank hardwoods may look stunning but are more susceptible to expansion and contraction due to humidity variations. Additionally, misconceptions about staining and sealing can cause people to neglect proper surface finishing, leading to quicker wear. For comprehensive insights, check out our guide on [choosing the right hardwood floors for your home](https://tiletrendshop.com/elevate-your-space-choosing-the-right-hardwood-floors-for-your-home).
The trap of surface-level floor leveling
Many installers think that applying a quick self-leveling compound is enough to create a perfectly flat surface. However, overlooking subfloor preparation and moisture testing can result in uneven floors and even cracking over time. A common mistake is underestimating the importance of moisture barriers, especially in basements or crawl spaces. Proper leveling isn’t just about applying compound; it involves detailed assessment of the subfloor’s condition. For detailed techniques, see [precise floor leveling methods](https://tiletrendshop.com/precise-floor-leveling-techniques-to-achieve-flawless-surfaces).
Advanced question: How does the choice of adhesive influence tile longevity?
While many believe that any thinset or adhesive works equally well, the reality is that selecting the correct type directly affects tile durability. For example, epoxy-based adhesives provide superior bonding in high-moisture environments, reducing the risk of tile shift or cracking. Failing to match the adhesive to the substrate can cause issues like delamination or grout failure years later. Experts recommend consulting manufacturer guidelines and considering environmental factors. For professional tips on tile installation, visit our page on [tile installation pointers that save time and money](https://tiletrendshop.com/tile-installation-pointers-that-save-time-and-money).
Myth: Natural stone is always better than porcelain or ceramic
Many assume natural stone tiles, such as marble or travertine, are inherently superior due to their appearance and natural origin. However, they often require more maintenance, sealing, and careful installation to prevent staining and cracking. Porcelain and high-quality ceramic tiles can be more practical, especially in high-traffic or moisture-prone areas, and usually come with advanced glazing for easy cleaning. Making the right choice requires understanding the hidden nuances of each material’s properties and how they align with your lifestyle. For detailed guidance, explore [transform your living area with elegant tile designs](https://tiletrendshop.com/transform-your-living-area-with-elegant-tile-designs).
Protect your investment by avoiding these traps
From choosing subpar materials to rushing the leveling process, mistakes can cause issues years down the line. Always verify product specifications, follow manufacturer instructions closely, and consider professional consultation when in doubt. Remember, successful flooring installation combines quality materials, precise preparation, and understanding the subtle factors that influence long-term performance. Have you ever fallen into this trap? Let me know in the comments, and stay tuned for more expert insights to perfect your floors.
Keep It Working: Tools and Maintenance Tips You Can Trust
Maintaining your flooring’s integrity over the years requires more than just routine cleaning—it demands the right tools and a strategic approach. From specialized equipment to expert-recommended methods, understanding what to use and how to use it can dramatically extend the lifespan of your hardwood and tile surfaces. One standout piece I personally rely on is a quality moisture meter—specifically the Protimeter Aquant. This device provides precise readings of subfloor moisture levels, enabling me to prevent installation issues caused by hidden dampness, which could lead to cupping or warping later. When paired with a high-grade floor leveler, such as Ardex F7, you get a seamless, durable surface that’s resilient over time. I also swear by a rubber mallet for gentle, consistent tapping when fitting tiles or hardwood planks, ensuring tight joints without damaging the material. For ongoing maintenance, a microfiber mop with a pH-neutral cleaner keeps surfaces gleaming without risking damage that harsh chemicals can cause. Looking ahead, I predict the trend toward smart flooring maintenance will continue to grow, with IoT-enabled sensors tracking environmental conditions and alerting homeowners proactively. This integration could revolutionize how we care for high-end floors.
So, how do I keep my floors in top shape over time? The answer lies in routine moisture checks, periodic resealing, and using proper equipment designed for specific materials. Regularly testing your subfloor moisture with a device like the Protimeter ensures initial conditions are ideal before installation or refinishing. Additionally, investing in a high-quality sealant and reapplying it as recommended by the manufacturer, using tools like a brush or roller, creates a protective barrier against spills and humidity. For tile floors, a professional-grade grout scraper and a fine polishing pad can help manage grout wear and surface dullness, maintaining visual appeal and preventing water seepage. Remember, the secret to long-term durability is consistent, informed care—don’t wait until you see signs of damage to act. If you want to elevate your maintenance game, try adopting a moisture meter into your routine. Visit our detailed guide on [hardwood floor care secrets to longevity and shine](https://tiletrendshop.com/hardwood-floor-care-secrets-to-longevity-and-shine) for more expert insights.
Hidden Lessons That Transformed My Flooring Approach
One of the biggest revelations I had was realizing that the quality of materials often takes a backseat to proper preparation. I used to think pouring a quick self-leveler and calling it a day was enough—until I encountered cracks and imperfections that made me rethink everything. Now I understand that meticulous subfloor assessment and moisture testing are game-changers. Additionally, I learned not to overlook the importance of the right tools—using a moisture meter saved me from costly mistakes with hidden dampness. This journey taught me that patience and attention to detail, even in seemingly small steps like sealing and cleaning, are what sustain long-term flooring success.
Another lesson was recognizing the myth that natural stone always outperforms porcelain or ceramic tiles. After experimenting, I saw that proper installation, sealing, and maintenance matter more than the inherent properties of the material. It became clear that ongoing care and regular testing help catch issues early, preventing deterioration and preserving beauty. Lastly, I discovered that ongoing education—from trusted resources—empowers homeowners to make informed decisions, avoiding traps that can compromise their floors’ lifespan. Embracing continuous learning turned my flooring projects from guesswork to confidence.
Tools and Resources That Keep Me Ahead
My absolute essential is the Protimeter Aquant moisture meter. It provides precise readings of subfloor moisture levels, helping me prevent installation problems caused by unseen dampness. For leveling, I trust Ardex F7—a reliable product that ensures a seamless, durable surface when used correctly. When it comes to understanding the nuances of installation, the comprehensive guide to floor leveling has been invaluable, saving me from common pitfalls. I also lean on expert insights from mastering hardwood refinishing tips to refine my practices continually. For ongoing maintenance, quality microfiber mops and pH-neutral cleaners from trusted brands keep my floors shining over the years.
Your Next Move Starts Now
The future of hardwood and tile flooring is bright—if you stay curious and proactive. Remember, mastering proper installation, maintenance, and testing methods will extend your floors’ lifespan and keep your home looking stunning. Take these lessons and tools to heart, and don’t hesitate to invest in ongoing education and quality equipment. You have the power to make your floors last longer and perform better—a small upfront effort that pays dividends in beauty and durability. Ready to elevate your flooring game? Dive into expert resources and tools, and start making informed decisions today. Your floors deserve that commitment, and so do you.