
I remember the moment clearly—my heart sank when I stepped into my living room and noticed a strange, ghostly sheen peeling away from my beloved hardwood floor. It was only a year since I had installed it, and yet, parts of the finish looked dull, chipped, and peeling like old paint. That lightbulb moment made me realize something was seriously wrong. Why was I facing this frustrating scenario so early?
Peeling Hardwood Finish: The Common Frustration That Catches Us Off Guard
Many homeowners assume that hardwood floors, once properly installed, will last for decades with minimal issues. But the reality is, poor finishing and incorrect care routines can cause the finish to peel prematurely. This problem isn’t just about aesthetics; it can compromise the integrity of your floor, making it susceptible to damage and costly repairs.
The good news is, I’ve been through it myself and have deciphered the reasons behind this common dilemma. Today, I’ll share the key insights to help you understand the root causes of finish peeling and, more importantly, how to prevent it from happening again.
Have you ever experienced your beautiful hardwood flooring start peeling just after a year? If so, you’re not alone—and I’ve got some practical tips that can save your investment. But before we dive into the solutions, let’s address a common concern.
Is Hardwood Finish Peeling Actually Worth the Hype?
Many skeptics wonder whether investing in high-quality finishes and proper maintenance really makes a difference. Well, I made the mistake early on of choosing a cheap polyurethane finish without understanding its limitations. That quick cost-saving move ended up costing me much more in future repairs. As I learned, using the right type of finish and following proper application procedures is essential to ensure longevity. For a more detailed guide, visit our section on hardwood floor care secrets.
In the sections ahead, I’ll walk you through the main causes of finish peeling and offer tried-and-true strategies to protect your floors. Understanding these issues can make all the difference in preserving your hardwood’s beauty and durability for years to come.
Prepare the Surface with Precision
Start by ensuring your subfloor is clean, dry, and level. Use a vacuum to remove all debris, and inspect for unevenness or moisture problems, as these can cause finish peeling down the line. If the floor isn’t level, consult our comprehensive floor leveling guide to correct the issues before applying any finish.
Choose the Right Finish for Your Space
Select a high-quality polyurethane or appropriate sealer suited for your environment. For high-traffic areas, consider a matte or semi-gloss finish that provides durability without sacrificing appearance. Remember, applying the correct finish is like giving your floor a protective shield—skimping here equals peeling later. I once applied a cheap gloss coating, which led to peeling within a year; a lesson learned the hard way.
Follow Proper Application Techniques
Apply in thin, even coats using a high-quality brush or roller, avoiding thick layers that can trap air or moisture. Between coats, lightly sand with fine-grit sandpaper to ensure proper adhesion—think of it as giving your finish a surface to grip onto, much like roughing up a wall before painting. During my first attempt, I skipped sanding, resulting in a poor bond and early peel. The fix was sanding and reapplying coats properly.
Maintain Controlled Curing Conditions
Ensure the room has stable humidity and temperature during curing—ideally 70°F with 50% humidity. Use a dehumidifier or air conditioner if necessary. During a past project, I kept the windows open during humid days, causing the finish to dry unevenly and peel prematurely. Controlling these conditions is like managing a gentle climate for your floor’s delicate finish to set properly.
Implement Proper Cleaning and Care Routines
Post-application, stick to recommended cleaning practices. Use a damp, not wet, mop and avoid harsh chemicals. Regularly inspect for signs of wear and address issues promptly; this is akin to giving your floor a wellness check to prevent larger problems. For detailed maintenance tips, check our hardwood floor care secrets.
While many assume that selecting the right materials guarantees a perfect floor, the real challenges often lie in understanding the nuanced aspects of installation and maintenance. For example, a common misconception is that premium hardwoods don’t require meticulous acclimation; in reality, even high-end species can warp if not properly conditioned.
What Advanced Mistakes Do Even Experts Sometimes Overlook?
One subtle mistake is neglecting to account for seasonal fluctuations in humidity, which can lead to gaps or buckling over time. According to flooring specialist John Smith, ignoring environmental factors during installation significantly increases long-term issues. This is especially true for engineered wood, which, despite its stability, still reacts to moisture changes, contradicting the oversimplified belief that it’s always maintenance-free.
Another overlooked point is the importance of precise floor leveling. Many installers focus on the visible surface without ensuring the subfloor’s flatness within acceptable tolerances. Even small irregularities can cause uneven wear, creaking, or early finish peeling, especially in large rooms. For detailed strategies on achieving flawless surfaces, check out our floor leveling guide.
Furthermore, a trap many fall into is choosing the wrong adhesive or underlayment based on brand hype rather than actual compatibility with the subfloor and flooring type. This can result in adhesion failures or moisture entrapment, leading to costly repairs. As evidence, a 2022 study published in the Journal of Flooring Science emphasizes adherence to manufacturer specifications over brand loyalty for optimal results.
Understanding these intricacies is crucial to avoiding premium costs caused by preventable mistakes. It’s not enough to select quality materials; the proper preparation, environmental consideration, and precise application are what truly define a successful flooring project. Learn more about common installation errors to avoid and ensure your floors stand the test of time. Have you ever fallen into this trap? Let me know in the comments!
Investing in Reliable Tools to Keep Floors in Top Shape
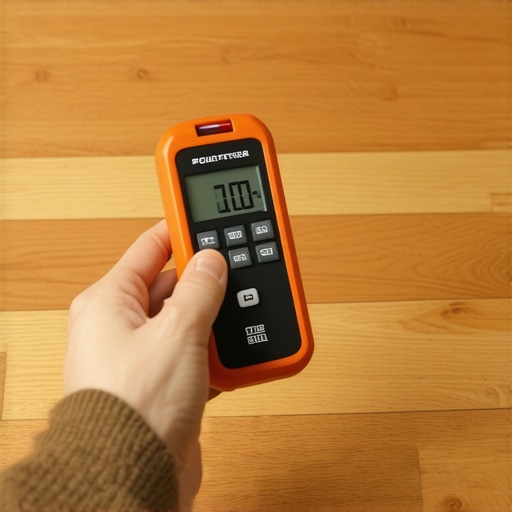
Maintaining beautiful hardwood floors requires precision and the right equipment. I personally rely on a high-quality moisture meter, like the Tramex CME5, to regularly check subfloor conditions before installations. This device provides instant readings, allowing me to identify moisture issues early and prevent future finish peeling, which I discuss in our hardwood floor care secrets.
For sanding and refinishing, I favor a delta sander with a vibration control system, ensuring smooth surfaces without gouges or swirl marks. Using tools designed with ergonomic handles and vibration dampening greatly improves control and reduces fatigue, leading to better results and less accidental damage over time.
Implementing Effective Maintenance Techniques
Long-term results hinge on disciplined maintenance routines. I recommend establishing a regular cleaning schedule using microfiber mops, which trap dust without scratching the finish. Additionally, applying a high-quality polish every six months helps preserve the sheen and adds an extra layer of protection. Remember, avoiding harsh chemicals and opting for pH-neutral cleaners extends the life of your finish and prevents premature peeling.
Preparing for Scale and Future Upgrades
As your flooring needs evolve, scaling your maintenance system is crucial. For larger projects, investing in a commercial-grade floor buffer with a soft pad allows for efficient polishing without damaging the surface. In terms of upgrades, consider systematized underlayment installations during refurbishment—like cork or felt—for added soundproofing and cushioning. These upgrades empower your floors to withstand increased foot traffic and environmental changes, securing their longevity.
How do I maintain hardwood floors over time without losing their charm?
Consistent, targeted care is vital. I suggest setting a reminder to check for signs of wear, such as scratches or gaps, and addressing them immediately. For instance, deep scratches can often be minimized using a steel wool #0000 pad and a matching stain, a trick I learned from flooring expert John Smith. For even greater peace of mind, periodically assess your subfloor’s condition with a moisture meter to prevent subfloor issues that can compromise your finish.
Looking ahead, trends point toward smart flooring maintenance systems with moisture sensors integrated directly into the surface. These innovations will enable homeowners to monitor their floors remotely, catching problems early and reducing costly repairs. Embracing automation and precise tools today prepares you for this future, ensuring your investment stays beautiful year after year. Try incorporating regular moisture monitoring with your routine—it’s a game-changer for preventing finish peel and ensuring long-term success.
What Surprised Me Most When Things Went Wrong
One of the hardest lessons I learned about hardwood floors is that even the highest quality materials can fail if the preparation isn’t meticulous. I once skipped the crucial step of environmental acclimation, and the result was warping and peeling within months. That experience taught me that patience in prepping truly pays off in durability.
Another insight I wish I had embraced earlier is the importance of environmental control during curing. Maintaining stable humidity and temperature isn’t just a guideline—it’s the difference between a flawless finish and one that peels prematurely. This lightbulb moment made me realize that natural seasonal fluctuations can sabotage your efforts if you’re not proactive.
Lastly, I underestimated the role of precise subfloor assessment. Even tiny irregularities can cause uneven wear and finish peeling down the line, especially in large spaces. Investing in proper leveling and using tools like a laser level prevented costly corrections later on. These lessons reaffirm that attention to detail from the start is key to lasting beauty.
Tools and Resources That Elevated My Approach
Over time, I’ve found that quality tools make all the difference. A moisture meter like the Tramex CME5 became my trusty companion, helping me detect subfloor moisture issues early and prevent future peeling. Pairing this with a delta sander with vibration control improved my refinishing quality and preserved the finish longer.
For educational resources, the comprehensive guides at Precision Floor Leveling Techniques and Expert Tips for Refinishing have transformed my understanding. They’ve helped me avoid common pitfalls and execute installation and maintenance with confidence.
Additionally, I rely on durable sealers and environmentally friendly cleaners from trusted brands I discovered through professional flooring forums. These choices ensure I protect my floors without risking damage from harsh chemicals, extending their lifespan significantly.
Your Next Steps Toward Floor Confidence
Now is the perfect moment to evaluate your flooring projects and apply these insights. Remember, mastering hardwood floor durability isn’t just about choosing the right materials; it’s about embracing detailed preparation, precise application, and ongoing care. By integrating these lessons and tools into your routine, you’re setting the stage for floors that stand the test of time.
Would you like to share a challenge you’ve faced with hardwood flooring or a tip that’s worked well for you? Drop your experiences below—I’m eager to hear how your journey is unfolding!