
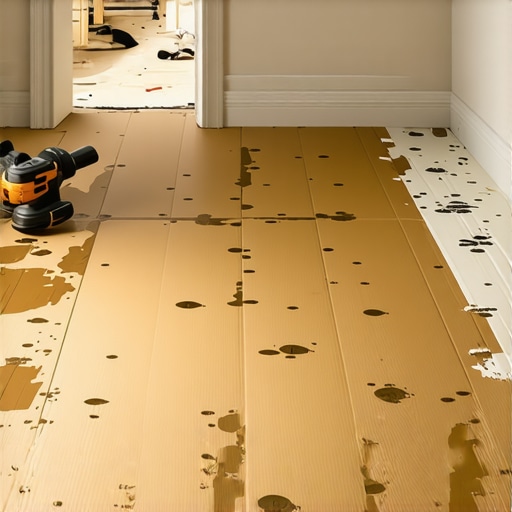
Ever had that gut-wrenching moment when you’re finally ready to lay down beautiful hardwood or tile, only to find scratches, dents, or stains from construction work? I remember my first renovation project vividly. The excitement of a fresh start was overshadowed by the reality that careless moving and unprotected floors often lead to costly fixes. One day, as I watched workers tread all over my brand-new surface without a second thought, a lightbulb flickered in my mind: there has to be an easier way to keep my floors pristine during construction.
Discovering a simple solution that saved my floors—and my sanity
What if I told you that the secret is surprisingly straightforward, and it doesn’t require expensive equipment or elaborate setups? During my experiments, I stumbled upon an underrated hero in construction protection: the humble piece of cardboard. Yes, just plain old cardboard—cut and laid out as a makeshift shield—can dramatically cut down on damage caused by heavy furniture, tools, and foot traffic. This hack not only kept my new floors scratch-free but also saved me hundreds on repairs. Now, I want to share how this simple trick can become your go-to during any renovation, big or small.
Question: Can cardboard really stand up to the rigors of heavy construction foot traffic?
Initially, I was skeptical. It sounded almost too simple. But I made the mistake early on of skipping protective measures, thinking a few blankets would suffice. The result? Dents and gouges that took actual refinishing to fix. That was my mistake—early in my project, I underestimated how much wear and tear even light work could inflict. Experts agree that proactive protection is crucial—learn from my oversight and prevent costly mishaps by planning ahead. For more detailed tips on avoiding common flooring mistakes, check out this guide.
So today, let’s dive into how a simple cardboard shield can make your construction process smoother and keep your new floors looking flawless. Stick around—I’ll show you step-by-step how I set mine up, and you’ll see how easy it is to adopt this neighborly trick into your own renovation plans.
**Ready to protect your investment?** Have you ever faced the frustration of discovering new floors damaged after a project? Share your story—I’d love to hear how you tackled it. Now, on to the practical prep work that can keep your floors pristine from start to finish.
Lay Down Protective Cardboard Layers
Start by measuring the area where you’ll work and cut large pieces of cardboard to size. Think of this as creating a shield that absorbs shocks and scratches from heavy furniture and tools. I once laid thick cardboard strips along my living room before moving in new furniture, and it prevented scuffs during the process. Secure the pieces with painter’s tape, avoiding adhesive residues that could damage the finish. Be meticulous around doorways and tight corners—they’re the most vulnerable spots. For added durability, double-layer the high-traffic zones, especially where heavy equipment will be used.
Double Up for High Traffic Zones
In my last renovation, I found that the main hallway saw the most traffic. To reinforce protection, I layered the cardboard, much like stacking cushions to absorb impact. During setup, I kept an eye on the alignment to prevent gaps that could cause tripping hazards or expose the floor. Once in place, I walked over the layers carefully, ensuring they stayed flat and intact. This simple step stopped scratches from dropping tools or dragging carts. For optimal results, replace or reinforce these layers as the project progresses—discard worn sections and add fresh cardboard where needed.
Strategic Placement of Heavy and Sharp Items
Identify equipment and furniture that will stay in place for extended periods. Wrap their bases with extra cardboard or foam padding to distribute weight evenly. I once wrapped my workbenches with corrugated cardboard underneath, acting like a buffer that prevented dents during multiple wire runs. This is especially crucial for tiles, hardwood, or delicate surfaces, where even minor pressure can leave permanent marks. When moving these items, use dollies or sliders on top of the cardboard to glide smoothly without lifting and risking damage. Think of this as making your floor slippery in a controlled way to ease heavy movements.
Remove and Replace as Needed
Regularly check the condition of your protective layers. If you notice tears, sogginess, or displacement, replace or reposition the cardboard. I made a habit of doing quick inspections at lunchtime, replacing sections that looked worn out. This proactive approach prevents debris from catching under the layers, which can cause scratches or unevenness. Keep spare cardboard nearby, along with scissors and tape, to make quick fixes without delaying the project. Remember, maintaining these shields is an ongoing process—think of them as your floors’ armor during battle.
Closing Tips for Long-Term Protection
Once the major construction phase wraps up, remove all protective layers carefully to avoid dragging debris across the floors. Use a broom or a vacuum with soft brushes to clear away dust and small particles before lifting each piece. This prevents tiny abrasions that could dull your finish over time. For high-end hardwood, consider applying a quick polish or protective sealant after cleaning to restore shine and add an extra layer of defense. Remember, these simple measures help preserve your investment and ensure your floors look their best long after the last nail is hammered.
Protecting your floors during construction isn’t just about covering surfaces—it’s about strategic planning and diligent execution. Think of it as building an invisible shield that safeguards your home’s beauty without sacrificing accessibility. With a little effort upfront, you’ll save significantly on repairs and enjoy a pristine finish that lasts for years. Want to dive deeper into tile installation tips? Check out this guide for more expert advice.
Many homeowners and even professionals fall prey to misconceptions about flooring installation, especially with hardwood and tile. One widespread myth is that following generic instructions guarantees perfect results, but in my experience, every project demands understanding specific nuances, like the importance of proper subfloor preparation. For instance, some believe that a slight unevenness isn’t critical; however, overlooking minor slope irregularities can lead to significant issues like cracked tiles or squeaky hardwood over time.
Why do so many advanced projects still encounter unforeseen problems despite following standard procedures?
In my research, I uncovered that many errors stem from neglecting the subtle details that influence long-term durability, such as moisture levels, expansion gaps, and cure times. Experts like those at the National Wood Flooring Association emphasize that meticulous attention to these factors drastically reduces costly repair cycles and maintains the integrity of the flooring. An often-ignored detail is the risk of inadequate floor leveling, which can cause uneven wear and visible lippage in tiles. While many assume that surface correction isn’t necessary once the surface appears flat, over time, undetected subfloor imperfections exacerbate, leading to premature failure. Using precise leveling techniques can make or break your project; for example, referencing trusted guides on floor leveling becomes invaluable. Moreover, common mistakes include rushing the installation without giving adhesives or leveling compounds adequate curing time, which often results in shifting or delaminating. This ‘oops’ can be avoided by scheduling relaxation periods into your timeline, especially when working with materials sensitive to environmental conditions. Remember, a flawless finish isn’t just about buying quality materials; it’s about executing each step with advanced awareness of the intricate factors at play. Have you ever fallen into this trap? Let me know in the comments. To elevate your next project, dig into specific strategies for high-quality installation by exploring topics like professional tile installation or hardwood refinishing secrets. Ultimately, understanding the hidden nuances helps ensure your flooring lasts and looks stunning for years to come.
Investing in Reliable Tools for Flooring Success
Maintaining quality in flooring projects requires the right equipment. Personally, I swear by a high-precision laser level, such as the Bosch GLL 3-330 C. Its accuracy ensures your tiles or hardwood planks are perfectly aligned, preventing lippage or uneven gaps that can ruin the aesthetic and compromise longevity. Unlike traditional bubble levels, laser levels project a straight, bright line across surfaces, making it easier to detect subtle unevenness in large areas, especially when working with large-format tiles. Employing such technology minimizes the need for repeated adjustments, saving time and reducing material waste.
For measuring moisture content—a critical factor in flooring durability—I rely on the Delmhorst BD-2100 moisture meter. This device provides instant readings of subfloor and material moisture levels, essential to prevent warping or delamination of hardwood and tile installations. Investing in quality tools like these empowers professionals and DIY enthusiasts alike to catch issues early, ensuring more consistent long-term results.
Implement Routine Maintenance to Preserve Your Floors
Long-term flooring health hinges on proactive care. I recommend establishing a regular cleaning schedule that includes dust mopping and occasional damp mopping with recommended solutions, avoiding harsh chemicals that can degrade finishes. For hardwood floors, applying a specialized polish every few months, such as hardwood floor care secrets, restores depth to the finish and provides a protective barrier against scratches and stains.
Similarly, inspecting grout lines and sealants during routine cleaning helps prevent water ingress that might compromise tile adhesion. Using a gentle scrub brush and mild cleaner maintains grout brightness, preventing discoloration over time. Reading expert guides on elegant tile designs can also introduce creative ways to refresh the overall look without costly replacements.
Embrace Advanced Floor Leveling Techniques
Achieving a flawless, durable surface begins with proper leveling. I often utilize the ultimate guide to floor leveling to refine my approach. One trick I personally recommend is the self-leveling compound application using a notched trowel—it creates an even base that reduces stress points, which are common causes of cracks or squeaks over time. For complex slopes or uneven subfloors, employing laser-guided leveling systems ensures accuracy that manual methods can’t match, especially in large areas or multilevel installations.
Scaling Your Flooring Projects Effectively
When planning larger projects, scaling tools like mobile moisture meters or automated leveling systems streamline workflow. As the trend shifts towards eco-friendly and smart flooring solutions, integrating IoT-enabled sensors can monitor environmental conditions, alerting you before issues manifest. Looking ahead, embracing these technologies combined with meticulous maintenance routines will not only extend the life of your floors but also save costs in the long run. To perfect your technique, I suggest adopting the precise floor leveling techniques discussed previously and applying them on your next project.
Question: How do I maintain my floors over time?
Long-term maintenance balances routine cleaning with periodic professional inspections. Keep an eye out for signs of wear, such as loose grout or scratches, and address them promptly. For hardwood, routinely buff out minor scratches using a fine-grit abrasive pad combined with a dedicated repair kit—this approach maintains the finish’s depth and prevents minor damage from escalating. For tiles, resealing grout lines every couple of years preserves water resistance and aesthetic appeal. Remember, proactive maintenance as described in common flooring mistakes to avoid ensures your investment remains pristine for decades.
Lessons That Changed My Perspective on Flooring Success
- One of the most eye-opening realizations was that even minor oversights, like skipping protective barriers, can lead to significant long-term damage, emphasizing the importance of proactive measures from the start.
- Discovering that simple materials like cardboard can outperform expensive protective gear surprised me, proving that ingenuity often beats high costs in home improvement.
- Understanding the intricacies of subfloor preparation and moisture management uncovered hidden pitfalls that can cripple a flooring project if overlooked.
- My deepest takeaway is that patience and meticulous attention during installation not only save money but also result in a flawless, durable finish that endures years of use.
- Finally, embracing advanced leveling techniques and using precise tools transformed my approach, transforming a daunting task into an achievable craft with consistent results.
Tools and Guides That Elevate Your Flooring Game
- Bosch GLL 3-330 C Laser Level: I trust this for ensuring perfect alignment, reducing guesswork and preventing costly errors, especially in large areas.
- Delmhorst BD-2100 Moisture Meter: This tool became essential in verifying moisture levels, averting warping and ensuring adhesion integrity.
- Comprehensive Guides and Resources: The articles on floor leveling techniques and installation pitfalls have been invaluable references that elevated my skills and confidence.
- Pro Tips from Industry Experts: Books and online tutorials that emphasize detail-oriented techniques have transformed my approach from novice to proficient.
Fuel Your Passion for Flooring Excellence
Embarking on your flooring journey is an investment in your home’s beauty and longevity. The insights and resources shared here aim to empower you with practical knowledge and confidence. Remember, every seasoned professional started with curiosity and a willingness to learn—so take that first step today. Dive into advanced leveling strategies, adhere to best practices, and don’t shy away from using innovative tools—the path to flawless floors is within your reach. Are you ready to transform your space with the confidence of a pro? Share your projects or questions below, and let’s grow together in this craft! For more expert guidance, explore these flooring tips and keep pushing your limits.