
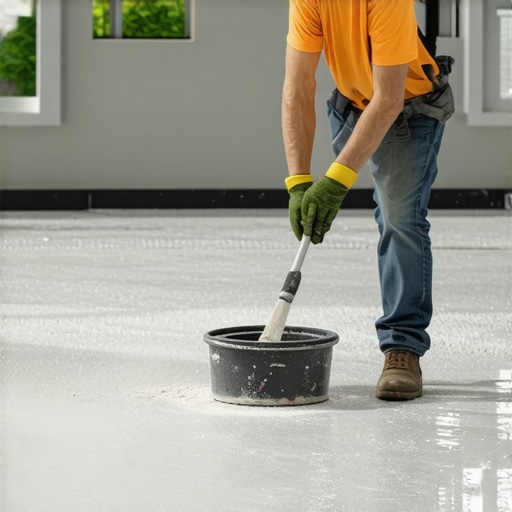
I vividly remember the day I turned my garage into a mini dust storm, all because I underestimated how messy mixing self-leveler could get. I was rushing to level a concrete slab and thought, “No big deal, I’ll just stir it up quickly.” Boy, was I wrong. The dust cloud that followed was like a scenes from a tornado movie—everywhere, and stubborn as hell to clean. It was a lightbulb moment for me: if you want a smooth, professional finish without the chaos, you gotta learn how to mix self-leveler the right way.
Say Goodbye to Dust Clouds When Mixing Self-Leveler
Mixing self-leveling compounds is a crucial step in achieving flawless floors. But if you’re not careful, it can turn into a messy, airborne nightmare that leaves dust particles floating around your workspace. Not only does this dust settle on your freshly laid tiles or hardwood, but it also poses health risks and complicates cleanup. Luckily, I discovered methods over the years that help keep the dust at bay, and today, I want to share these with you so your next project goes smoothly without the cloud of dust cloud.
Are You Wasting Time and Resources with Dusty Mixing?
One common mistake I made early on was ignoring proper dust control while mixing. I thought just stirring the compound was enough, but I didn’t realize how much airborne dust could be generated without the right techniques or tools. This oversight not only made cleanup a nightmare but also affected the quality of my work. It’s essential to understand that proper mixing isn’t just about consistency — it’s also about keeping your workspace clean and safe. For more tips on ensuring your flooring materials last, check out this helpful guide on hardwood floor care.
To avoid recreating my mistake, you’ll want to consider specialized mixing tools, adequate ventilation, and dust containment methods. In the sections ahead, I’ll walk you through proven strategies that turn a dusty mess into a clean, efficient process, ensuring your floors are perfect and your workspace remains safe.
Prepare Your Workspace and Gather Necessary Tools
Before mixing self-leveler, clear the area of debris and cover nearby surfaces with plastic sheeting or damp cloths to trap airborne dust. Equip yourself with a commercial-grade mixing drill fitted with a paddle attachment, a flexible bucket, a spatula, and a dust mask with a respirator filter. This setup minimizes dust release and ensures thorough mixing. I recall a time when I used a standard handheld drill, which splattered dust all over my workspace, prolonging cleanup and risking contamination of the mixture. Upgrading to a proper paddle drill significantly reduced dust and improved my workflow.
Use Appropriate Ventilation and Dust Containment Measures
Maximize airflow by opening windows and door vents, and use a portable HEPA-filter air cleaner in the room. Position plastic barriers or temporary walls to contain dust within the workspace. When I was working on a basement slab, I kept a box fan blowing outwards through a vented opening, which prevented dust from drifting into adjacent rooms. This step not only protected my lungs but also kept the dust from settling on surfaces where I was planning to lay flooring.
Mix the Self-Leveler Correctly and Efficiently
Start by pouring the required amount of water into the bucket, then gradually add the self-leveling compound while stirring continuously with the paddle drill set to a low speed. Maintain a steady, circular motion similar to stirring a large pot of soup, ensuring each batch is free of lumps. During my first attempt, I skimped on stirring time, resulting in uneven consistency. When I increased mixing duration and used a paddle drill, the mixture became lump-free and self-levelling properties were optimal, giving me a smooth surface without bubbles or pooling.
Keep the Mixture Moving to Reduce Dust Clouding
Proceed to mix in short bursts, then pause to scrape the sides and bottom of the bucket with a spatula, preventing clumps and reducing dust suspension. During one project, I noticed a persistent dust cloud whenever I left the mixture to sit too long. Continuous agitation kept the dust particles bound within the mixture, preventing airborne dispersal and ensuring a safer, cleaner process.
Monitor and Adjust the Environment
Maintain humidity levels between 40-60% using a dehumidifier or humidifier, as extreme dryness can cause dust particles to become airborne more easily. Wear a fitted dust mask and goggles throughout the mixing process. I also found that working during cooler parts of the day minimized dust agitation caused by temperature differences. These small environmental adjustments make a significant difference in dust control and the final quality of your self-leveling pour.
Prioritize Cleanup and Post-Mix Safety
Immediately after mixing, seal the bucket tightly and dispose of used tools in a damp trash bag. Use a damp cloth to wipe off any dust or residual compound from tools and surfaces. I learned that rushing cleanup — especially with a dry cloth — kicks up more dust; using a damp rag contained particles better and kept my workspace clean for the next steps. Proper cleanup prevents dust from settling onto freshly applied layers, helping to achieve a perfectly smooth, professional finish.
While many homeowners believe that laying hardwood floors is a straightforward project, seasoned professionals know there’s a labyrinth of subtle intricacies that can make or break the final result. It’s a common myth that choosing the right wood species alone ensures longevity and aesthetic appeal, but the real secret lies in understanding the nuanced factors influencing installation and finishing. For example, the moisture content of your subfloor and wood must be carefully balanced; overlooking this can lead to gaps or cupping down the line, despite using premium materials. Advanced craftsmen often test environmental conditions beforehand, referencing studies like those by the National Wood Flooring Association, which emphasize the importance of climate control during installation.
Why Do So Many Misjudge the Impact of Subfloor Preparation?
Many believe that a level subfloor is sufficient, yet the subtle imperfections—less than a millimeter of unevenness—can cause significant issues like lippage or uneven wear. Skipping meticulous prep, such as grinding high spots or sealing porous surfaces, can result in uneven adhesion or premature finish failure. Furthermore, improper expansion gap calculations are a silent killer; neglecting to leave appropriate space for seasonal expansion often leads to buckling or cracking. The critical takeaway? Even the most beautiful hardwood planks can’t compensate for poor preparation or misjudged environmental factors. To master these nuances, explore detailed guides like [this comprehensive article on floor leveling techniques](https://tiletrendshop.com/the-ultimate-guide-to-floor-leveling-for-a-perfect-finish), which delves into precise methods for flawless surfaces.When it comes to maintaining professional-grade floors, having the right tools can make all the difference. Personally, I swear by a high-quality paddle drill for mixing self-leveler; it ensures a lump-free, smooth pour, reducing cleanup time and improving adhesion. Investing in a variable-speed drill gives you control over mixing speed, preventing splatter and dust clouds, which is essential for health and quality control. For measuring humidity levels in subfloors or hardwood, nothing beats a digital moisture meter; proper moisture content is critical to avoid warping or buckling down the line.
For cutting tiles with precision, I rely on a wet tile saw fitted with a diamond blade. It produces cleaner cuts and minimizes chipping, especially with larger formats. When leveling uneven subfloors, I use a laser level combined with a long spirit level for verification; the laser projects a bright line across the surface, revealing even minor deviations that can cause lippage or uneven wear. Additionally, underlayment leveling compounds with extending drying times allow you to make final adjustments, which can be the difference between a perfect finish and a noticeable flaw.
Regular maintenance of your equipment is vital; clean your tools immediately after use and store them properly to ensure longevity. For example, a well-maintained paddle drill maintains consistent mixing performance, saving you time on each project. Looking ahead, I predict advances in smart tools—such as app-connected moisture meters that provide instant feedback—will revolutionize how we approach flooring installation and maintenance. To keep your floors beautiful over the long haul, adopting these tools and techniques is essential.
How do I maintain flooring tools over time?The Hardest Lesson I Learned About Self-Leveling Compounds
One of my most valuable realizations was that rushing the mixing process inevitably leads to a dusty chaos, no matter how experienced you are. Proper technique, patience, and quality tools transform a messy task into an efficient step that guarantees a smooth surface. Learning to control dust not only improves safety but also enhances the final finish, saving time on corrections and rework.
Tools That Changed My Flooring Game
Investing in a high-quality paddle drill with a variable speed setting made all the difference in preventing lumps and reducing airborne dust during mixture. My trusted moisture meter also became indispensable for ensuring optimal subfloor conditions before applying self-leveler. Additionally, a durable dust mask and plastic containment barriers have allowed me to work confidently, reducing health risks and post-project cleanup. For comprehensive insights on how tool selection impacts flooring success, explore this guide on expert flooring techniques.
Transforming Challenges Into Triumphs in Flooring Projects
My journey taught me that meticulous preparation—like sealing porous surfaces and ensuring proper environmental conditions—can make or break your project. Small details, such as controlling humidity and working during cooler hours, dramatically reduce dust dispersion and improve adhesion. Embracing these personal lessons turned complex installations into satisfying achievements, reminding me that patience, precision, and the right tools are the secret ingredients for professional results. When you equip yourself with these insights, flooring becomes a rewarding craft rather than a daunting chore. To deepen your understanding, check out this comprehensive guide on floor leveling.