
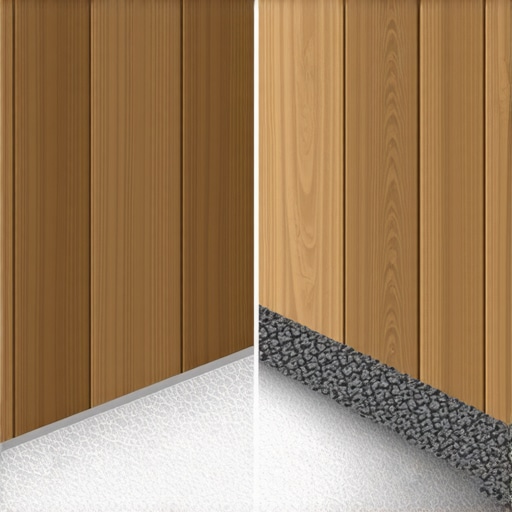
It was late one evening when I stepped onto my newly installed luxury vinyl floors and immediately felt that uncanny, hard plastic sensation underfoot. I couldn’t believe how something that looked so elegant could feel so unpleasant—almost like walking on a stiff, unyielding surface rather than the cozy, inviting floor I had envisioned. That frustrating realization was a lightbulb moment for me. The culprit? Cheap underlayment.
The Hidden Cost of Cutting Corners with Underlayment
When upgrading a room or embarking on a flooring project, it’s easy to get tempted by the lowest prices on underlayment materials. But as I learned the hard way, settling for subpar options can transform what should be a luxurious experience into a discomforting ordeal. Cheap underlayment often lacks proper cushioning and soundproofing qualities, which directly impacts how your luxury vinyl feels underfoot. Instead of the plush surface you expected, you end up with a rigid, plastic-like surface that can make standing for extended periods uncomfortable and even compromise the flooring’s lifespan.
This is more than just a matter of comfort—it’s about investing in the durability and aesthetics of your space. Premium underlayment acts as a buffer, absorbing minor subfloor imperfections, reducing noise, and enhancing cushioning. Skimping on it might save some dollars upfront, but it can lead to costly repairs or replacements down the line.
Are you wondering whether your current underlayment is sabotaging your flooring’s potential? If so, you’re not alone. Many homeowners jump into installation without understanding the significance of quality underlayment, leading to regrets and unnecessary expenses.
Is the Hype Around Cheap Underlayment Justified?
Honestly, I made the mistake early on thinking all underlayments were created equal. I underestimated how much a subpar underlayment could diminish the feel and lifespan of my luxury vinyl. A proper research and understanding of the material choices could have saved me from that uncomfortable walking experience. To avoid making my mistake, I recommend checking out this comprehensive guide on flooring installation mistakes to avoid for lasting results. It’ll help you grasp how crucial the right underlayment is to your project.
Stay tuned, because next, I’ll walk you through what to look for in quality underlayment and how to ensure your investment results in the stunning, comfortable floors you deserve. Ready to turn those plastic-like sensations into a soft, luxurious feel? Let’s dive into the practical steps that will make a real difference.
Start with a Clean, Dry Subfloor
Before laying any flooring material, thoroughly clean your subfloor, removing dust, debris, and loose particles. Use a vacuum or a broom, then wipe down with a damp cloth to eliminate stubborn dirt. Ensuring a pristine surface prevents imperfections that could telegraph through your new floor. I recall a time I skipped this step, and loose gravel caused tiles to crack during curing, which made me learn the importance of preparation. For detailed cleaning techniques, visit this guide.
Level the Subfloor Carefully
Uneven floors are the enemy of a professional-looking finish. Use a long level or a laser level to identify dips and high spots. Mark these areas clearly. For deep low spots, mix a self-leveling compound, following the manufacturer’s instructions, to create a uniform surface. Pour the mixture slowly into the low areas, spreading with a trowel or squeegee. I once poured a self-leveler that pooled in one corner because I didn’t tape the edges, leading to an uneven surface. Learning precise leveling techniques saved my project later.
Manage Moisture Levels
Moisture can cause your flooring to warp or buckle. Use a moisture meter to check the subfloor’s humidity, especially in basements or slab foundations. If moisture levels are high, employ a vapor barrier or a moisture-resistant primer. I forgot to test moisture on a humid summer day, and my vinyl planks developed bubbles after installation. Avoid such issues by proactive measurement, as detailed here.
Acclimate Your Materials Properly
Hardwood, laminate, and even vinyl need time to adjust to your home’s temperature and humidity. Store your materials in the installation area for at least 48 hours. This prevents expansion or contraction after installation, which causes gaps or buckling. An experience I had involved installing a hardwood floor immediately after delivery; within weeks, gaps appeared due to moisture changes. Proper acclimation eliminates this risk, as explained in this detailed guide.
Cutings and Layouts That Fit
Begin by planning your layout, measuring the room carefully to avoid awkward cuts at the edges. Use a chalk line to mark guidelines aligning with the room’s center or main focal points. When making cuts, use a sharp, high-quality saw and measure twice to prevent errors. I once mismeasured a cut that resulted in a small tile being off, which threw off the pattern. Careful planning avoids such costly mistakes. For precise cutting techniques, see this resource.
Install with Consistent Adhesive or Underlayment
Follow manufacturer instructions for your flooring type regarding adhesive or underlayment. Roll out underlayment smoothly, avoiding wrinkles or overlaps that could cause unevenness. Apply adhesive uniformly using a notch trowel to prevent lippage or gaps. In my experience, applying too much adhesive caused ribbing and uneven surfaces, which I fixed by scraping and reapplying properly. To learn about optimal adhesive application, check this installation tip.
Lay the Flooring Mindfully
Start laying from the longest straight wall, using spacers to allow for expansion. Press each piece firmly into the adhesive or string together for click-lock systems, ensuring a tight fit. Check regularly with a level to maintain flatness. Once laid, remove spacers and install baseboards or molding to conceal expansion gaps. I remember a time I rushed this step, causing seams to misalign, requiring me to redo parts of the floor later. Discipline during installation keeps everything aligned, as detailed here.
Final Checks and Finishing Touches
After installation, walk on the floor to check for uneven spots or gaps. Use a rubber mallet and tapping block to gently level any raised edges. Allow the floor to settle for at least 24 hours before moving furniture or walking extensively. Sealing or finishing the surface last ensures longevity and protects against stains. When I missed this pause, I noticed scratches on my hardwood finish, which could have been avoided. For maintenance tips, see this guide.
Many homeowners believe that flooring installation is a straightforward process: lay it down, and you’re done. However, even experienced DIYers often overlook the nuanced details that can make or break the quality of their floors. One prevalent myth is that everything will level itself out over time, but in reality, neglecting proper subfloor preparation can lead to uneven surfaces and future cracking. Overlooking the importance of precise levelness may seem harmless initially, but it sets the stage for issues like lippage, squeaks, and reduced durability. To avoid these pitfalls, I recommend mastering the fundamentals of floor leveling, which can be complex but is critical for a professional finish—check out this guide for in-depth techniques.
Another misconception is that moisture isn’t a concern in well-ventilated areas. On the contrary, many people skip moisture testing, assuming their concrete slabs are dry enough. This oversight can result in buckling or warping over time, especially with engineered hardwood or floating systems. I once installed a plank floor without testing and faced costly buckling in a summer heatwave. Employing a moisture meter is a simple step but invaluable in preventing this issue. For homeowners serious about their project’s longevity, understanding moisture dynamics is key—see this article.
Responding to the need for acclimation is another place where many go wrong. The common practice of rushing hardwood out of the box directly into installation ignores the delicate moisture balance these materials require. It’s a mistake that leads to gaps, buckling, or cupping within months. Proper acclimation, which involves storing flooring in the environment where it will be installed for at least 48 hours, is essential. I learned this lesson the hard way after rushing a hardwood installation and dealing with visible gaps afterward. For advanced tips on acclimation, visit this guide.
What about the subfloor itself? Many assume that a rough surface is acceptable since sanding or filling is manageable. But the reality is that uneven subfloors can obscure issues that only become apparent after installation, often leading to uneven or bouncey flooring. The most overlooked mistake is ignoring subtle dips—less than a quarter inch—which might seem insignificant but can cause major problems. Investing time in thorough evaluation and leveling ensures a flat, durable surface, avoiding the common ‘oops’ moments associated with uneven installations. For deeper insights, check this resource.
Finally, let’s address a question that even advanced flooring professionals should keep in mind: How does environmental change affect flooring stability over the years? This isn’t just about seasonal humidity swings; it’s about understanding how different materials respond to long-term climate variations. For instance, engineered hardwood tends to be more sensitive to moisture fluctuations than solid wood, which can buckle unexpectedly if the environment isn’t controlled. According to expert research, proper climate control and choosing the right materials can mitigate these risks significantly. For more details, explore this post.
Have you ever fallen into this trap? Let me know in the comments. Remember, a flawless floor is often the result of paying attention to the smallest details, not just the big ones. By avoiding these common myths and traps, you’ll ensure your flooring endures both time and wear, giving you a beautiful, lasting result.
Keeping Your Floors in Top Shape: Practical Maintenance Strategies
Maintaining hardwood and tile flooring over the years requires the right tools and consistent care. Personally, I rely on a high-quality floor buffer equipped with a soft pad for hardwoods; it gently restores shine without causing scratches. For tiles, a grout saw and a steam cleaner are indispensable—they allow me to spot-clean and prevent mold buildup efficiently. Investing in a reliable moisture meter is critical, especially in humid climates, to monitor conditions that could lead to warping or buckling, as emphasized in this resource. Regularly checking and addressing issues early can save you from costly repairs down the line. For long-term results, adopting a routine that includes gentle cleaning, periodic inspections, and timely refinishing is key.
Tools I Recommend for Floor Preservation
One tool I swear by is the electric orbital sander, which I use for refinishing hardwood floors—I prefer models with variable speed controls to match the specific needs of different projects. Additionally, a detailed cleaning kit containing microfibre mops, pH-neutral cleaners, and soft brushes ensures that I don’t damage the finish or grout. A laser distance meter helps me verify that expansion gaps are maintained, especially when planning to add new floor layers or transitioning thresholds. As flooring materials evolve, so do the maintenance techniques; in the future, I predict that smart sensors embedded in floors may alert homeowners to issues like moisture ingress or structural shifts before visible signs appear. Staying ahead with such innovations could revolutionize how we care for our floors.
How do I maintain hardwood or tile floors over time?
The secret lies in regular care and using the right tools to catch problems early. I recommend avoiding harsh chemicals that can degrade finishes and instead opting for pH-neutral solutions. To keep scratches at bay, placing rugs in high-traffic areas and lifting furniture carefully with sliders prevents damage. Refinishing hardwood floors periodically—guided by professional techniques outlined here—restores their luster and extends lifespan. For tiles, resealing grout lines every few years maintains their appearance and prevents staining. Consistency in maintenance not only preserves beauty but also ensures safety, as dirt and debris can turn into slippery hazards over time. Try incorporating a monthly deep-clean using specialized tools, and you’ll notice a significant difference in longevity and look.
The Hardest Lesson I Learned About Flooring Projects
One key insight I wish I had embraced earlier is that meticulous preparation beats rushed installation every time. I once hurried through subfloor cleaning and ended up with uneven tiles that cracked later—highlighting how skipping even minor steps can lead to costly fixes. Patience in prep work—like thorough moisture testing and proper leveling—is the real secret to lasting beauty and performance.
My Go-To Tools for Flooring Success
I rely on a laser level for precise layouts and a high-quality moisture meter to catch issues early. These tools have saved me from embarrassingly crooked tiles and warped hardwood. For detailed guidance on using them effectively, check this resource. Investing in these essentials has transformed my approach, giving me confidence that my floors will stand the test of time.
Cherishing the Journey of Creating Beautiful Spaces
Building concrete knowledge and developing craft skills has turned flooring installations from daunting tasks into rewarding experiences. Every mistake has been a lesson, and every successful project a testament to patience and attention to detail. Think of your flooring project as an opportunity to craft something enduring—your effort will pay off in long-lasting beauty and a home that truly reflects your care. Don’t hesitate; take those first steps with purpose and pride. Have you faced challenges during your flooring projects? Let me know below.