
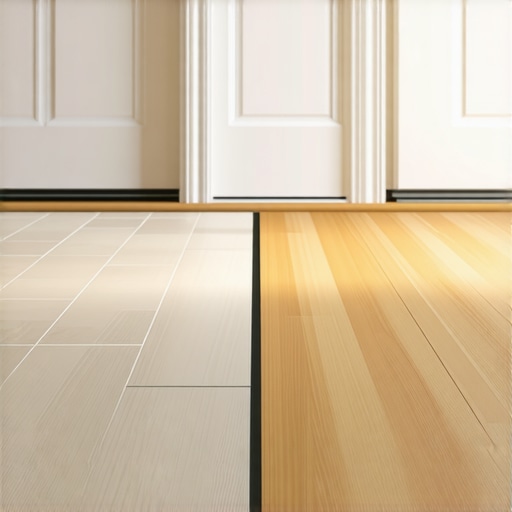
I’ll never forget the moment I stepped into my living room after a weekend renovation. Instead of the sleek, seamless transition I envisioned between my new tile kitchen and the hardwood living area, I was met with an uneven, squeaky gap that made everything look unfinished—and honestly, a bit sloppy. It was a lightbulb moment for me: I realized I had neglected the importance of a proper transition.
The Hidden Power of a Simple Transition
That experience sparked a journey to understand why such a tiny detail as a transition strip makes all the difference. Not only does it elevate the aesthetic of your space, but it also plays a crucial role in protecting your floors from damage, cracking, or shifting over time. As I dug deeper, I learned that many homeowners overlook this essential element during installation, leading to costly fixes down the line.
Today, I want to share what I’ve discovered—how a transition strip can be your home’s unsung hero, ensuring durability, safety, and style. From my personal experience, I know that tackling this before the finishing touches can save you both time and money. Let’s explore how to get it right from the start, and why this piece of your flooring puzzle is worth paying attention to.
Ever Faced a Weird Gap or Squeak Between Floors? You’re Not Alone!
One common mistake I made early on was underestimating the importance of a proper transition strip, thinking it was just a decorative element. But in reality, it’s about more than looks—it’s about **functionality**. The gap I neglected soon became a trap for dirt and debris, and the squeak—oh, the squeak—became a walking nuisance. If you’ve experienced similar issues, you’re definitely not alone, and there’s a simple solution that can make all the difference. For a comprehensive guide on installing these strips effectively, check out this helpful resource.
And if you’re wondering whether this small detail is worth the effort, let me assure you—skipping it can lead to bigger problems later, like uneven surfaces or damage to your flooring materials. Knowing the benefits of a transition strip sets the foundation for a lasting, beautiful floor connection. Up next, I’ll walk you through the top reasons why every home should have one and how to install it correctly—so stay tuned!
,
Prepare Your Tools and Materials
Before starting, gather all necessary tools: a saw (preferably a miter or handsaw), measuring tape, pencil, level, pry bar, hammer, drill, and safety gear like goggles and gloves. Choose the right transition strip—beaded, T-molding, or threshold—based on your flooring types and aesthetic preference. Ensure your subfloor is clean, dry, and level; consult the installation mistakes to avoid guide to verify your surface.
Assess and Measure the Gap
Step onto the area where the transition will go, and use a level to check for unevenness. Measure the width of the gap or joint between floors. Mark the desired length of the transition strip with a pencil, accounting for expansion gaps—generally about 1/4 inch on each side—to prevent buckling.
Cut the Transition Strip Accurately
Using a saw, cut the transition strip to match your measurements. For corners or intricate spots, use a miter saw or a hacksaw, ensuring straight cuts. When cutting, support the strip securely and wear eye protection. File or sand any rough edges to prevent splinters.
Prepare the Substrate and Underlayment
If your subfloor isn’t perfectly flat, apply a suitable leveler—such as those described in the precise leveling techniques. This ensures a smooth surface for your transition. Lay a thin, even layer of thinset or adhesive suitable for your flooring type if required, especially for tile transitions, to secure the strip firmly.
Install the Transition Strip Effectively
Position the strip at the joint, ensuring it sits flush with the adjoining floors. For floating floors, slide the strip underneath the tongue or groove if possible; for glued-down or nailed installations, secure it with appropriate fasteners. Use a level to verify the strip’s alignment—it’s crucial for a seamless look and preventing tripping hazards. Tap gently with a rubber mallet to lock it into place without damaging the surface.
Handling Uneven Surfaces and Gaps
If the subfloor has minor humps or dips, shim the transition strip with thin wooden or plastic shims before fixing permanently. For large gaps or unevenness, consider installing a shimmed subfloor extension or a flexible transition strip designed for uneven surfaces. Remember, the goal is to make the transition as smooth and flush as possible.
Secure and Finish the Installation
Fasten the strip using nails, screws, or adhesive tailored to your flooring material, following manufacturer instructions. Countersink fasteners and fill any holes with matching filler or wood putty. Clean any excess glue or debris promptly. Check the overall levelness and smoothness, and make adjustments if necessary.
Once fixed, walk over the transition to ensure stability and comfort. If using a tile or stone strip, apply grout or sealant as required to prevent dirt accumulation and enhance durability. Properly installed, a well-executed transition strip not only protects your flooring edges but also elevates your entire space’s look.
Test and Maintain Your Transition
After installation, monitor the area for several days, checking for movement or gaps. Regular cleaning with appropriate products will maintain its appearance. Address any lifting or cracking immediately to prolong the lifespan of your floors.
Remember, precise measurement and careful fitting are key to a professional-looking result. For more tips and troubleshooting, visit expert flooring tips to refine your skills and ensure every project is a success.
Even seasoned DIYers often believe that achieving a perfectly level floor is just a matter of pouring some self-leveling compound and hoping for the best. But in my experience, this oversimplification leads to costly errors and subpar results that can haunt your project years later. One common myth is that self-leveling products are foolproof; however, many overlook the importance of proper subfloor preparation, which is crucial for success. Applying a high-quality primer, like the one discussed in this guide, can prevent adhesive failure and ensure a smooth finish.
Another nuance often missed is the significance of moisture testing before installation. Moisture seepage can cause tiles to crack, hardwoods to swell, or vinyl to warp—issues that seem to emerge months after the job is done. Experts like the Floor Covering Institute emphasize conducting tests such as the plastic sheet or calcium chloride tests to detect hidden moisture problems. Neglecting this step is a common mistake that leads to expensive remediation and rework.
Hardwood floors are another area fraught with misconceptions. Many assume that acclimation time alone guarantees stability, but in reality, temperature and humidity fluctuations during and after installation play a decisive role in preventing gaps and buckling. For advanced insights, you might explore this expert advice on managing environmental conditions effectively.
Tile installation also harbors its own set of pitfalls. The rigidity of standard thinset mortar often causes tiles to crack under slight movements or substrate imperfections. An alternative is to opt for flexible adhesives designed for substrates prone to slight settling or thermal expansion. Additionally, improper joint spacing can lead to lippage, where tiles sit unevenly side by side, creating a crooked appearance that ruins the visual harmony of your space. Using a proven method like the 24-hour wait rule for leveling compounds can help avoid these issues, ensuring a flawless finish.
A major
Maintaining perfect floors over the years requires more than just good installation; it demands the right tools and a proactive approach. Personally, I rely on a few specialized instruments that make spot-checks and repairs straightforward, ensuring my floors look pristine long after the initial work. For example, I always keep a high-quality moisture meter, like the Protimeter Surveymaster, on hand. It helps me quickly identify hidden moisture issues beneath slabs or subfloors, which is crucial because moisture often leads to tile cracking or hardwood warping if unnoticed. Regularly checking moisture levels prevents these costly problems and prolongs your flooring’s lifespan.
Another tool I find indispensable is a laser level. Unlike traditional bubble levels, a laser level projects a consistent, bright line across large surfaces, making it much easier to spot unevenness or lippage in tiles or hardwood planks. I prefer a model with a rotating head to cover wider areas and achieve precision in both horizontal and vertical planes. Using a laser level regularly during maintenance or even minor repairs can help you catch and correct issues before they escalate into full-blown restoration projects.
For detailed assessments, a feeler gauge or a gentle floor sander can be useful to evaluate wood expansion gaps or smooth out minor uneven spots without pulling up entire sections. These tools, combined with a good digital caliper for precise measurements, empower DIY enthusiasts to troubleshoot and maintain their floors effectively. Remember, addressing these issues early on helps maintain the aesthetic appeal and structural integrity of your flooring for decades.
Looking ahead, I predict smart inspection devices integrated with IoT technology will become commonplace. Imagine a sensor that continuously monitors issues like moisture fluctuations or temperature changes, alerting you immediately before damage occurs. This trend could revolutionize how we care for floors, making maintenance more predictive and less reactive.
Ever Wondered How to Keep Floors Flawless Over Time? Try Regular Moisture Checks
Consistently monitoring moisture levels, especially under concrete slabs or in basements, is a game-changer for longevity. Use a reliable moisture meter to identify potential problems early, then address them with appropriate sealing or ventilation. This proactive approach saves money and preserves your beautiful floors, making ongoing maintenance more manageable and less stressful. For detailed guidance, check out this comprehensive floor leveling guide that emphasizes moisture control as a key step in flooring success.
If you’re ready to test your floors’ resilience, I recommend trying the moisture meter I trust—it’s a small investment that offers huge peace of mind. Keeping your floors in top shape involves more than just one-time fixes; regular checks and reliable tools make all the difference in ensuring your investment stands the test of time.
What My Mistakes Taught Me About Floor Transitions You Can’t Find Elsewhere
- Sometimes, I underestimated the importance of precise measurements, which led to uneven gaps and squeaks that took longer to correct later. This taught me the value of double-checking everything before installation begins.
- Choosing the wrong transition strip style can clash with the overall aesthetic, reminding me that functionality and style should go hand-in-hand for a cohesive look.
- Neglecting subfloor preparation seemed minor at first, but I quickly learned it can cause long-term issues like cracks or uneven surfaces. Proper prep is a non-negotiable step in my process now.
- I realized that small tools like a laser level or moisture meter have saved me from costly mistakes—investing in quality tools is an act of confidence in your craft.
- Finally, understanding that ongoing maintenance, including regular moisture checks, is crucial for preserving perfect floors, not just installing them; this holistic view has transformed my approach to flooring projects.
Tools and Insights That Changed My Flooring Journey
- Moisture Meter: I trust the Protimeter Surveymaster for early detection of hidden moisture issues, preventing future damage.
- Laser Level: It’s indispensable for ensuring perfect alignment and catching imperfections early, saving time and effort.
- Floor Leveler Primer: Using a high-quality primer, as discussed in this guide, has made my leveling smoother and more reliable.
- Grout Sealer: Protecting my grout has extended the lifespan of my kitchen and bathroom tiles, maintaining their pristine appearance.
Stay Curious—Floors Are Full of Secrets Waiting to Be Discovered
Achieving flawless floor transitions is as much about passion and curiosity as it is about technique. Every project teaches me something new—maybe it’s about selecting the right materials, or understanding the subtle nuances of subfloor prep. Remember, your floors aren’t just surfaces—they’re the foundation of your home’s story. So, inspire yourself to learn more, ask questions, and embrace each challenge as an opportunity to elevate your craftsmanship. Want to share your own flooring discoveries or challenges? Drop a comment below—let’s learn together and keep floors beautiful for years to come.