
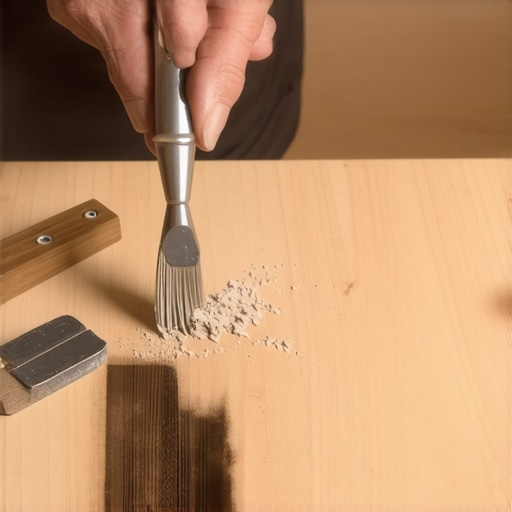
Ever had that sinking feeling when your hardwood floor gets a nasty gouge from an accidental drop or a misstep? I remember the first time I encountered a deep scratch right in the middle of my living room floor. I stared at it, convinced I’d need to replace entire planks or hire a costly professional. But then I had a little lightbulb moment—what if I could repair that gouge myself, using just some wood dust and glue? It sounds simple, but I found out it’s a game-changer for DIY enthusiasts and homeowners alike.
Why Patching Gouges Matters More Than You Think
Gouges and scratches aren’t just cosmetic issues—they can impact the integrity and longevity of your flooring. Small damages often lead to moisture penetration, which can cause further warping or rot over time. Plus, a well-executed repair preserves the warmth and beauty of your hardwood, saving you from the hassle and expense of full plank replacements or refinishing jobs.
Is This Method Actually Reliable?
Early on, I made the mistake of thinking any patch job would be obvious or temporary. I didn’t realize that a properly mixed and applied patch using wood dust and glue could blend seamlessly with existing flooring. According to hardwood flooring experts, using the right type of glue and matching dust significantly increases the success of these repairs (source). This method is not just a quick fix; it’s durable when done correctly.
So, have you ever faced a gouge or deep scratch in your hardwood floors that just wouldn’t go away? If so, you’re not alone, and I promise you, a bit of wood dust and good-quality glue can truly make a difference.
Now, let’s roll up our sleeves and walk through the step-by-step process of patching those unsightly gouges, restoring your floor’s smooth look and solid feel. Trust me, it’s easier than you think—and you might even enjoy the satisfying end result.
Prepare Your Workspace and Materials
Clear the area around the gouge and gather your supplies: fine wood dust (preferably from the same type of flooring), high-quality wood glue, a putty knife, fine sandpaper, a damp cloth, and a small brush. I remember one time I worked in my garage, sifting through sawdust from an old project to find matching particles, which made the repair blend seamlessly.
Match and Mix the Wood Dust
Take a piece of scrap wood similar to your flooring and grind or sand it to create a fine dust. Mix this dust with a small amount of wood glue to form a thick, paste-like consistency. Think of this as creating your custom filler—like making a color-matched cake batter, but for your floor. The goal is to achieve a paste that’s thick enough to fill the gouge without spilling over.
Apply the Filler with Precision
Using a putty knife or a small spatula, carefully press the mixture into the gouge, overfilling slightly to account for shrinkage as it dries. I once worked on a heavily scratched area in my dining room, and I found that pressing the mixture deep into the gouge ensured a flush finish, avoiding the need for excessive sanding later. Smooth out the surface, ensuring the patch is level with the surrounding floor.
Wait for the Mixture to Cure
Allow the filler to dry fully, usually about 2-4 hours, depending on the glue used and the size of the gouge. For larger repairs, I found it helpful to leave it overnight to ensure complete curing, reducing the risk of crumbling or shrinking afterward. During this time, avoid walking on or cleaning the patched area.
Sand and Finish the Repair
Once dry, gently sand the patch with fine-grit sandpaper until it is smooth and level with the rest of the floor. Be cautious not to gouge the surrounding wood; think of this as buffing out a scratch on your car—you want a seamless finish. Wipe away dust with a damp cloth to prepare for a finishing coat.
Blend and Protect
If necessary, apply a thin layer of matching stain or finish to the patched area to further blend it in. Use a small brush and dab carefully, especially if your floor has a distinctive color or gloss. Finish with a clear polyurethane coat if your flooring has a glossy finish, restoring both aesthetics and protection. When I previously applied a quick topcoat, the repair became virtually invisible, astonishing even my skeptical spouse.
This process can be used for scratches, gouges, or deep dings, turning a potential eyesore into an almost invisible repair, saving you from costly replacements or refinishing jobs. For more detailed techniques and common pitfalls, check out the comprehensive guide on mastering hardwood refinishing.
When it comes to flooring, there’s a common misconception that following basic installation steps guarantees a perfect result. However, even seasoned DIYers often overlook subtle nuances that can make or break their project’s success. One of the most overlooked aspects is the importance of proper subfloor preparation. Many assume that a subfloor only needs to be level, but in reality, moisture content, surface smoothness, and material stability are equally critical for long-term durability. Neglecting these can lead to issues like tile lippage or hardwood buckling down the line.
Another widespread myth is that thicker underlayment always provides better support. In truth, the type of underlayment and its compatibility with your flooring material matter more than thickness alone. Using inappropriate underlayment can cause uneven surfaces or moisture buildup, which may result in mold or decay. For instance, foam underlayments are suitable for laminate but not for solid hardwood, where cork or specific rigid boards are preferred.
One trap I often see is underestimating the significance of precise floor leveling. Achieving a perfectly level surface isn’t merely about aesthetics—it ensures even wear and prevents future repairs. Many skip the detailed leveling process, thinking minor imperfections won’t matter. But small dips or humps can become glaring issues within months, especially in high-traffic areas. The use of self-leveling compounds can be a game-changer here, but only if the substrate is properly prepared. For detailed guidance, check out expert tips on flooring installation.
Advanced installers understand that expansion joints and control gaps are often overlooked elements that protect the flooring from future stress. Many mistakenly believe these gaps are simply aesthetic; in reality, they accommodate movement caused by humidity, temperature fluctuations, and subfloor shifts. Failure to incorporate proper gaps can result in buckling, cracking, or warping over time.
To ensure a long-lasting, professional-looking finish, paying attention to the detailed preparation steps is essential. Skipping or rushing through these nuances often leads to costly repairs and frustration. For comprehensive strategies on achieving perfect floor flatness, I recommend reviewing this detailed floor-leveling guide.
Have you ever fallen into this trap of overlooking a subtle detail that caused big trouble later? Let me know in the comments and share your experience. Remember, mastery lies in the details—your floors deserve it.
How do I keep my floors working smoothly over time?
Maintaining your flooring is crucial to ensure it continues to perform and look its best for years. One of the most reliable tools I swear by is a high-quality moisture meter, especially when working with hardwood or tile installations. Moisture meters like the Protimeter SMP are invaluable—they help me verify that the subfloor’s moisture levels are within acceptable ranges before and after installation, reducing the risk of warping or mold growth (source). Regular inspections with this device can catch issues early, saving significant repair costs down the line.
Another essential aspect is investing in a good impact-resistant buffer or sander for periodic touch-ups. I specifically prefer a random orbital sander with adjustable grit; it allows me to lightly buff out scratches and wear spots without damaging the finish. This proactive approach keeps hardwood floors looking pristine, especially in high-traffic areas. Pairing this with a soft microfiber mop equipped with gentle cleaning pads helps prevent dirt buildup without scratching surfaces.
What tools should I consider for effective floor leveling?
When it comes to floor leveling, a self-leveling compound is your best friend, but only if applied properly. I recommend using a laser level combined with a screed or a long, straight edge to identify uneven spots accurately. For precise application, a gauge rake ensures the compound is spread evenly, preventing dips or humps. Remember, the key to lasting results is thorough surface preparation—removing debris and ensuring a clean, dry substrate enhances adherence and reduces shrinkage or cracking (source). For larger projects, consider renting a power trowel machine to get a perfectly flat surface.
Anticipating future trends in flooring maintenance
Looking ahead, I believe smart tools integrated with IoT technology will revolutionize flooring care. Imagine moisture sensors that sync with your smartphone, alerting you instantly to potential problems before they escalate. Additionally, AI-driven cleaning machines customized for your specific floor type could streamline routine care, extending its lifespan. Staying ahead means embracing these innovations, ensuring your floors remain not just functional but also a showcase of modernity.
Master the art of floor upkeep with advanced tips
If you haven’t yet, try employing a combination of a moisture meter and a fine impact buffer for your routine maintenance. These tools not only save you money but also give you peace of mind about your investment. Regular inspections and proactive repairs keep damage at bay, and understanding the proper use of leveling compounds ensures your surfaces stay flawlessly even over decades.
Don’t forget—proper maintenance begins with smart planning and the right tools. Check out this comprehensive guide to perfect leveling techniques that complement your ongoing care routine. Incorporate these practices today to keep your floors working seamlessly, ensuring they remain beautiful and durable for years to come.
Lessons That Changed My Approach to Flooring
- Never underestimate the power of inspection; catching a small issue early can save big bucks later, as I learned when I discovered tiny cracks before they turned into major problems.
- For me, matching wood dust isn’t just about color; it’s about blending in seamlessly and restoring confidence in my DIY skills. Small details, huge impact.
- Skimping on proper curing time is tempting, but patience ensures durability. Waiting those extra hours made my repairs last years, not months.
- Investing in quality materials—like fine sandpaper and high-grade glue—transformed my repair outcomes from mediocre to professional-looking.
- Understanding that every subfloor is unique pushed me to adapt techniques rather than relying on one-size-fits-all solutions, a lesson I carry with each project.
Tools and Resources That Keep My Floors Perfect
- The Protimeter SMP moisture meter has been a game-changer, helping me prevent moisture-related issues before they start, ensuring my hardwoods stay stable.
- Reading “Mastering Hardwood Floor Refinishing” opened my eyes to subtle nuances that avoid common pitfalls—it’s my go-to guide for long-lasting results.
- The self-leveling compounds I trust are from brands with proven track records; they guarantee a flat foundation, which is crucial for any successful flooring job.
- My favorite tutorial on perfect floor leveling provided step-by-step clarity that boosted my confidence in tackling uneven surfaces.
Your Next Step to Beautiful Floors
Taking care of your floors is an ongoing journey, but every project, big or small, is a chance to learn and improve. Embrace the process, use trusted tools, and don’t shy away from expert resources. With dedication and attention to detail, your hardwood or tile floors can remain stunning for decades. What’s one flooring challenge you’re eager to conquer next? Share your story below and let’s grow together in mastery.