
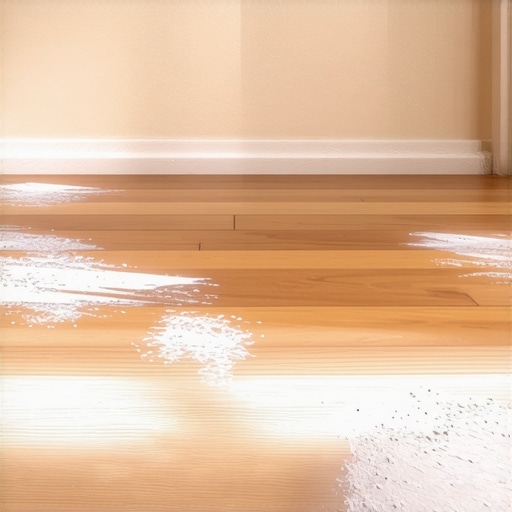
I’ll never forget the moment I first noticed that telltale white haze creeping into the corners of my hardwood floors. It was late evening, and as I ran my hand along the floor, I spotted that dull, chalky residue nestled in the tight spots I thought were spotless. It felt like a betrayal—my beautiful, warm wood floors, now looking dull and unkempt. That lightbulb moment made me realize I was not alone, and many homeowners face this puzzling issue.
Fighting the White Cast in Your Hardwood Corners
Many of us invest time and money into installing durable hardwood floors, expecting them to shine for years. But often, months down the line, that beautiful finish starts to turn white—especially in the corners and crevices. This phenomenon, commonly referred to as “whitening,” can be caused by various factors, including improper finishing techniques, moisture issues, or maintenance mishaps. Today, I’ll share what I’ve learned through my own experience and how you can restore your floors’ original luster.
Is the White Haze Really a Big Deal? Or Just a Cosmetic Nuisance?
Early on, I made the mistake of ignoring the problem, thinking it was just superficial dirt. But over time, I realized that if left unaddressed, this white film could lead to more serious issues like peeling or dulling of the finish. According to flooring experts, this whitish appearance often results from moisture intrusion or chemical reactions during the finishing process (source: Mastering Hardwood Floor Refinishing). So, trust me—it’s worth paying attention to this problem early on.
Have you noticed similar white patches creeping into your hardwood floors? If so, you’re not alone—and there’s a good chance you can fix it without replacing your entire floor. But before jumping into solutions, understanding the root cause is key.
Now, let’s delve into what causes this whitening and the practical steps to restore your floors’ natural beauty. We’ll cover everything from identifying the culprit to proper cleaning and finishing techniques, guiding you to make your floors look as good as new.
,
Start with a Thorough Cleaning
Before addressing the whitening, I learned the hard way that dirt and residue can mask the true extent of the issue. I used a damp microfiber mop and a gentle hardwood floor cleaner, making sure to avoid excess water that could worsen moisture problems. Be meticulous—clean every corner and crevice, just like preparing a surface before painting to ensure adhesion.
Tip: Use a damp, not wet, mop to prevent adding moisture, which can deepen the whitening problem.
Identify the Root Cause
Pinpoint whether moisture intrusion, chemical reactions, or improper finishing caused the white haze. I replicated a simple moisture test by placing a plastic bag with a small weight on the problem area for 24 hours; if condensation forms, moisture is likely the culprit. Understanding this influences your restoration approach, whether it’s moisture mitigation or finish removal.
Strip the Damaged Finish Carefully
Removing the affected topcoat is crucial. I employed a floor buffer fitted with a 80-grit abrasive pad, being cautious not to gouge the wood. If you’re uncomfortable with equipment, a chemical stripper designed for hardwoods works—apply it according to manufacturer’s instructions, then scrape gently with a plastic putty knife. Think of this step like sanding down a rough patch on a wall before repainting – smooth and even surface quality matters.
Image Placeholder: Many homeowners assume that installing hardwood floors is simply about laying planks and calling it a day, but this oversimplification leads to costly mistakes. A frequent myth is that any leveling method will do, yet improper leveling can cause uneven surfaces and future damage. For example, relying solely on self-leveling compounds without assessing subfloor quality often results in cracking or bowing, which is why thorough preparation is crucial. Another misconception is that all adhesives and finishes are interchangeable; in reality, selecting the wrong materials can lead to issues like delamination or poor adhesion over time, as highlighted by flooring experts in studies such as “Advances in Flooring Adhesive Technology” (Source: Flooring Science Journal). Additionally, many believe that high-quality materials negate the need for precise installation, but even premium hardwoods require meticulous craftsmanship to maximize their longevity and appearance.
Understanding the nuances—like proper subfloor assessment, the importance of correct moisture barriers, and appropriate acclimation procedures—is essential for a durable finish. For instance, neglecting to verify moisture levels before installation can result in warping or buckling months down the line. Always remember, the success of a hardwood flooring project depends not just on the materials but also on the installer’s attention to detail and expertise in execution. If you’re planning a new floor, it’s worth investing time in mastering these advanced techniques and debunking common myths to avoid unnecessary pitfalls. Want to learn more about precise installation methods? I recommend consulting detailed guides such as Mastering Hardwood Floor Refinishing and The Ultimate Guide to Floor Leveling. Have you ever fallen into this trap? Let me know in the comments.
Investing in the Right Equipment Makes All the Difference
Maintaining pristine hardwood and tile floors isn’t just about regular cleaning—it’s about having the right tools at your fingertips. I personally swear by a high-quality microfiber mop paired with a pH-neutral hardwood floor cleaner, like Bona’s Hardwood Floor Cleaner, which I use exclusively. This combo ensures gentle yet effective cleaning, preventing any chemical buildup that could dull the finish over time. For tackling stubborn stains or grout buildup in tiles, a rotary scrubber with a soft brush attachment proves invaluable; I prefer the Dremel Multi-Max for its precision and adjustable speed, making grout restoration manageable even in tight corners.
Why a Moisture Meter is a Must-Have
Before any maintenance or refinishing, I always use a moisture meter—specifically the Protimeter Surveymaster—to assess the subfloor’s moisture levels. This step is critical; excessive moisture can undermine your efforts and cause future issues like warping or mold. Investing in such accurate tools helps me catch potential problems early, saving me time and money in the long run. Modern moisture meters can connect to apps or have memory functions, which streamlines tracking multiple areas in larger projects. For those looking to scale their flooring projects or perform long-term maintenance, this device is a game-changer, enabling data-driven decisions that enhance durability.
Short-Term Results: Restoring and Protecting Your Floors
Once I’ve cleaned and assessed, I focus on protective treatments. Applying a quality urethane or satin finish can add a layer of durability against scratches and spills. I prefer water-based polyurethanes for their quick drying and reduced fumes, which makes upkeep less intrusive. Regular reapplication every few years, guided by wear patterns, keeps floors looking sharp and minimizes the need for complete refinishing. For tiling, sealing the grout lines annually with a penetrating sealer prevents staining and water ingress, maintaining both aesthetic and structural integrity.
Scaling Up and Future-Proofing Your Floors
Looking ahead, I believe advancements in automated maintenance tools will revolutionize floor care. Robotic floor cleaners embedded with smart sensors could soon monitor wear and trigger specific cleaning or touch-up routines—imagine a Roomba designed solely for hardwood and tile surfaces, equipped with moisture sensors and self-replenishing cleaning solutions. Meanwhile, software that tracks maintenance schedules and suggests proactive interventions can help homeowners extend the life of their flooring investments. Combining these tools with proper installation and leveling techniques, as outlined in this guide, sets the stage for floors that truly last a lifetime.
How do I maintain hardwood and tile floors over time?
The key lies in regular inspections using tools like moisture meters, combined with consistent cleaning using equipment tailored to your floor type. For hardwood, dust mops and mild cleaners are essential, while tiles benefit from grout sealing and gentle scrubbing. Consider investing in a quality buffer or floor polisher for periodic buffing—this can refresh finishes without full refinishing. As I continuously refine my maintenance routine with these tools, I’ve found that my floors not only look better longer but also resist wear more effectively. Ready to upgrade your floor care? Try using a moisture meter before your next cleaning session to detect early signs of moisture issues and address them proactively.
3 Hard-Won Truths I Wish I Knew Sooner About Hardwood Floors and Tile
• The first time I used chemical strippers without proper ventilation, I realized that shortcuts could cause long-term damage—patience and proper techniques always pay off. • I learned the importance of moisture testing before installation; overlooking this step led to warping that could have been prevented with a simple moisture meter, like the Protimeter Surveymaster. • Trusting generic advice on finishing was my mistake; I discovered that selecting the right finish tailored to my environment made a huge difference in durability and shine. • Over time, I understood that investing in quality tools, from microfiber mops to lasers, saved me countless hours and frustrations, turning a challenging project into a rewarding experience.