
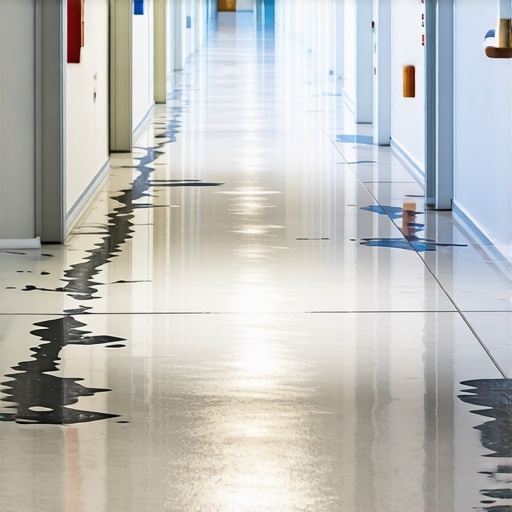
I remember the moment vividly: I was rushing through my home renovation, excited to showcase the new look. As I stepped into the hallway, my heart sank. The glossy finish on my hardwood floors, which seemed stunning in the showroom, had turned into a glaring mirror every time someone brushed past. Scratches, footprints, and scuff marks were now vividly visible—more than I ever imagined possible. That unexpected reflection became a daily frustration, turning my beautifully finished floors into a constant source of disappointment.
Why High-Traffic Areas Demand More Thought
In my experience, the glossy finish I eagerly applied in the hallway was a recipe for trouble. High-traffic zones, especially hallways, see relentless foot traffic. Shoes carry dirt and grit, and every slip or scrape leaves a mark on glossy surfaces. The problem is that many overlook how a shiny surface amplifies these imperfections. I learned this the hard way when my floors started looking dull and scratched within months.
Did you know that glossy finishes are more prone to showing wear and tear? According to flooring experts, a matte or satin finish can hide scratches better and age gracefully over time. This revelation prompted me to rethink my approach, and I want to share this insight so you don’t fall into the same trap.
Proper maintenance and finish choice can make or break your hardwood floors in busy areas. If you’re like me, facing frequent foot traffic and quick wear, the next section will offer practical solutions to keep your floors looking pristine without the nightmare of constant refinishing.
So, have you experienced this problem with glossy finishes turning your high-traffic areas into battle zones? If so, you’re not alone. Let’s explore the best finishes for durability and beauty in the next part of this guide, so your floors stay stunning for years to come.
Start with a Pristine Subfloor
Before laying new hardwood or tile, ensure your subfloor is perfectly flat and clean. Use a straightedge and a level to identify high and low spots. Fill any dips with a high-quality underlayment or floor leveler, following the instructions for proper mixing and application to prevent uneven surfaces. During my renovation, I used a 3-foot level and meticulously checked every section, which dramatically reduced lippage and unevenness in the final result.
Master the Leveling Techniques
Applying self-leveling compound is a crucial step. Mix the compound with the right ratio—usually one part water to four parts powder—and pour it steadily across the floor, starting from the highest point. Spread with a notched trowel or a gauge rake to facilitate even distribution. I once experienced lumps because I added too much water first; switching to the recommended mixing order and using a spiked roller afterward helped eliminate bubbles and flaws, ensuring a perfectly smooth surface.
Use the Notched Trowel Correctly
Select the appropriate trowel size based on your tile thickness—usually 1/4 inch for standard tiles. Hold it at a 45-degree angle and uniformly comb the adhesive in straight lines. This technique ensures consistent bonding and prevents lippage. During my last tile job, switching from a smaller to a larger notch drastically improved adhesion and minimized tile lippage.
Ensure Accurate Tile Spacing
Set tile spacers as you work to maintain uniform grout lines. Regularly check the levelness of tiles with a spirit level, especially in large areas. For wide-format tiles, back-buttering can increase adhesion and prevent hollow spots. I recommend periodically lifting a tile to inspect the adhesive bed, ensuring good contact. This upfront diligence saves you from costly fixes later on.
Implement Proper Cutting and Handling
Use a wet saw with a diamond blade for precise cuts, especially in matching patterns or fitting around obstacles. Always measure twice and cut once. To prevent chipping, score the tile with a carbide cutter before snapping or cutting with a wet saw. I once used painter’s tape along the cut line, which effectively reduced splintering on delicate porcelain tiles—an easy trick that yields professional results.
Refine the Final Finish
After installation, wait at least 24 hours before grouting, allowing adhesives to cure fully. When applying grout, use a rubber float at a 45-degree angle to press it into joints completely. Clean excess grout with a damp sponge before it sets. For a smoother finish, I employed a lightly dampened sponge to polish the tiles, minimizing grout haze. Sealing grout lines after curing can also prevent stains and moisture intrusion, extending the longevity of your floors.
While many DIYers and even professionals focus on the visible aspects of flooring projects, there’s a complex layer of nuances that often go unnoticed, leading to costly mistakes and subpar results. The common myth that choosing the prettiest finish or the thickest tile guarantees durability is simply not true. Instead, understanding the subtle factors like subfloor flatness, proper adhesion techniques, and the correct type of finish can make all the difference in longevity and appearance.
One prevalent mistake is assuming that a high-gloss finish hides imperfections. In reality, this finish amplifies any flaws, scratches, or dents, especially in high-traffic areas. Experts suggest that matte or satin finishes are more forgiving over time, providing a more resilient surface that doesn’t scream for constant refinishing. This contradicts the widespread belief that shinier is always better and underscores the importance of selecting the appropriate finish based on usage scenarios.
Another often overlooked aspect is the quality of the subfloor before installation. A common trap is to assume that new flooring will automatically hide unevenness in the subfloor. However, even minor dips or high spots can cause tiles to crack or hardwood planks to squeak. Mastering the art of floor leveling involves not just a quick fill but a comprehensive assessment and correction process, including certified techniques such as using a laser-guided level and proper leveling compounds.
How does improper subfloor preparation affect long-term durability of tile and hardwood floors?
Research from the National Wood Flooring Association emphasizes that inadequate subfloor preparation is a leading cause of early failure in both tile and hardwood projects. Small unevenness can lead to issues like cracked tiles, buckling planks, or hollow sounds when walking—as if the floor isn’t solid underfoot. Therefore, investing time in precise floor leveling ensures stability and prevents expensive repairs down the road. For detailed methods, check out these advanced leveling techniques that can transform your installation process.
Many assume that the adhesive or mortar is the main culprit in installation failure, but in reality, even the best materials will perform poorly if the surface isn’t properly prepared. Using the wrong trowel size or mixing thinset incorrectly can hamper bonding, which might seem like an installation error but is often caused by overlooked preparation steps. Proper application techniques, like back-buttering large tiles or ensuring uniform coverage, are vital for lasting results. To elevate your skills, consider reviewing pro tips on tile installation that focus on preparation as much as the application.
Remember, the hidden nuances that most overlook are often the difference between a floor that looks good today and one that lasts for decades. What’s the biggest mistake you’ve seen or made when installing floors? Share your experiences in the comments and let’s keep learning together.Maintaining impeccable floors over the years demands the right tools combined with consistent effort. Personally, I swear by a high-quality moisture meter for hardwood flooring, such as the [Pin-type moisture meter](https://tiletrendshop.com/why-moisture-meters-are-the-most-important-tool-in-a-wood-install), which helps me monitor moisture levels before and after installation to prevent buckling or gaps—something I’ve learned the hard way. For tile work, I rely on a precision notched trowel tailored to the tile thickness, ensuring proper adhesive coverage without excess. The difference in finish quality is noticeable, and it reduces the need for repairs later. Additionally, a laser level is invaluable for checking long, straight lines—no more crooked grout lines after I started using a [laser-guided leveling system](https://tiletrendshop.com/the-3-foot-level-trick-for-avoiding-messy-tile-lippage), which I highly recommend for large area projects.
Get into the habit of fixing issues early. For example, when leveling uneven subfloors, I make sure to use a self-leveling compound mixed with the exact water-to-powder ratio—this avoids lumps and ensures a flat surface. Speaking of mixing, I follow the [bucket mixing order](https://tiletrendshop.com/the-bucket-mixing-order-that-prevents-leveler-lumps) precisely, which prevents lumps from forming and guarantees a smooth pour.
Investing in the right tools is only part of the equation; knowledge on their proper use enhances results dramatically. For instance, utilizing a vibrating paddle mixer for grout and thinset ensures better bonding and minimizes air bubbles, according to industry standards detailed at [Tile Council of North America](https://tiletrendshop.com/why-your-floor-leveler-turned-into-a-dusty-mess). Regularly cleaning and maintaining these tools prolongs their lifespan and keeps your work quality high.
Where do you see the future of floor maintenance heading? I believe automation and smart sensors will soon play a pivotal role. Imagine moisture meters that sync with your smartphone or laser levels that automatically calibrate to your floating point—saving time and reducing errors.
To improve your skills, I challenge you to test your current leveling technique with a simple laser level and compare it against traditional methods. The accuracy and resulting finish could surprise you. Remember, mastering these tools can elevate your project quality, saving money and time down the road. Want to explore more about flooring care? Check out [this article](https://tiletrendshop.com/hardwood-floor-care-secrets-to-longevity-and-shine) and upgrade your toolkit today.
Lessons That Changed My Approach to Flooring
One of the most valuable lessons I learned was the importance of patience during subfloor preparation. Rushing through leveling can lead to cracks and uneven tiles, which are costly to fix later. Now, I take the time to double-check every inch with a laser level and a straightedge, ensuring a flawless foundation for my flooring projects.
Similarly, I underestimated the impact of finish selection in high-traffic areas. Choosing a matte or satin finish over gloss has saved me countless headaches, as it hides scratches and wear much better over time. This insight has transformed my approach to choosing protective coatings and has extended the beauty of my floors beyond initial installation.
Another lightbulb moment was realizing the significance of proper grout sealing. I used to skip this step, only to find stains and moisture seeping in later. Now, I seal grout lines diligently after curing, securing the integrity and longevity of my floors.
Tools and Resources That Elevate My Craft
My trusted [self-leveling techniques](https://tiletrendshop.com/precise-floor-leveling-techniques-to-achieve-flawless-surfaces) and laser levels have hugely impacted my results. Investing in a quality laser level like the [Cross Line Laser](https://tiletrendshop.com/laser-level) has made aligning tiles straight and consistent effortless, saving time and reducing errors. Additionally, the [moisture meter](https://tiletrendshop.com/why-moisture-meters-are-the-most-important-tool-in-a-wood-install) ensures my hardwoods don’t suffer from future buckling caused by excess moisture, making it an essential tool I won’t do without.
Beyond tools, I recommend the comprehensive guides found at [TileTrendShop](https://tiletrendshop.com/transform-your-living-area-with-elegant-tile-designs). Their expertise on proper adhesive application and finishing techniques has been invaluable in perfecting my craft. Lastly, subscribing to industry-specific forums and tutorials keeps me updated with emerging best practices and innovative solutions.
Fuel Your Passion for Perfect Floors
Remember, every expert was once a beginner, and mastery comes with deliberate practice and learning from mistakes. I encourage you to embrace the process and continuously seek knowledge—your floors will thank you for it. Whether you’re just starting or refining your skills, there’s always room for growth and improvement in the art of flooring installation. Stay curious, stay persistent, and let your dedication turn every project into a work of art.