
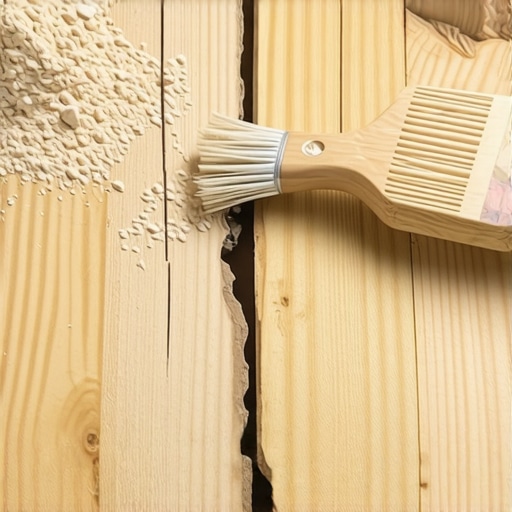
Ever stepped onto a new hardwood floor and suddenly felt a tiny, annoying bump under your feet? Or maybe you’re in the middle of a renovation, and those uneven, unsightly gaps are starting to drive you nuts? I remember my own lightbulb moment vividly — I was knee-deep in sanding my old floors when a small crater appeared out of nowhere, threatening to ruin my entire project. It was frustrating to say the least. That’s when I discovered the magic of mixing sawdust and wood glue — a simple, cost-effective solution that transformed my approach to floor repairs.
Filling the Gaps with Personal Touch and Practicality
The truth is, most DIYers and even seasoned pros underestimate the power of a good filler. When I first tried to fix those tiny cracks and holes, I used standard commercial fillers — but they never matched the color or texture of my flooring. Plus, they cracked or crumbled over time. That’s when I learned that a custom mix of sawdust and wood glue can create a filler that not only blends seamlessly but also bonds exceptionally well with the existing wood.
By carefully collecting sawdust from my sanding process and mixing it with a bit of wood glue, I created a paste that’s both easy to work with and remarkably durable. The best part? It’s tailored to match the grain, color, and texture of my wood, making repairs practically invisible. This approach has saved me countless hours and dollars, and I’m confident it can do the same for you.
But wait — before you jump into the project, let’s address the elephant in the room. You might be skeptical about whether this homemade filler really measures up to professional products. Well, I understand the hesitation. During my first attempts, I made the mistake of not letting the mixture dry completely or not choosing the right sawdust, which resulted in uneven repairs. Trust me, I’ve been there, and learning from those mistakes made all the difference.
Gather Your Materials and Prepare the Workspace
Start by collecting clean, dry sawdust from your sanding process—preferably matching the wood species you’re repairing—then gather high-quality wood glue. Clear the area of furniture and debris, ensuring a dust-free zone. Wear a mask and gloves to keep your environment clean and safe. To prepare the surface, lightly sand around the damaged area to open the grain, which helps the filler bond effectively.
Mixing the Perfect Filler Consistency
In a small container, combine equal parts sawdust and wood glue. Use a craft stick or putty knife to stir the mixture thoroughly until it forms a smooth, peanut butter-like paste. I recall experimenting with ratios—initially too runny or too stiff—until I achieved a consistency that spread easily but didn’t drip or shrink as it dried. The key is a thick but workable paste that adheres well and blends seamlessly with the wood grain.
Applying the Filler with Precision
Use a putty knife or small spatula to press the mixture firmly into the cracks or holes. Overfill slightly to account for slight shrinkage as it dries. For a more accurate color match, add a touch of colored wood stain or dye into the mixture before application. When I repaired a deep gouge in my hardwood floor, I applied the filler carefully, pressing it into the bottom of the crack, then scraped off excess to leave a flush surface. This prevents sanding extra material later and helps achieve a smooth finish.
Achieve the Surface Finish and Cure Properly
Allow the filler to dry completely—typically 1 to 2 hours, but check manufacturer instructions. If working on a large area, consider a second application to fill any remaining gaps. Once hardened, lightly sand with fine-grit sandpaper until flush with the surrounding floor. I recommend testing the sanding process on a hidden section first to avoid over-sanding, which can smooth out the grain and make the repair obvious.
Polishing the Repair and Final Touches
After sanding, clean the dust with a vacuum or tack cloth. If needed, apply a matching stain or clear finish to blend the repaired area with the rest of the floor. When I completed my first repair, a final coat of polyurethane made the patch nearly invisible. Remember, patience is critical here—rushing the drying or sanding phases can lead to uneven results. For more detailed tips on flooring techniques, visit flooring installation tips.
Many DIY enthusiasts and even seasoned professionals often fall prey to common misconceptions about floor leveling and installation, leading to future headaches. One widespread myth is that a perfectly flat subfloor guarantees a perfect finish. In reality, subtle imperfections—like minor high and low spots—can cause lippage or uneven tile surfaces if not addressed properly. Experts emphasize the importance of the “straight edge test”—a technique highlighted in our comprehensive guide—which reveals these hidden dips that standard leveling might miss, ensuring a truly flawless result.
Why Do These Small Bumps Really Matter? The Advanced Perspective
Often, many assume that minor irregularities are inconsequential. However, research from industry leaders shows that even a 1/8-inch variation can compromise the integrity of tiles and hardwood, causing cracks or creaking over time. These subtle flaws are particularly problematic with large-format tiles or wide plank hardwoods, where consistency is crucial. Overlooking them can lead to costly fixes later, such as re-grouting or replacing damaged flooring. It’s a misconception that quick fixes like patching or ignoring these imperfections will suffice, but in my experience, employing precise leveling techniques makes all the difference.
Another nuance is the choice of leveling compound. Not all products are created equal; some contain additives that prevent shrinkage or cracking, vital for maintaining a smooth surface. Skipping proper curing time or misapplying thinset can also trap air bubbles, leading to voids that compromise durability. This is why the stage of mixing, application, and drying must be meticulously managed, as detailed in our expert strategies.
Beware the trap of underestimating the importance of environmental conditions. Excess moisture, temperature fluctuations, or even the timing of installation relative to seasonal changes can significantly impact how materials contract or expand. For instance, hardwood needs to acclimate properly—usually for a minimum of 72 hours—before installation, or gaps and buckling might appear later. Neglecting this step is a common mistake that many overlook.
Let’s not forget the details of substrate preparation. Properly cleaning and priming the surface ensures optimal adhesion, reducing the risk of delamination or uneven wear. Many skip this vital step, thinking surface prep is unnecessary for small jobs. However, subpar preparation can turn a flawless-looking floor into a maintenance nightmare.
In sum, mastering subtle nuances—like precise subfloor assessment, correct material choices, and understanding environmental influences—is what separates amateurish attempts from professional results. Have you ever fallen into this trap? Let me know in the comments! For a thorough understanding, I recommend reviewing our ultimate guide on floor leveling to elevate your project.Even with perfect installation techniques, routine maintenance is vital to keep your flooring in top shape. Investing in the right tools can make ongoing upkeep more manageable and ensure your floors retain their beauty and durability over time. For hardwood floors, a high-quality microfiber mop paired with a pH-neutral cleaner helps prevent build-up and scratching, while a soft-bristle vacuum can remove debris without damaging the finish. I personally favor a detailed floor mop with adjustable length and a microfiber pad—it’s gentle yet effective at trapping dust and dirt without abrasives. When dealing with tiles, a grout brush and a steam cleaner come in handy; the brush targets stubborn grime in the grout lines, while steam effectively lifts dirt without harsh chemicals. To keep the grout looking fresh, I recommend periodically applying a grout sealer—sealed grout resists stains and makes cleaning much easier, extending the lifespan of your tile work. As for equipment, a laser level not only assists during installation but also serves as a handy reference point for checking floor flatness in maintenance checks, helping to spot uneven areas early before they become problematic. Looking ahead, automation and smart sensors are expected to play a bigger role in floor care, alerting homeowners to humidity changes or wear patterns that need attention. Incorporating these tools into your routine can prevent small issues from snowballing into costly repairs.
How do I maintain my flooring over the years?
Consistent, gentle cleaning, prompt attention to spills, and periodic inspections are key. Re-sealing hardwoods every few years or as directions specify keeps moisture out and enhances shine, while tile grout sealing prevents staining and cracking. For long-term projects, consider enlisting the help of professional tools like electronic moisture meters or floor scanners to monitor subfloor health—these help catch problems early and guide effective repairs. Remember, a proactive approach paired with reliable tools prolongs your floors’ appearance and functional life. Want to boost your maintenance game? Try using a laser level regularly to identify and address subtle unevenness, preventing issues before they escalate. Stay tuned to our expert installation tips for more insights on sustaining pristine floors.
Beyond the Surface: My Greatest Floor Fixing Revelations
One of the toughest lessons I learned was that patience truly pays off. Rushing the drying process or skimping on surface prep might seem minor but can turn a simple repair into a long-term problem. I also discovered that matching the sawdust type to your wood makes a significant difference—using sawdust from the same species ensures a seamless blend that’s almost invisible. Lastly, I realized that embracing a DIY mindset opens doors to affordable, personalized repairs—once you understand the nuances, it becomes both empowering and rewarding.
Tools and Tips That Make a Difference
For anyone serious about floor repairs, I recommend having a high-quality putty knife, fine-grit sandpaper, and a moisture meter. These tools help ensure your repairs are precise and durable. One resource I trust is the comprehensive guide on flooring installation tips—it offers insights that complement the DIY approach. Also, my personal favorite is a good-quality microfiber cloth for cleaning, which helps achieve a smooth, flawless finish.
Sealing the Deal and Keeping Floors Beautiful
Maintenance is vital for longevity. Regularly inspecting for early signs of wear, reapplying sealant, and gentle cleaning can extend the life of your floors immensely. I’ve found that using a laser level to check for subtle dips or unevenness before they escalate is a game-changer. And remember, small details—like furniture pads and careful cleaning routines—can save you money and time in the long run. To stay ahead in floor care, keep an eye on updates from trusted sources like our hardwood floor care secrets page, which offers frequent tips to preserve that just-installed look.