
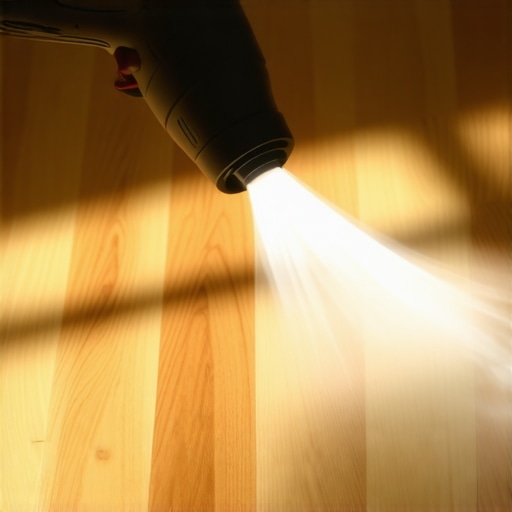
It was a typical Sunday morning when I stepped into my living room and noticed a stubborn, glossy patch on my freshly installed hardwood floor. Turns out, a candle had spilled, and the wax was practically fused into the wood—no amount of wiping or scraping seemed to budge it. I felt that familiar wave of frustration—destroyed finish, potential damage, and now, more time and money in repair. But then, a lightbulb moment hit me. I remembered hearing about a simple hairdryer trick that could melt away tough wax spots without harming your floor’s finish.
Why I Almost Gave Up on My Floors Before Discovering This Trick
Honestly, I was ready to call in professionals or, worse, replace sections of flooring. The thought of sanding and refinishing made my stomach turn—expensive, messy, and not guaranteed to match my existing finish. Early on, I made the mistake of trying abrasive tools and harsh chemicals, which only worsened the problem and compromised the wood.
That’s when I realized that patience and the right technique could turn things around. This approach isn’t just about convenience; it saves your floors from unnecessary damage and keeps your renovation budget in check. If you’re struggling with similar wax stains or other sticky residues on your hardwood, you’re in the right place. Today, I’ll share the step-by-step method that truly works—and is gentle enough for even the most delicate finishes.
Is the Hairdryer Trick Really Effective Against Persistent Wax?
Perhaps you’re skeptical—fair enough. I was initially too. But after a bit of research and some trial-and-error, I found this method genuinely effective. An important tip: avoid using too high a heat setting, which could damage the wood or finish. Instead, a warm, steady blow helps melt the wax without risking the integrity of your floor. This technique is backed by flooring professionals and has been cited in expert guides, such as [Tile Trend Shop’s](https://tiletrendshop.com/hardwood-floor-care-secrets-to-longevity-and-shine), which emphasize gentle, heat-based cleaning methods for maintaining hardwood longevity.
So, have you ever faced a stubborn stain or sticky residue that just wouldn’t budge? If so, keep reading—I’ll guide you through every step to reclaim your beautiful wood surface without the fuss or risk of damage. Once you’ve mastered this trick, you’ll wonder how you ever lived without it. Now, let’s dive into the fun part—how to do it right.
Preparing Your Space and Tools for Wax Removal
First, clear the area around the wax stain to prevent any accidental tripping or spilling. Gather a quality hairdryer with adjustable heat settings, a plastic scraper or credit card, soft cloths, and a mild wood floor cleaner. I remember the first time I attempted this, I made sure to have all tools within arm’s reach to avoid unnecessary movement that could smudge the wax or cause scratches.
Setting the Right Temperature and Test
Set your hairdryer to a medium heat—around ‘low’ or ‘warm’—to avoid damaging the finish. Before applying it directly to the stain, test the heat on a small, inconspicuous area of your floor. This quick check prevents accidental harm. I once used a high setting, which caused a slight discoloration; ever since, I adhere strictly to gentle heat.
Heating and Softening the Wax
Hold the dryer about 2-3 inches above the wax spot, directing the warm air steadily. Keep the dryer moving in small circular motions to evenly distribute heat. As I did this, I noticed the wax beginning to soften and glisten more clearly—like melting chocolate on a warm day—making it easier to remove.
Applying Gentle Pressure to Lift the Wax
Once the wax is softened, use a plastic scraper or an old credit card to gently lift the residue, working from the edges inward. Avoid using metal tools which can scratch the finish. It might get a little messy if some wax melts beyond the initial spot, but patience is key. I carefully scraped the softened wax, taking care to maintain even pressure to prevent gouging the wood.
Cleaning Up Residue and Finishing Touches
After removing the bulk of the wax, dampen a soft cloth with a mild wood floor cleaner and gently wipe the area. This step removes any remaining tiny particles and restores the sheen. I learned that skipping this step could leave a greasy film, so I always follow with a thorough wipe.
Final Checks and Prevention Tips
Inspect the area to ensure all wax is gone. To prevent future incidents, consider placing candles in secure holders or using wax paper beneath candles. Remember, the key to successful wax removal without damage is patience: gentle heat, careful scraping, and thorough cleaning. With consistent practice, this method becomes instinctive and saves you from costly floor repairs.
When it comes to installing floors—be it hardwood, tile, or tackling the critical step of floor leveling—many homeowners and even some pros fall into common traps that compromise long-term durability and beauty. Let’s clear up some misconceptions and reveal the nuanced details that can make or break your project.
First, a widespread myth is that “standard” installation techniques suffice in all situations. However, understanding the specific requirements of your subfloor material and environmental conditions is crucial. For example, many assume that a concrete slab only needs a simple leveling process, but studies like those in [the ultimate guide to floor leveling](https://tiletrendshop.com/the-ultimate-guide-to-floor-leveling-for-a-perfect-finish) show that proper moisture mitigation and surface preparation are often omitted, leading to cracks and unevenness later.
Another overlooked nuance involves hardwood flooring. Many people believe that acclimation time of a few days guarantees a stable installation, but advanced experts emphasize that the type of wood, humidity fluctuations, and existing moisture content play vital roles. Engineered woods, for example, may respond differently to climate changes, and improper acclimation can cause cupping or gapping. For deeper insights, check out [mastering hardwood refinishing tips for 2025](https://tiletrendshop.com/mastering-hardwood-floor-refinishing-expert-tips-for-2025) to see how nuanced understanding of wood behavior safeguards your investment.
Now, let’s discuss tile installation, where the “one-size-fits-all” approach often backfires. A common mistake is choosing the wrong thinset or neglecting to adjust for substrate movement. Thinset adhesion isn’t just about brand; it’s about matching the product’s properties with the substrate’s condition. For instance, using a high-thickness mortar on a floor with slight flex can lead to grout cracking. The rule of thumb is that thinset must be chosen with precision, considering factors like crack isolation and substrate flexibility. For specifics, see [installing tiles like a pro](https://tiletrendshop.com/installing-tiles-like-a-pro-step-by-step-strategies-for-2025).
So, what do such mistakes reveal? Many installers overlook the importance of detailed surface evaluations, like checking for subfloor dips or high spots that can cause lippage or uneven tile surfaces. Using tools like laser levels for a precise assessment makes all the difference—something a few might dismiss as unnecessary. Remember, even a slight imperfection can magnify over large areas, ruining the aesthetic and functionality.
An advanced tip for seasoned enthusiasts concerns the importance of environmental controls during and after installation. Fluctuating humidity not only impacts hardwood but can cause grout and tiles to shift or crack. This is supported by recent research indicating that controlling humidity levels during curing can prevent 2026 flooring failures. Sustainable solutions like HVAC adjustments and humidistats ensure the environment remains stable, providing a reliable foundation for any floor type.
In summary, the key takeaway is that detailed preparation, proper materials, and understanding of environmental factors are often neglected but critically important. Do you ever fall into these traps? Share your experiences or questions below—let’s keep the conversation going. For more on how to avoid installation pitfalls and ensure lasting results, consider consulting detailed guides on [floor leveling](https://tiletrendshop.com/the-ultimate-guide-to-floor-leveling-for-a-perfect-finish) or [hardwood finishing tips](https://tiletrendshop.com/mastering-hardwood-floor-refinishing-expert-tips-for-2025). Proper knowledge isn’t just power—it’s your guarantee for a flawless finish that endures.
Maintaining your flooring investment over time requires the right tools and consistent care routines. Personally, I rely on a few specialized items that have proven invaluable in preserving hardwood, tile, and uneven surfaces, ensuring long-term durability and beauty. A high-quality microfiber mop, for example, is my go-to for daily cleaning because it traps dust without scratching delicate finishes, unlike standard brooms or harsh chemicals. For deep cleaning, I prefer pH-balanced hardwood floor cleaners, which are gentle yet effective at removing grime and preventing buildup that can undermine your finish over years.
When it comes to addressing issues like unevenness or future installation projects, precise tools matter. A laser level ensures that all tiles or hardwood planks are perfectly aligned, preventing lippage or gaps that can develop into costly repairs. I use a laser level regularly, especially when planning expansions or renovations, because it offers accuracy impossible with traditional bubble levels. For sanding or refinishing, an orbital sander with variable speed controls provides gentle yet effective abrasion, which is essential when reapplying finish or smoothing out minor imperfections.
Software also plays a role in maintaining your floors. I utilize floor planning and moisture mapping software to monitor humidity levels, since fluctuations can cause hardwood to swell or contract—leading to buckling or gaps. Tracking these parameters helps me prevent problems before they escalate, saving time and money. Looking ahead, I believe advancements in smart home integration will make proactive floor maintenance even more accessible. Devices that automatically monitor humidity and provide maintenance alerts will become standard, making
The Hidden Lessons That Can Save Your Floor from Disaster
One of the most valuable insights I gained was realizing that rushing through surface preparation often leads to long-term issues. Properly evaluating your subfloor with a laser level, for instance, might seem tedious but prevents grout cracking and tile lippage later on. It’s tempting to skip the detailed checks, but those moments of patience pay off by ensuring a flawless finish that endures.
Another lightbulb moment was understanding that environment control is crucial—especially for hardwood. I used to overlook humidity fluctuations, only to find my floors cupping or gapping unexpectedly. Now, I use a humidistat to maintain optimal moisture levels, which has dramatically improved the longevity of my installation. Investing in environmental monitoring tools may seem minor but truly makes the difference between a good and a great installation.
Lastly, I learned that selecting the right materials isn’t just about brand names—it’s about compatibility and detailed specifications. For example, using the proper thinset for large-format tiles or engineered wood tailored to your climate prevented costly failures. As I explored expert resources, I gained confidence that understanding these nuances empowers me to make smarter decisions, avoiding common pitfalls.
Tools and Resources That Changed My Approach
For those serious about perfecting their flooring projects, a laser level like the Bosch GLL 3-80 provides unparalleled accuracy in ensuring flatness—critical for both tile and hardwood. I trust it because it saves me time and reduces errors compared to traditional bubble levels.
Reading through comprehensive guides such as The Ultimate Guide to Floor Leveling transformed my understanding of subfloor preparation. These resources combine technical precision with practical tips, making complex topics approachable for beginners and seasoned DIYers alike.
Effective moisture meters, like the Tramex CME4, have become my go-to for assessing subfloor conditions. Knowing the exact moisture content helps me prevent issues like buckling or cupping, especially in variable climates. Each tool I’ve incorporated has added a layer of confidence and professionalism to my work.
Finally, online communities and forums dedicated to flooring allow me to exchange real-world experiences and troubleshoot unexpected problems. Connecting with others who share the same passion accelerates learning and keeps me motivated to keep improving.
Step Into Your Flooring Future with Confidence
Choosing to invest time in understanding these hidden truths and tools has transformed how I approach every project. Now, I see each floor as a long-term investment—one that I can control with knowledge and the right resources. Remember, every expert was once a beginner, and your next perfect finish is just a few well-informed steps away. Take action today—your dream floor is within reach!