
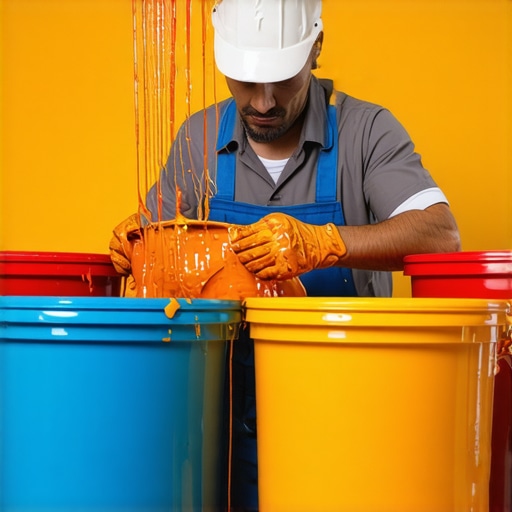
Imagine spending hours pouring self-leveling concrete only to find it has lumps, swirls, or uneven patches the next day. I remember my first major DIY flooring project — confidently mixing the leveling compound, only to watch it set into stubborn clumps and bubbles. That lightbulb moment hit me like a ton of bricks: the way I was adding ingredients was sabotaging my entire effort. If you’ve ever been down this road, you know how frustrating—and costly—that can be.
Why Your Mixing Technique Can Make or Break Your Floor
Getting a smooth, level surface isn’t just about the right materials; it’s also about how you prepare and mix your leveling compounds. The order in which you add water, powder, or other components can lead to lumps, bubbles, or poor adhesion — issues that might seem minor but can ruin your entire flooring job. I’ve learned through trial, error, and plenty of messes that a proper mixing order is crucial for a flawless finish. Today, I’m going to share with you a proven sequence that prevents lumps and ensures a smooth pour every single time. Whether you’re leveling a concrete slab or restoring an existing floor, mastering this technique will save you headaches and help you achieve professional results.
Is the Mixing Order Really That Important?
Now, I know some skeptics might be thinking, “Is it really that critical?” Well, early on, I made the mistake of dumping the powder directly into the water — thinking I could save time. That only led to clumps and leftover dry patches, forcing me to redo the work and waste time. It might seem like a small detail, but proper sequencing can be the difference between a smooth, bondable surface and a lumpy nightmare. For a deeper dive into the science of floor leveling, check out this comprehensive guide that explains how mastering leveling techniques boosts durability and appearance.
So, are you ready to learn the step-by-step process that ensures a seamless pour? Stick around, because what I’m about to share will radically change the way you prepare your mixes — and the outcome of your project.
Prepare Your Materials and Workspace
Before mixing your self-leveling compound, ensure all tools and materials are ready — trowels, mixing buckets, a drill with a paddle attachment, and protective gear. Clear the area of debris and dust to prevent contaminants from affecting adhesion and finish quality. Think of your workspace as a surgical theatre; precision and cleanliness set the stage for success.
Mix the Self-Leveling Compound Correctly
Start with the Right Water-to-Powder Ratio
Using the exact ratio specified by the manufacturer is vital. For example, I once added 4.5 liters of water to 25 kg of powder, as recommended, but initially, I thought eyeballing it would save time. The result was a runny, bubbly mix that didn’t level properly. The key is always to adhere strictly to manufacturer instructions. This ensures the compound’s viscosity allows it to flow smoothly without separation or bubbles.
Add Water First, Then Powder
Pour the measured water into your mixing bucket first. Slowly sprinkle the powder into the water while stirring continuously. Imagine pouring cream into coffee slowly to prevent lumps; this gradual approach helps maintain a lump-free, homogeneous mixture. When I tried dumping the powder all at once, clumps formed, leading to uneven surfaces after curing. Steady stirring as you add powder helps prevent this.
Mix Thoroughly to Achieve Homogeneity
Use a paddle attachment on a drill to mix at a low speed for about 2-3 minutes. Scrape the sides and bottom of the bucket frequently to incorporate all material. The goal is a smooth, pourable consistency without lumps or air bubbles. I once neglected to scrape the sides and ended up with pockets of unmixed powder that caused weak spots in my floor. Consistent, thorough mixing is your best defense against this.
Eliminate Bubbles and Ensure Flawless Flow
Use a Spike Roller
Once poured, pass a spike roller over the surface to burst trapped air bubbles and help the compound flow into tiny crevices. Holding the roller lightly and working methodically can significantly improve the finish. I learned this during a weekend project; after rolling, the surface was noticeably smoother, and subsequent tile installation went much more seamlessly. Eliminating bubbles at this stage prevents imperfections from appearing after curing.
Control Pouring Technique
Pour the mix in a steady, sweeping motion from one corner of the room, allowing it to self-level naturally. Avoid pouring all at once or in uneven streams, which can create thin spots or pooling. Think of pouring syrup on a pancake; steady, continuous flow yields the best spread. During my first attempt, rushing the pour caused uneven thickness, forcing me to redo parts of the floor.
Let It Set and Cure Properly
Allow the compound to cure undisturbed for the period specified by the manufacturer—typically 24 to 48 hours. Keep the area free from foot traffic and drafts that could disturb the surface. I once ignored this advice and stepped onto a freshly poured section too early, leaving footprints that marred the smooth finish. Patience here ensures a perfectly flat, durable foundation suitable for tile or hardwood installation.
When it comes to **flooring installation**, many DIY enthusiasts operate under misconceptions that can sabotage their efforts. One prevalent myth is that a perfectly level subfloor isn’t crucial for hardwood, tile, or laminate floors. In reality, even minor unevenness can lead to gaps, squeaks, or cracking over time. Experts emphasize that meticulous subfloor prep, including precise leveling, is essential for long-lasting results. For advanced projects, understanding the nuances of subfloor moisture content and material compatibility can make a significant difference. For instance, engineered hardwoods are sensitive to humidity changes, and failing to address this can cause bowing or gaps, as highlighted in this comprehensive guide.
Another widespread misconception is that all adhesives or thinsets are interchangeable. However, choosing the wrong product without considering the specific tile or substrate can result in lippage or tile cracking. Professional installers often select adhesives based on factors like material weight, porosity, and load-bearing requirements, which is a step many amateurs overlook. A common mistake is using standard thinset for large-format tiles, which require specialized formulations to facilitate self-leveling and reduce lippage. Learning about these advanced material properties can prevent costly re-dos.
Have you ever fallen into this trap? Let me know in the comments.
Moreover, there’s a myth that surface prep isn’t critical if the visible surface looks good. What many forget is that dirt, oil, or debris trapped in the subfloor or underneath the tiles can compromise adhesion and durability. I’ve seen cases where ignoring proper cleaning and priming led to eventual grout failure or tile looseness. Paying attention to microscopic surface properties and employing proper cleaning routines are practices often overlooked but vital for achieving flawless results.
Advanced professionals also pay close attention to the sequence of installation steps. For example, installing flooring over a slab with residual moisture without proper curing or membrane use can cause warping or delamination. A detailed understanding of vapor barriers and moisture mitigation tactics — like the plastic sheet test — is a hidden nuance that separates good work from great.
The takeaway here is that beneath the common techniques lie critical details that, if neglected, can cost time and money. Elevating your knowledge beyond the basics involves understanding material science, substrate prep, and nuanced installation methods. Want to dive deeper? Check out this resource on precise leveling techniques and learn the advanced tricks that pros deploy for perfect finishes. Remember, mastering these nuances ensures your flooring will stand the test of time, looking as good years down the line as it did on installation.
Maintaining your freshly installed hardwood, tile, or levelled concrete floors requires precision tools and a strategic approach. Over time, even the most professionally completed floors can face wear and tear, but with the right maintenance practices and equipment, you can extend their lifespan significantly. One essential tool I rely on is a high-quality microfiber mop, which gently lifts dust without scratching delicate surfaces, complemented by PH-neutral cleaning solutions that preserve finishes over the years. For hardwood floors, I recommend investing in a floor buffer or machine—this allows for periodic polishing to restore shine and remove minor scratches without requiring a full refinish. For tile floors, a grout cleaning brush coupled with a steam cleaner can eradicate grime buildup efficiently, preventing staining and discoloration. Using draft-resistant sealants and applying protective pads under furniture are inexpensive but effective steps to prevent long-term damage. Prediction-wise, the advent of smart floor sensors that monitor moisture levels and structural integrity hints at a future where proactive maintenance will become standard, reducing costly repairs before they happen.
How do I maintain my flooring system over time?
Establishing a consistent routine with the right tools can make a world of difference. For instance, scheduling quarterly deep-cleanings with specialized equipment like steam cleaners or orbital buffers helps keep your floors in top shape. Additionally, monitoring humidity levels with digital hygrometers ensures engineered hardwoods and laminate floors don’t swell or shrink, preserving their structural integrity. Applying protective pads to furniture and using area rugs in high-traffic zones minimize scratches and wear. Furthermore, periodically inspecting grout lines and sealing them with the appropriate concrete or tile sealant prevents moisture intrusion, which is crucial for maintaining tile longevity, as detailed in our comprehensive guide on floor leveling. Implementing these maintenance routines with quality tools will ensure your flooring remains beautiful and durable for decades.
Managing long-term results and scaling your flooring projects
As your space evolves or your needs change, scaling your flooring solutions might be necessary. Start by assessing the integrity of existing installations—use a laser level or a straightedge to detect uneven areas. When expanding or replacing sections, matching materials and finishes precisely preserves uniformity, which can be challenging. For large-scale projects, professional-grade tools such as calibrated mortar mixers or digital moisture meters offer better accuracy and efficiency compared to DIY alternatives. Additionally, consider collaborating with specialists for complex tasks like subfloor reinforcement or moisture mitigation—this ensures that the foundation for your flooring remains solid and long-lasting. Embracing advanced tools and techniques now sets the stage for seamless upgrades in the future, and staying informed about new advancements like self-healing sealants or IoT moisture sensors will keep your flooring game ahead of the curve.
Small Details, Big Differences: Lessons I Didn’t Expect to Learn
- I once thought that the cheapest tools would do — until I realized precision matters. Upgrading to quality mixing paddles and laser levels dramatically improved my work’s consistency and longevity.
- The importance of patience in curing cannot be overstated. Rushing the drying process for faster results often led to cracks or uneven surfaces; slow, deliberate care pays off in durability.
- Clear documentation of every step helped me identify mistakes faster and refine my technique, saving both time and resources on future projects.
- Networking with seasoned professionals revealed that even small adjustments—like the angle of trowels or the speed of pour—have outsized impacts on final quality.
Tools and Resources That Transformed My Approach
- SmartLevel Laser Tool: This device offers unparalleled accuracy for leveling subfloors, making adjustments straightforward and saving me from costly rework.
- Book: “The Complete Guide to Floor Leveling”: A treasure trove of techniques and troubleshooting tips from industry experts—trust me, this changed my entire workflow.
- Precise Floor Leveling Techniques: An invaluable online resource with step-by-step strategies to ensure every project starts with a solid foundation.
- The Ultimate Guide to Floor Leveling: Deep dives into materials, methods, and common pitfalls—essential for pushing your skills further.
Believe in Your Next Move and Keep Going
Every floor I’ve leveled has taught me that mastery is a journey, not a destination. Embrace continuous learning, invest in quality tools, and take pride in the small victories. Your floors will thank you for it, standing strong and beautiful for years to come. Ready to tackle your next flooring project with confidence? Just remember—the right preparation and mindset will take you far.
What’s the biggest lesson you’ve learned when working on your floors? Share below—I’d love to hear your story!