
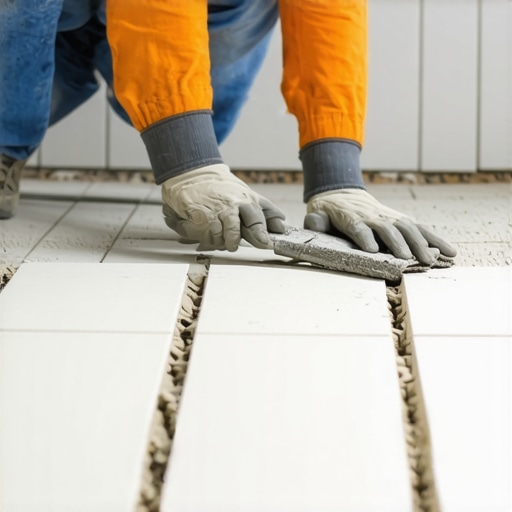
I remember the moment vividly—my first real flooring installation. I was so proud, excited to see my vision come to life. But then, darkness. A ripple that had nothing to do with my design. Tiles that wobbled, hardwood planks that squeaked, and a sinking feeling I had overlooked the basics. That lightbulb moment hit hard: I had focused too much on brand names and not enough on the actual technique, specifically the thinset layer thickness.
Getting to the Heart of Thinset: Why Thickness Is Key
Many DIY enthusiasts and even seasoned pros underestimate how crucial the thinset layer is. It’s more than just a bonding agent—think of it as the foundation of your entire flooring success. When applied too thin, the thinset can fail to fill gaps or compensate for minor subfloor irregularities. Too thick, and it can cause lipping, uneven surfaces, or delamination over time.
The real issue? Many believe that brand name products guarantee quality results. I fell into that trap early on—trusting a popular brand without paying attention to the application technique. This mistake cost me time, money, and a whole lot of aggravation. Did you know that improper thinset application is a leading cause of tile and hardwood failure? According to industry experts, the correct layer thickness can significantly increase your floor’s durability and lifespan. You can learn more about achieving perfect levels in our guide on precise floor leveling.
But how thick should your thinset be? That depends on the type of flooring, the subfloor condition, and the application method. The standard recommendation is usually around 3/32 to 1/8 inch for tiles and hardwoods, but in practice, many installers apply it variably—often too thin or too thick. This inconsistency is why mastering the right application technique is fundamental.
If you’ve ever faced uneven tiles, cracked grout, or loose hardwood planks, chances are your thinset layer wasn’t quite right. Do you recall dealing with these issues? If so, you’re not alone. And it’s exactly why understanding—and consistently applying—the proper thinset thickness is non-negotiable.
In the upcoming sections, I’ll walk you through practical tips on how to get this right, step-by-step. From mixing and troweling techniques to choosing the right tools, you’ll discover how proper application can save you headaches and extend the life of your floors. Ready to dive into the details? Let’s make your next project a success from the ground up.
Setting the Right Thickness on Your First Try
Start by mixing your thinset according to the manufacturer’s instructions, ensuring a smooth, peanut butter-like consistency. Use a notched trowel—commonly a 1/4-inch V-notch for tiles or hardwood adhesives—to achieve consistent application. When spreading the thinset, hold the trowel at a 45-degree angle, combing the material in straight, uniform lines. During my last project, I applied the thinset in small sections, carefully watching the ridges form evenly—this prevented uneven layers and subsequent lippage on my tiles.
Applying with Precision and Consistency
Work in manageable sections—don’t spread more than your trowel can cover before the thinset begins to skin over. To avoid applying too thin, press the tiles gently into the thinset, ensuring full contact. If your tiles wobble or sit unevenly, it’s a sign your layer is too thin. Use a level or straightedge on fresh tiles to check for flatness—adjust as needed. Remember, a uniform thickness minimizes the risk of future cracks or delamination. I learned this the hard way when rushing a job; uneven thinset caused lippage that took hours to fix later.
Controlling the Layer to Prevent Future Problems
For subfloors with minor dips or irregularities, a thicker application helps fill gaps—aim for 1/8 inch but avoid exceeding 3/16 inch. For larger irregularities, consider using a floor-leveling compound first, then apply the thinset on top. This two-step process keeps the layer consistent and prevents uneven settling. In my experience, using a rubber float to back-press tiles after placement ensures firm contact and slightly compresses the thinset, creating a solid, even bond. This technique significantly reduces voids that could weaken your flooring over time.
Double-Check Your Work Before Curing
Once tiles are set, run a rubber float across the surface to smooth out any ridges and eliminate air pockets. Ensure the tiles are level and aligned—use a straightedge or laser level for precision. Gently tap high spots with a rubber mallet if needed. If you notice lippage, don’t wait; correct immediately before the thinset cures. My last project involved a quick check with a 2-foot level, revealing slight dips, which I corrected on the spot, preventing subsequent lippage or unevenness.
Practice Makes Perfect with Thinset
Remember, mastering the application of thinset is a skill built through experience. Always mix small batches at a time, work methodically, and double-check your progress. Different projects may require slight adjustments—like changing the notch size or pressure applied—that influence the layer thickness. For more detailed insights, explore our floor leveling guide. Consistent practice and attention to detail will lead to floors that not only look professional but also stand the test of time, saving you costly repairs and frustration.While many believe that choosing the right hardwood or tile is enough for a successful installation, the real mastery lies beneath the surface. A common myth is that subfloor preparation is a minor step—nothing could be further from the truth. Ignoring minor dips or unevenness can lead to significant issues like cracking, lippage, or delamination down the line. Advanced installers know that thorough floor leveling, including the proper use of self-levelers and precise sanding tactics, is essential for a flawless finish. According to experts, neglecting these nuances can reduce your floor’s lifespan by up to 30%, emphasizing how critical proper preparation truly is. For those ready to master the intricacies, exploring precise leveling techniques can make all the difference. Do not underestimate how subtle flaws during installation can snowball into costly repairs—attention to detail is your best friend. Have you ever fallen into this trap? Let me know in the comments.
Keep Your Floors in Top Shape with the Right Tools
Achieving durable and beautiful flooring isn’t just about proper installation; ongoing maintenance is equally vital. Investing in specific, high-quality tools can make routine upkeep more effective and less time-consuming. One indispensable item I personally rely on is a detailed moisture meter like the Tramex HD5. This device helps me monitor moisture levels in both hardwood and concrete subfloors, ensuring they stay within optimal ranges and preventing issues like warping or delamination. Regular checks prevent costly repairs down the line, and advanced moisture detection is becoming a gold standard in professional flooring care.
How do I maintain hardwood and tile floors over time?
Routine cleaning with tools tailored to your flooring type is crucial. For hardwood, I prefer microfiber mops paired with pH-neutral cleaners to avoid damaging the finish. For tiles, a quality grout brush and a handheld steam cleaner are excellent for keeping grout lines clean without excessive scrubbing—more effective and gentler than traditional brushes. Additionally, a laser level helps me verify the flatness periodically, catching any settling or unevenness early before it affects appearance or integrity. Investing in these tools—notably, a good-quality, adjustable vacuum equipped with fine filters—has saved me countless hours and upheld my floors’ longevity.
Tools That Make the Difference in Long-Term Results
Another essential is a floor sander or buffer for hardwoods, used carefully to restore shine or remove scratches without aggressive sanding. For high-traffic areas, applying protective coatings like polyurethane with a foam roller and a high-quality brush ensures even coverage and durability. If issues like lippage or uneven seams occur, a professional-grade tile leveling system with reusable spacers simplifies corrections without damaging the installation. These tools, combined with consistent inspections—like referencing our guide on floor leveling—ensure your flooring remains flawless for years.
The Future of Floor Maintenance: Smarter Tools
As technology advances, smart sensors and IoT-enabled devices are expected to become standard in flooring maintenance. Imagine a moisture meter that syncs with your smartphone or an app that prompts you when it’s time for polishing or sealing, based on real-time data. These innovations will empower homeowners and professionals alike to stay ahead of issues before they manifest visibly. For now, investing in precise, reliable manual tools like laser levels or moisture meters remains the best practice, and I encourage you to experiment with advanced techniques like using a calibrated moisture meter to prevent future problems. Incorporate these tools into your routine, and you’ll extend the life of your floors significantly. Ready to upgrade your maintenance arsenal? Try integrating a high-accuracy moisture meter today and see immediate benefits in preserving your hardwood or tile surfaces.
Looking back on my early projects, I realize how a simple oversight in thinset application cost me dearly. That essential layer beneath tiles and hardwood floors is more than just a bonding agent—it’s the backbone of lasting beauty and durability. Mistakes like applying it too thin or too thick can lead to cracks, lippage, and premature failure, turning your dream floor into an ongoing headache. The key takeaway? Pay close attention to layer thickness, adapt to your specific materials, and always double-check your work before curing. By honing this skill, you’ll not only enhance the look of your floors but also their lifespan, saving you time and money in the long run. Want to ensure your next installation stands the test of time? Embrace the details—because precision at this stage makes all the difference.
Comments are closed.