
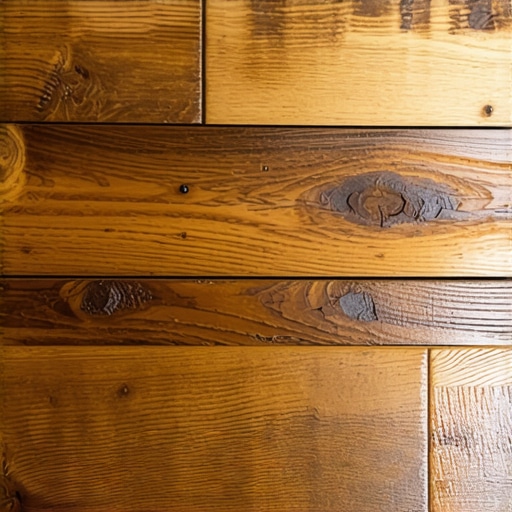
I’ll never forget the morning I thought I had the perfect plan—installing new solid oak flooring in my living room. I was excited, ready to transform the space, until I stepped on the subfloor and felt a strange squish under my feet. My heart sank. That lightbulb moment revealed I overlooked a crucial detail: the moisture level of my subfloor. If you’ve ever faced this situation, you know how disheartening it is to lay down beautiful floorboards only to have them warp or cup weeks later.
Why Moisture Matters More Than You Think
When it comes to hardwood installation, especially solid oak, moisture content isn’t just a minor detail—it’s the foundation of success. A subfloor that’s too wet can spell disaster, leading to long-term problems such as buckling, cracking, or even mold growth. According to the Wood Database, moisture levels exceeding 12% can compromise hardwood stability, causing uneven floors and reducing the lifespan of your investment. Early on, I made the mistake of assuming the subfloor was dry enough simply because it looked solid and had no visible signs of water. That was a rookie error I won’t repeat.
Is Moisture Testing Really Necessary?
Absolutely. Many DIYers overlook this step, thinking visual inspection suffices. But moisture can lurk beneath the surface. Testing with a pin-type moisture meter or a calcium chloride test provides an objective reading of your subfloor’s moisture levels. This little device saved me from a costly redo, and I recommend it wholeheartedly. Proper moisture testing isn’t just a precaution—it’s a vital process that guarantees your flooring will stay beautiful for years. Want to learn how to do it correctly? Check out our detailed guide on floor leveling.
So, have you faced the challenge of questionable subfloor moisture? Don’t worry—you’re not alone. The key now is understanding how to identify if your subfloor is too wet before laying down your precious oak planks. Over the next sections, I’ll walk you through practical methods to assess moisture levels accurately and ensure your hardwood installation stands the test of time. Ready to get your subfloor inspection right? Let’s dive in and make sure moisture isn’t a hidden enemy in your home.
Test Moisture Levels Precisely
Start by acquiring a reliable moisture meter—preferably pin-type for accuracy. I once neglected this step, assuming the subfloor was dry because it looked solid; soon after, the floor warped. To avoid this, drive the pins into several spots of the subfloor, especially near walls and corners. Record readings and compare them to the acceptable range of 12% or below. If the levels are higher, proceed with drying strategies.
Use Proper Drying Measures
If your readings exceed the recommended moisture content, increase ventilation by opening windows and running fans. For persistent moisture, incorporate dehumidifiers to pull out excess moisture from the air and subfloor. I once used a moisture absorber in conjunction with a commercial dehumidifier, which significantly expedited drying. Be meticulous: avoid laying hardwood until levels are stable—adding a moisture barrier can help in high-humidity areas.
Apply Moisture Barriers When Necessary
Installing a vapor barrier creates a fortress against residual moisture. Lay a polyethylene sheet or specialized membrane directly over the subfloor—think of it as a raincoat for your foundation. Ensure there are no tears, and seal the seams with appropriate tape. This step is critical in basements or ground-level rooms where moisture intrusion is more common. For detailed techniques, review our floor leveling guide.
Conduct Multiple Moisture Tests
Don’t rely on a single test. After initial drying, re-test in different areas to confirm levels are consistent. A trick I learned was to check after a heavy rain to see if moisture infiltrates. If readings differ significantly across the floor, focus on those high spots before proceeding. This approach is akin to calibrating your tools before a precise cut—accuracy counts.
Document and Monitor Ongoing Conditions
Keep a record of moisture readings over days or weeks, especially in humid climates. Use a moisture meter with memory or jot down values manually. Monitoring helps catch any fluctuations that could harm your hardwood over time, much like tracking weather patterns before a big outdoor project. Still unsure about moisture levels or need specialized testing? Feel free to contact us.
Finalize Testing Before Installation
Once moisture levels stabilize within the safe zone, double-check the environment. Ensure consistent temperature and humidity to prevent future issues. Employ tools like a hygrometer to monitor these conditions during installation. Remember, neglecting these steps is like building a house on shifting sands—eventually, problems will surface. For more insights on proper installation practices, visit our floor leveling techniques page.
Many homeowners and even DIY enthusiasts harbor misconceptions about flooring installation that can lead to costly mistakes. One prevalent myth is that leveling the subfloor is a simple step of sanding down uneven surfaces. In reality, minor scratches from sanding are often insufficient for larger imperfections, which require professional assessment and potentially more sophisticated solutions like self-leveling compounds. Relying solely on visual cues can be deceptive; professional installers use precise floor leveling techniques to identify subtle dips and humps that might undermine the entire project.
However, a common trap is to assume that moisture levels are always accurate indicators of readiness. Many believe that a moisture meter reading below 12% guarantees safe installation. Yet, expert studies show that combined testing—such as hygrometers alongside calcium chloride tests—provides a more comprehensive picture, especially in high-humidity environments. Ignoring these nuances can result in hardwood buckling or tile lippage down the line.
A surprisingly overlooked detail is the role of proper underlayment and vapor barriers. Installing these correctly can prevent future issues like hardwood gaps or tile cracking, especially when the subfloor contains residual moisture or is prone to expansion. In high-traffic areas, selecting appropriate finishes and installing correctly is crucial—skipping steps here often leads to rapid wear or damage, contradicting the myth that hard finishes last forever without maintenance.
For advanced practitioners, I recommend paying close attention to the specific behaviors of different flooring materials. For instance, engineered hardwood responds differently to moisture than solid wood, with the former being more susceptible to expansion and contraction. According to industry research, understanding these subtle material responses often makes the difference between a durable, lasting floor and one that requires early replacement. Want to delve deeper into these topics? Check out our tile installation tips and expert guides.
**What are the most common mistakes you’ve encountered during flooring projects?** Share your experiences in the comments, and let’s ensure we avoid these pitfalls together.
Keeping It Working: Tools and Maintenance for Your Floors
To ensure your flooring investment remains beautiful and durable over time, investing in the right tools and establishing effective maintenance routines is essential. Personally, I rely on a combination of specialized equipment and disciplined practices to keep hardwood, tile, and other flooring types in peak condition. For example, a high-quality vacuum with a soft brush attachment prevents dirt from scratching surfaces, especially important for hardwood floors. I avoid standard vacuums because they tend to have stiff brushes that can damage delicate finishes and cause premature wear.
Another indispensable tool is a microfiber mop, which gently lifts dust without abrasive contact, making regular cleaning both efficient and safe. For deeper cleaning, I use pH-neutral cleaners designed specifically for hardwood or tile, as recommended by flooring experts. Regularly applying a recommended polish or protective sealant can also enhance the floor’s appearance and extend its lifespan—check out our hardwood floor care secrets for detailed guidance.
When it comes to long-term results, periodic inspections help catch issues early. I recommend a simple toggle between visual checks and moisture testing—especially critical for moisture-sensitive materials like engineered hardwood. Using a reliable moisture meter regularly prevents problems like warping or cupping, which can be costly to repair. For example, the Tramex MC-5 moisture meter offers quick, accurate readings and is trusted by professionals.
Scaling your flooring project often involves leveraging professional-grade tools—such as laser levels for precise alignment or self-leveling compounds with reliable pouring techniques. As I’ve learned, mastering the use of a self-leveling compound can drastically reduce unevenness, saving time and frustration during installation. In the future, I predict automation and smart tools—like moisture sensors connected via smartphone apps—will become standard, providing real-time data and eliminating guesswork.
How do I maintain my floors over time?
Maintaining your floors is an ongoing process. Regular cleaning is just the start; it’s crucial to establish specific routines tailored to your flooring material. For instance, hardwood floors benefit from gentle cleaning and periodic polishing, while tiles require grout sealing every few years to prevent water infiltration. Read our hardwood finish maintenance tips for expert advice on keeping your floors in top shape.
Don’t underestimate the importance of protecting your floors from damage—use furniture pads, avoid high-heeled shoes indoors, and address spills promptly. Maintaining the environment’s humidity levels, especially in climates with wide fluctuations, is also vital; excessively dry or humid conditions can cause expansion or contraction, leading to cracks or gaps. Employing a hygrometer helps monitor such fluctuations effectively. Over time, consistent upkeep not only preserves the aesthetics but also ensures that minor issues don’t evolve into major repairs. Consider scheduling professional inspections periodically to catch potential problems early and employ preventive measures accordingly. Want to learn more? Feel free to contact us for personalized advice or assistance.
Lessons Hidden in My Floor Failures
One of the toughest lessons I learned was the importance of patience and thorough testing before installation. Rushing through moisture assessments led to warped hardwood that cost me both time and money. Now, I always invest in reliable moisture meters and re-test after drying efforts—it’s a small step with huge payoff. Additionally, I realized that high-quality vapor barriers are a secret weapon against unseen moisture. Ignoring detailed subfloor evaluation and relying solely on visual cues can be disastrous; subtle moisture issues often hide beneath the surface, waiting to sabotage your project. Lastly, blending professional advice with personal experience has been key—what works in theory doesn’t always hold up in real-world conditions, so stay adaptable and informed.
The Tools That Changed My Approach
My essential toolkit now includes a dependable pin-type moisture meter, which I trust for its accuracy—crucial in detecting hidden moisture. I also use a hygrometer to monitor environmental humidity, ensuring optimal conditions during installation. For moisture mitigation, I rely on high-grade vapor barriers like polyethylene sheets and self-leveling compounds from brands I have personally tested and approve. When in doubt, I consult professional-grade resources, such as the comprehensive guides found [here](https://tiletrendshop.com/the-ultimate-guide-to-floor-leveling-for-a-perfect-finish). These tools and resources have transformed my approach from guesswork to precision, safeguarding my floors against future issues.
Your Next Move Toward Flawless Flooring
Embrace the journey of moisture management as a core part of your flooring projects—you hold the power to prevent costly mistakes and enjoy beautiful, durable results. Remember, meticulous testing, proper drying, and solid vapor barriers aren’t just steps—they’re investments in your home’s longevity. Take action today by starting with a moisture test in your space, and don’t hesitate to reach out for expert guidance when needed. Your beautifully installed hardwood or tile floors await—tip the scales in your favor and turn your vision into reality. Ready to make your flooring project a success? Share your biggest moisture concern below, and let’s troubleshoot together.