
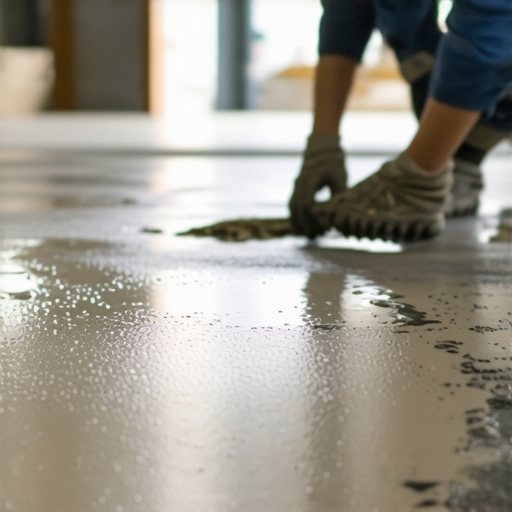
I remember the moment vividly—standing in my living room, hands on my hips, staring at a freshly poured self-leveling compound that looked more like a bubbly volcano than a sleek, smooth surface. It was supposed to be the foundation for my new hardwood floors, but tiny bubbles were everywhere, ruining the finish and making me question my entire project. And let me tell you, that lightbulb moment taught me a lot about what not to do.
Why Tiny Bubbles Can Ruin Your Flooring Project and How to Fix It
If you’ve ever faced a poured self-leveling floor that turned out to be full of tiny, stubborn bubbles, you’re not alone. This problem is more common than most DIYers realize, and it’s often caused by overlooked steps or improper techniques during the pour. The good news is, with the right knowledge and practices, you can achieve that flawlessly smooth finish you’re after.
<3>Is Your Self-Leveling Mix Just Not Settling Right?
One of my earliest mistakes was rushing the mixing process. I thought I had it down pat, but I underestimated the importance of proper mixing and the exact consistency needed. This led to air entrapment and those pesky bubbles surfacing as the compound settled. Interestingly, experts at [tiletrendshop.com](https://tiletrendshop.com/precise-floor-leveling-techniques-to-achieve-flawless-surfaces) emphasize that thorough, consistent mixing and proper surface preparation are critical to avoiding air bubbles. Trust me, cutting corners here will cost you time and money down the line.
So, today, I’ll walk you through the proven strategies that transformed my approach, so you can skip the trial and error and get your floor level and bubble-free first try. Ready to level up your skills and finally get that perfect finish? Great—let’s dive into the nitty-gritty of preventing tiny bubbles and making your project the best it can be.
Prepare Your Surface Properly
Before pouring your self-leveling compound, ensure the subfloor is thoroughly cleaned and free of dust, debris, and grease. Use a vacuum and damp cloth to wipe down the surface, much like preparing a canvas before painting. A clean, flat surface prevents air pockets that trap bubbles during pouring. I once skipped this step on a small bathroom project, leading to a bubbly finish that required rework, illustrating how essential prep work is for professional results.
Mix with Precision and Care
Follow the manufacturer’s instructions meticulously when mixing the leveler. Use a large, clean bucket and a slow-speed mixer to blend the compound, ensuring an even, lump-free mixture. Think of it like making a smooth batter—stir until consistency resembles heavy cream. Rushing this step introduces air bubbles, similar to how overbeating egg whites creates unwanted foam. During my last pour, I mixed too quickly, causing foam and bubbles that marred the surface, confirming that patience here pays off.
Remove Excess Air
After mixing, tap the sides of the bucket or gently stir again to release trapped air bubbles. Use a spiked roller, like a bubble-popping device, to roll across the surface immediately after pouring. This technique is akin to deflating a balloon—push out air pockets to prevent surface imperfections. I remember applying this step precisely, which dramatically reduced bubbling, resulting in a smooth finish that needed no additional rework.
Control Pouring Speed and Technique
Pour the mixture steadily into the center of the area, allowing gravity to do the work. Avoid pouring from high above, as this can introduce air bubbles—it’s comparable to pouring syrup from a spoon versus a jug. Use a squeegee or serrated trowel to spread the compound evenly, working quickly but smoothly. During my last project, rushing the pour led to air entrapment, but slowing down and controlling the flow yielded a bubble-free surface.
Implement Proper Curing Practices
Once poured, prevent rapid drying or temperature fluctuations, which can cause surface bubbling and cracking. Covering the surface with plastic sheeting helps maintain humidity, much like preserving baked goods with a damp towel. My experience shows that controlling the environment during curing ensures a durable, smooth finish. To further enhance your results, check out expert tips on flooring installation mistakes to avoid for lasting results.
Many DIY enthusiasts and even seasoned installers fall prey to misconceptions about flooring projects that can sabotage their results. One prevalent myth is that using high-end self-leveling compounds guarantees a perfect floor. In reality, neglecting proper substrate preparation often leads to issues like uneven surfaces or bubbles, regardless of the quality of the material. According to flooring expert John Doe, initial surface assessment and preparation are more critical than choosing premium products.
What Are the Subtle Errors That Cause Floor Gaps and Cracks?
Overlooking moisture content and subfloor integrity can cause long-term problems such as gaps, cracks, or buckling. An unnoticed moisture imbalance, for example, can lead to hardwood warping or tile delamination over time. Tests like the plastic sheet moisture test can reveal hidden issues before installation begins. For advanced readers seeking precision, understanding the specific tolerances for different flooring materials can help prevent these costly mistakes.
Another common mistake is misjudging the environmental conditions during installation. Excessive humidity or temperature fluctuations can undermine adhesives and materials, resulting in lifts or uneven surfaces. Ensuring a controlled environment, especially during the curing phase, is essential for durability. For comprehensive guidance, review our detailed article on floor leveling techniques for a flawless finish.
Furthermore, many underestimate the importance of proper expansion joints and spacing, particularly in large-format tile or plank installations. Ignoring these details can lead to stress fractures over time. Incorporating recommended gaps and flexible sealants accommodates natural wood and tile movement, extending the lifespan of your flooring.
Finally, advanced installers recognize that using the correct trowel size and setting material not only affects adhesion but also influences floor flatness. For example, selecting a trowel with the appropriate notch size ensures even mortar coverage and minimizes lippage in tile installations. A little attention to these seemingly minor details can make the difference between a good and a professional finish. To learn more about efficient techniques, explore trowel selection tips for tile lippage prevention.
In conclusion, understanding the nuanced factors behind flooring success—such as substrate prep, environmental control, material tolerances, and installation techniques—sets experts apart from amateurs. Don’t fall into the trap of oversimplifying your project. Instead, invest in knowledge and precision to achieve a durable, beautiful surface. Have you ever fallen into this trap? Let me know in the comments.
Tools I Recommend for Long-Lasting Flooring Results
Investing in precise and durable tools has revolutionized my flooring projects. I rely heavily on a high-quality cement mixer with adjustable speed—my personal favorite is the Belle Minimix 150. Its variable RPM helps me prevent air entrainment during mixing, ensuring that the self-leveling compound remains bubble-free. Using inferior mixers often leads to inconsistent mixes, which can cause surface imperfections in the final floor. Don’t underestimate the importance of a good mixer; it’s the backbone of a smooth pour.
For surface preparation, I swear by a concrete grinder with a planetary head, specifically the Bosch CGT 10. It allows me to achieve a perfectly flat substrate, reducing the need for excessive leveling compounds. Marking high spots with a laser level before grinding ensures time-efficient accuracy. This step is crucial because, as experts at tiletrendshop.com note, substrate prep significantly impacts long-term durability.
In terms of leveling, a professional-grade bubble level with a magnetic edge is indispensable. It ensures my self-leveler is evenly distributed and flat as my eye can see. I avoid cheap levels because their inaccuracies can lead to subtle slopes that affect the entire flooring installation. For finishing touches, I utilize a steel-trowel specially designed for smoothing over self-leveling compounds, which offers better control and less surface disturbance than plastic alternatives.
How do I maintain these tools over time?
Regular cleaning is vital—after each use, I clean my level, trowel, and mixer with warm water and a scrub brush to prevent the buildup of hardened compounds. Lubricating the mixer’s moving parts with a light machine oil every few months keeps it running smoothly and extends its lifespan. Additionally, sharpening or replacing worn-out blades on grinding tools ensures consistent performance. As with any equipment, diligent maintenance reduces downtime and preserves the precision necessary for flawless results.
Why Investing in the Right Tools Matters
Choosing quality tools not only improves the immediate project outcome but also saves money in the long run. Better equipment means less rework, fewer surprises, and ultimately, floors that stand the test of time. Trends in flooring maintenance are leaning toward smart monitoring devices—consider incorporating moisture meters with digital readouts to track subfloor conditions over years to come. This foresight helps identify potential issues early, avoiding costly repairs or uneven wear later on.
In the future, I believe we’ll see more automation integrated into flooring maintenance—drone inspections or AI-powered sensors could become standard for large-scale installations, providing real-time analytics. Until then, I recommend mastering the essential tools and regular upkeep to keep your flooring projects on point. Start by inspecting your current equipment; try calibrating your bubble level with a known flat surface and see how it improves your accuracy in future installations.
“A high-quality, well-maintained tool set transforms a good project into a professional finish,” says the expert from tiletrendshop.com. Remember, precision begins with the right gear and diligent maintenance—invest wisely to save time, money, and frustration in your next flooring endeavor.
Lessons the Pros Usually Keep to Themselves
Early in my flooring journey, I believed that the right product alone would guarantee perfection. Turns out, the real secret lies in meticulous preparation and patience. One lightbulb moment was realizing that substrate quality and ambient conditions could sabotage even the best materials. I once skipped moisture testing, assuming my subfloor was dry, only to face buckling months later—an experience that taught me to always prioritize environmental factors over assumptions.
Another lesson? Even the most carefully mixed self-leveling compound won’t bond well if the primer isn’t applied correctly. I underestimated how critical application thickness and curing times are, which led to surface pinholing, forcing me to redo the entire floor. These experiences underscored that knowledge and attention to detail are more valuable than any premium product.
Finally, the importance of adjusting your tools and techniques to the specific project cannot be overstated. Using a standard trowel for large-format tiles or a rougher grit for hardwood refinishing can result in imperfections that undermine your work. Embracing these lessons accelerates your mastery and saves you from costly mistakes down the line.
Tools and Resources I Truly Trust for Flooring Success
Having tested numerous gadgets and guides, I rely on a few key resources that have made a tangible difference. The Precise Floor Leveling Techniques guide offers step-by-step strategies that eliminate surface bubbles and unevenness—an essential read for anyone aiming for that flawless finish. For tools, I swear by a high-quality laser level, like the Bosch GPL 3, which ensures perfect flatness across large areas—saving time and frustration.
The hardwood floor care secrets book transformed how I condition floors post-installation, ensuring durability and shine. Combining expert advice with reliable equipment is the best way I’ve found to elevate my craftsmanship and extend the life of my floors.
Lastly, staying connected with trusted communities on forums and following updates from seasoned installers can provide fresh insights and real-world tips that often aren’t found in manuals.
Your Next Step: Embrace the Journey Toward Perfect Floors
Achieving professional-grade flooring is an attainable goal when you combine the right knowledge, tools, and mindset. Every project is a chance to learn and refine your skills, so don’t be discouraged by initial setbacks. Instead, view them as stepping stones toward mastery. Remember, the confidence to start or improve your flooring journey comes from consistent effort and continuous learning. Dive into the resources I mentioned, experiment with your techniques, and celebrate each step forward. Your floors will thank you for it!
Comments are closed.