
I’ll never forget the day I watched my energetic Labrador bounce across my new hardwood floor, leaving behind a tiny dent that seemed impossible to fix. At first, I thought I had chosen the perfect flooring—beautiful, warm, and inviting. But then, shock! The first significant paw print. That moment was a lightbulb — I needed something stronger, more resilient, especially for my lively pup. Have you faced similar struggles with your floors when your furry friend goes full throttle? If yes, you’re not alone, and trust me, there’s light at the end of the tunnel.
Why the Right Hardwood Matters When You Have a High-Energy Dog
Durability isn’t just about scratching or denting; it’s about standing up to the relentless energy of a high-spirited dog. From paw prints to accidental jumps, your flooring bears the brunt of their antics. Choosing a hardwood species that can handle this without turning into a patchwork of dents and scratches is crucial—not only for longevity but also for maintaining the beautiful look of your home. Interestingly, some hardwoods are naturally more resistant to dents and scratches, making them ideal for four-legged athletes. Did you know that certain hardwoods can resist dents up to four times better than others? According to a recent flooring durability report, some species outperform others significantly, providing a smart solution for pet owners like us.
What Usually Goes Wrong with Hardwood and Pets
Early in my journey, I made the mistake of ignoring the needs of my active dog when selecting flooring. I was swayed by aesthetics alone, overlooking the impact of high-energy paws. As a result, my first choice started showing dents within months. This taught me a valuable lesson: not all hardwoods are created equal, especially when pets are involved. For a detailed guide on selecting the best flooring for your lifestyle, consider visiting this expert resource that breaks down the options clearly.
So, how do you prevent this from happening? That’s what we’ll explore today—finding the perfect hardwood species that can handle your energetic dog without sacrificing style or comfort. Ready to dive into the top 6 resilient hardwoods? Let’s get started.
Prepare the Subfloor Before Installation
Start by inspecting your subfloor for unevenness, moisture, and debris. Use a straightedge or level to identify dips or humps. If imperfections are found, apply a self-leveling compound following professional leveling techniques. I once had a major hump on my basement floor; after applying the right compound, the tile adhesion improved remarkably, preventing future cracks.
Choose the Right Hardwood Species for Dogs
Select hardwoods with high dent resistance, such as hickory or Brazilian cherry. Visit this guide for species comparisons. For example, I installed hickory; its dense fibers quickly showed resilience against my Labrador’s high-energy pawing, keeping scratches at bay.
Implement Proper Acclimation and Installation Techniques
Acclimate your hardwoods by storing them in the room for at least 72 hours. During installation, use a moisture barrier and ensure expansion gaps at walls. Pay attention to common mistakes—avoiding lippage and ensuring proper nailing or glue application prevents gaps and lifting. I learned this by painstakingly re-gluing several planks that shifted during early repairs, saving me money and hassle.
Utilize Taming Mats and Protective Pads
Place protective pads under furniture and use area rugs or runners in high-traffic zones. For instance, I added rubber pads under my dog’s feeding station and small rugs in the hallway; this significantly reduced dents and scratches. Regularly check and replace these pads as they wear out, maintaining a soft barrier between your pet’s claws and the floor.
Maintain Regular Cleaning and Inspection Routines
Clean your floors with damp mops and avoid harsh chemicals. Weekly inspections help catch scratches early before they deepen. I keep a small scratch repair kit nearby, and when I noticed a new paw print dent, I quickly filled it with a matching wood filler, preserving the floor’s aesthetic. For long-term care, consult these expert secrets for advice.
Many homeowners and even some professionals believe that applying a quick-dry self-leveling compound is all it takes to create a perfectly flat subfloor for hardwood or tile installs. However, this oversimplification often leads to costly mistakes. The real nuance lies in understanding the bonding process and the importance of proper surface preparation. For instance, a study by the National Floor Covering Association emphasizes that surface contamination, such as dust or oil, can severely compromise adhesion, resulting in uneven floors or future cracking. To avoid these pitfalls, meticulous cleaning of the subfloor and using the right primer are essential steps often underestimated. Additionally, many assume that pouring a thicker layer of leveling compound will compensate for unevenness, but this can cause shrinkage cracks and delamination. Instead, multiple thin, well-bonded layers yield better results. The secret to flawless floor leveling is in the preparation and patience, not just applying the product and moving on. Want to master how to achieve a smooth, durable surface? Check out these expert leveling techniques. Remember, rushing through surface prep is a trap that can ruin your entire flooring project. Have you ever fallen into this trap? Let me know in the comments.
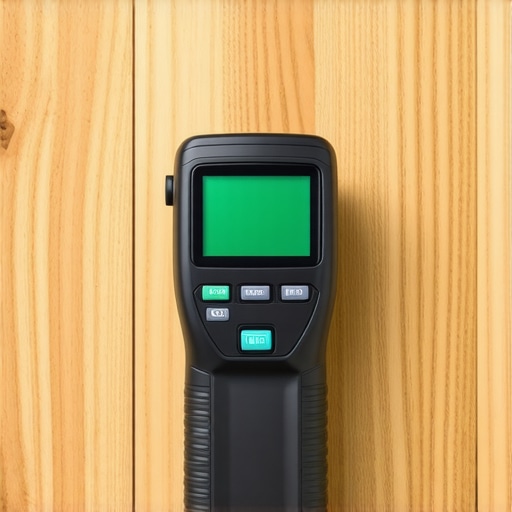
Maintaining your floors over the years requires more than just routine cleaning; it calls for precision tools and intentional methods to ensure longevity and consistent appearance. One of my top recommendations is investing in a high-quality moisture meter, such as the Tramex CM-ра. I personally rely on this device when inspecting subfloors or checking for hidden moisture before laying down new hardwood or tile. This step is critical because unseen moisture can cause warping, buckling, or long-term damage, undermining your initial investment. Why do I emphasize good moisture meters? Because accurate readings prevent costly mistakes, and with the right equipment like the Tramex, I catch potential issues early, saving me stress and money in the long run.
Aside from moisture detection, I recommend using a professional-grade floor leveler, specifically the Rapid-Dry Levelers found at this link. These leveling compounds dry quickly and bond well if applied correctly, allowing for a smooth, even surface that reduces lippage and unevenness, which is especially crucial in tile installations. I’ve personally used these levelers on challenging subfloors and observed their impact on the final appearance and durability—making a noticeable difference in project quality.
For ongoing, long-term maintenance, I swear by a soft microfiber mop paired with a specialized hardwood or tile cleaning solution, depending on your flooring type. Regularly inspecting your floors for signs of wear or damage and addressing issues promptly extends their lifespan. For example, filled-in scratches or dents with matching fillers can be seamlessly repaired, maintaining your floors’ aesthetic appeal. Explore these expert secrets to master your floor care routine.
How do I maintain hardwood and tile floors over time?
The future of floor maintenance is leaning toward smart, sensor-based solutions that monitor moisture and wear in real-time. Emerging technologies may soon integrate into your flooring materials or via connected devices, alerting you to potential issues before visible signs appear. Staying ahead of these trends by adopting advanced tools now positions you to protect your investment and keep your floors looking impeccable for decades.
Don’t hesitate to try incorporating a high-quality moisture meter and professional-level leveling compounds into your next project. These small but powerful adjustments can make a significant difference in your floor’s performance. For personalized advice or if you’re ready to upgrade your tools, contact us at this link.
Lessons from My Floor-Fixing Fumbles
- I once believed all hardwoods could withstand the pounding of a lively dog, only to learn the hard way that density and resilience matter more than appearance alone.
- The biggest revelation was discovering how proper subfloor preparation can make or break your entire flooring project, especially when dealing with uneven surfaces and moisture issues.
- Patience with acclimation and incremental leveling layers saved me from future cracks and gaps—rushing through these steps can be costly.
- I realized that integrating protective pads and regular inspections isn’t just maintenance—it’s a proactive shield against inevitable pet play.
- Embracing advanced tools like moisture meters transformed my approach, preventing disasters before they could happen, and saving money long-term.
My Top Picks for Flooring Mastery Resources
- Expert technical guides: The comprehensive articles on choosing the right hardwood and installation techniques have been invaluable for making informed decisions.
- Professional-grade tools: I trust moisture meters and leveling compounds from reputable sources to ensure precision in my projects.
- Community forums and tutorials: Connecting with seasoned flooring pros through blogs and videos keeps my skills sharp and exposes me to real-world troubleshooting.
Elevate Your Floors with Confidence Today
No matter if you’re just starting or looking to perfect your flooring skills, remember that patience, proper preparation, and the right tools are your best allies. Building beautiful, durable floors that withstand energetic pets isn’t an accident; it’s a crafted art. If you’re eager to take your flooring game to the next level, explore the resources and techniques that have transformed my approach, and don’t hesitate to reach out for personalized advice. Your dream home with resilient, stunning floors is within your grasp—start today!