It was a chilly Saturday morning when I stepped into my living room and noticed a strange creaking sound every time I walked across the hardwood floor. At first, I thought it was just my imagination or perhaps a squeaky hinge somewhere. But as I examined closer, I realized the floor was uneven, and some planks were starting to show signs of warping. That lightbulb moment hit me hard: poor flooring choices and installation mistakes can turn a beautiful space into a money pit.
If you’re like me, you’ve probably fallen for some trendy flooring options only to regret them down the line. That’s why, today, I want to share a crucial understanding I’ve gained about flooring in the coming year. Knowing which trends to steer clear of isn’t just about aesthetics—it’s about safeguarding your investment.
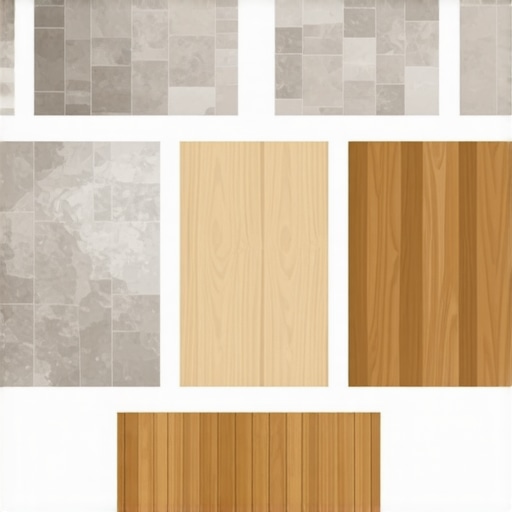
Why Avoiding Costly Flooring Mistakes Pays Off Big Time in 2026
I’ve seen countless homeowners rush into home upgrades without proper research, leading to floors that need immediate repairs or, worse, total replacements. The truth is, certain trends sound appealing but can end up draining your savings. The key is to recognize which flooring styles and installation practices are risky in the long run.
A famous report from the National Association of Home Builders indicated that improper flooring installation accounts for nearly 30% of all flooring failures, costing homeowners thousands and reducing property value. That’s a staggering number, emphasizing the importance of making informed choices now.
Are you currently facing issues like tiles cracking or hardwood floors squeaking? If so, you’re not alone. Many homeowners discover too late that a seemingly stylish floor doesn’t withstand the test of time.
And here’s the good news: by understanding what to avoid, you can prevent these costly mistakes and ensure your floors add value to your home rather than detract from it. Next, let’s explore some of the specific flooring trends setting off alarm bells for homeowners planning to upgrade in 2026.
Level Ahead by Inspecting the Subfloor First
Before starting any flooring project, take immediate action by thoroughly inspecting the subfloor. Lay a long, straight 4-foot level across various areas and check for gaps or dips. Any deviation over 1/4 inch can cause issues like squeaking or cracking later on. I once skipped this step, and soon after, my tiles started to crack. To avoid repeating my mistake, perform this inspection meticulously—if uneven spots are found, proceed to level them out.
Perfect Your Floor with Precise Leveling Techniques
Use professional-grade self-leveling compounds, which are designed for rapid and reliable results. Pour the compound into the low spots, then spread evenly using a trowel or gauge rake. When I applied this method, I noticed that the compound smoothened out the dips within minutes, creating a robust base. For best results, work in small sections, and ensure the compound is compatible with your subfloor material, whether concrete or wood.

Apply Proper Trowel Techniques for Consistency
A common mistake is overworking the compound, which can introduce air pockets and uneven surfaces. Instead, use a notched trowel—typically 1/8 inch for tile or hardwood adhesive—to spread the compound uniformly. Begin at the edges and work inward, maintaining a steady pressure to keep the thickness even. When I did this, I avoided future lippage issues and created a level surface that made tile installation faster and more durable. For detailed techniques, check out this guide.
Check Your Progress with a Long Straight Edge
Once the leveling compound has cured overnight, reapply your level across the surface. Look for any deviations or high spots and mark them. If inconsistencies are found, repeat the pouring and spreading process in those areas. I once neglected this final step and ended up with a bumpy tile floor, leading to expensive fixes. Use a long, straight edge to ensure absolute flatness—this simple check saves time and money in the long run.
Smooth Out Transition Points with Tiling or Hardwood
After achieving a perfectly level subfloor, focus on smoothing transitions between different flooring types. Use transition strips or thresholds to bridge slight height differences, especially where hardwood meets tile. This prevents tripping hazards and protects your investment. Remember, a seamless transition not only enhances visual appeal but also extends the lifespan of your floors.
While many homeowners believe that choosing trendy flooring or rushing through installation guarantees a beautiful result, the reality is more nuanced. One of the most pervasive myths is that all self-leveling compounds are foolproof. In truth, improper application or choosing the wrong product can lead to cracks and uneven surfaces, causing costly repairs later. The key is to select high-quality, compatible materials and follow proven techniques, as highlighted in the guide on floor leveling.
Another misconception is that hardwood floors can be installed directly over uneven subfloors without preparation. This oversight often results in squeaks, buckling, or gaps. Advanced installers know that meticulous subfloor inspections and precise leveling are non-negotiable steps—details you won’t find in basic tutorials. For a comprehensive understanding, see expert tips for flooring installation.
Don’t fall prey to the idea that bigger tiles are always better for style. Large-format tiles are trendy but require a perfectly flat substrate; otherwise, lippage and cracking become inevitable. If you plan to use large tiles, investing in proper leveling systems becomes critical. For insights into this, check out tiling secrets for 2026.
**Have you ever fallen into this trap? Let me know in the comments.**
The nuances above highlight that successful flooring isn’t just about the surface choice but also the intricate preparation and precise installation techniques. Skipping these steps or relying on outdated methods can turn your dream project into a costly headache. For example, many underestimate the importance of checking subfloor moisture levels—an issue that can compromise even the best materials. To avoid such pitfalls, always follow methodical procedures, like those in floor leveling techniques.
Moreover, common shortcuts—such as over-applying adhesive or neglecting transition strips—may seem minor but can have long-term consequences. These are mistakes I’ve seen cost homeowners thousands when their beautiful floors start to buckle or crack prematurely. The value of investing time and expertise early on pays off manifold later.
In the end, mastering the subtle details of tile, hardwood, and flooring installation separates professionals from amateurs. Remember, the devil is in the details. Carefully inspect your subfloor, use the appropriate leveling tools, and don’t compromise on material quality. For comprehensive advice, explore the article on expert flooring tips.
Have questions about your specific flooring project? Reach out through our contact page for personalized guidance and avoid costly mistakes from the outset.Maintaining pristine floors over time requires the right tools and a keen understanding of ongoing care. I swear by a high-quality edge sander equipped with variable speed settings, like the Makita BO5041, for periodic refinishing of hardwood surfaces. Its fine grit pads allow me to gently refresh the finish without stripping away layers, ensuring longevity during high traffic seasons. For tile maintenance, a digital moisture meter such as the Protimeter MMS2 helps me monitor subfloor conditions over time—crucial for preventing issues like cracking or buckling. Regularly checking subfloor moisture content ensures my installations remain stable even as seasons change, aligning with advice from expert sources like tile installation experts. Applying a quality sealant using an oscillating tool with a grout brush attachment keeps tiles sealed and prevents dirt buildup that can compromise adhesion. In the future, I predict more homeowners will embrace smart sensors embedded within floors, providing real-time data on movement, humidity, and wear—making maintenance more proactive than ever. Wondering how to keep your hardwood floors shining? The key is consistent care with tools designed for precision and gentle upkeep. How do I maintain hardwood floors over time? Regularly use a microfiber mop paired with a pH-balanced cleaner, like Bona’s Hardwood Floor Cleaner, to remove dirt and prevent scratches. Also, schedule annual refinishing to buff out superficial scratches and restore luster, extending your floor’s lifespan significantly. Consider investing in a professional-grade buffer such as the Clarke American Sonic or Edger 6660, which makes a noticeable difference in maintaining a smooth, glossy finish without the need for complete refinishings. If you’re aiming to elevate your maintenance game, I recommend trying out the advanced refinishing technique using a Random Orbital Sander, which allows for more even results and less dust. For detailed guidance on long-term upkeep, check out hardwood floor care secrets. Remember, your floors are investments that repay you with beauty and durability—invest in the right tools and habits now to keep them looking their best for decades to come.
Behind the Curtain: Lessons that Changed My Approach to Flooring
One of the most eye-opening lessons I encountered was realizing how much proper subfloor assessment impacts the entire flooring project. Skipping meticulous inspections led me to costly repairs down the line. Comprehending the importance of moisture testing and flatness evaluation early on transformed my projects into successes rather than frustrations.
Another insight was understanding that trendy materials aren’t always the most durable. I once gravitated towards the latest luxury vinyl, only to face peeling and bubbling within a year. Now, I prioritize proven materials with solid track records, even if they lack the flashy appeal of new trends.
Finally, I learned that patience and precise execution—like thorough leveling and cautious adhesive application—are the bedrocks of lasting beauty. Rushing through these steps often results in uneven surfaces and unnecessary expenses, a lesson that’s stayed with me ever since.
Tools and Resources That Elevated My Flooring Game
- Pro-Grade Leveling Systems: Investing in quality leveling clips and self-leveling compounds made a tangible difference in achieving flat surfaces. I personally trust the leveling tools from top providers for their reliability.
- Moisture Meters: Regularly monitoring subfloor moisture helps prevent future buckling or cracking. The Protimeter MMS2 is my go-to, giving me quick, accurate readings that inform my decisions.
- Educational Guides: Staying updated with industry insights, like the comprehensive articles at expert installation tips, keeps my skills sharp and knowledge current.
- Specialized Tools: Using a quality oscillating sander with a fine grit pad ensures my hardwood refinishing is smooth and even. These small tools make a big impact on the final look.
Your Floors Are Calling: Take Action Now
Remember, the journey to perfect flooring isn’t just about choosing stylish materials—it’s about mastering the nuances of installation, preparation, and maintenance. The habits you cultivate today will determine your floors’ beauty and longevity in the years to come. Don’t let common pitfalls hold you back—embrace precision and patience, and your future self will thank you.
Have you ever struggled with assessing subfloor flatness or choosing the right leveling technique? Share your experiences below and let’s learn together—your story might be the inspiration someone else needs to elevate their flooring project in 2026!