I remember the moment vividly—it was a chilly Saturday morning when I stepped into my living room and immediately noticed it: a tiny, almost invisible dip in the corner where I planned to lay new tiles. At first, I thought I could ignore it; I mean, who notices a slight slope, right? But as I started tiling, that little imperfection turned into a major headache, causing uneven gaps and a crooked finish. That lightbulb moment made me realize something crucial—skipping proper floor leveling isn’t just about aesthetics, it’s about the longevity and durability of your entire flooring project.
Here’s how to avoid my rookie mistake and ensure a flawlessly smooth surface every time
Is Overlooking Floor Dips Still Costing You? Think Again
Early on, I made the mistake of thinking that minor dips didn’t matter. I thought I could fix them later or cover them up. Spoiler alert: that approach never ends well. Not only does it compromise the look, but it can also lead to cracking tiles, wobbling hardwood, and costly repairs down the road. According to flooring experts, about 70% of floor failures stem from improper leveling during installation—a mistake I learned firsthand and want to help you avoid.
So, what’s the secret? It’s simple: understanding and applying the right leveling techniques from the start. Whether you’re installing tile or hardwood, addressing dips and unevenness ensures your floors will last, look gorgeous, and save you a bundle on future fixes.
Let’s dive into the core secrets that the pros use in 2026 to guarantee a flat, durable surface—saving you time, money, and frustration. But first, have you ever faced the anxiety of uneven floors ruining your DIY or professional project? If so, stay tuned—these tips are exactly what you need to turn that problem around.
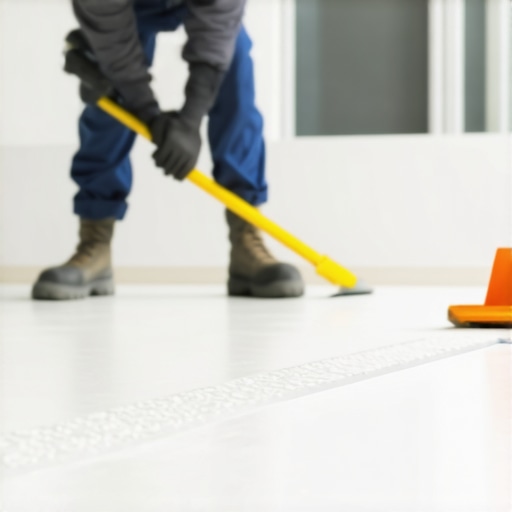
Prepare the Subfloor Rigorously
Before you start any flooring project, inspect the subfloor thoroughly. Remove debris, old adhesives, and loose materials. Use a concrete grinder or sander to smooth out high spots and rough patches, ensuring a solid foundation. Think of it as leveling a landscape: you can’t plant a garden on uneven ground without grading first. During my DIY, I used a handheld grinder to address stubborn bumps, which made the subsequent leveling compound adhere perfectly and prevented future cracks.
Identify and Measure Unevenness Accurately
Use a long, straight edge or a laser level to spot dips and humps. For precise measurements, place a spirit level or a straight wooden plank across the surface and observe any gaps underneath. In my experience, pinpointing these irregularities early saves time. I once skipped this step, and the tile cracked months later because I missed a 3/8-inch dip that caused uneven weight distribution, leading to stress lines. For detailed techniques, visit precise floor leveling techniques.
Apply a Suitable Self-Leveling Compound
Select a high-quality self-leveling compound designed for your subfloor type. Pour the mixture into the low areas first, then use a gauge rake or trowel to spread it evenly. For best results, work in small sections, and avoid overworking the compound, which might cause bubbles. During my project, I poured the compound in a small corner and used a LONGS (a specialized leveling tool) to work it into the dips, achieving a flat surface suitable for tile installation. Remember, the goal is to create a smooth, level plane, like a mirror reflecting the ceiling, to prevent future issues.
Verify Levelness After Application
Once the compound sets, recheck the surface using a straightedge or laser level. Look for any remaining imperfections or high spots. If necessary, lightly sand or reapply the leveling compound in specific areas. This step saved my project when I found a tiny 1/16 inch bump after initial curing; a quick reapplication fixed it without disrupting the entire surface. For comprehensive insights, see hardwood floor leveling pro tips.
Seal and Protect Before Flooring
Let the leveling compound cure fully, respecting the manufacturer’s drying time. Seal porous surfaces if required, especially in moisture-prone areas. This prevents issues like swelling or cracking later. In my case, I applied a sealant after curing, which enhanced the bond with the flooring material and increased durability. Proper prep ensures your floors stand the test of time, much like a well-primed canvas guarantees a vibrant painting.
While many believe that rough massages or quick fixes suffice, expert-level flooring hinges on understanding subtle nuances like moisture variations, subfloor stability, and material shrinkage. One common myth is that leveling compounds alone guarantee a perfect finish; in reality, ignoring environmental conditions during application can cause future cracks or warping. Advanced installers know that testing the subfloor’s moisture content with specialized devices can prevent costly mistakes, a step often skipped by DIYers who focus solely on surface appearance. A critical mistake is assuming wood expansion is uniform; different hardwood species expand and contract variably depending on humidity levels, leading to uneven surfaces over time, as studies have shown in flooring durability research (see https://tiletrendshop.com/hardwood-floors-floor-leveling-tips-for-lasting-beauty).
Why does proper moisture control in subfloors matter for long-term durability?
Moisture imbalance can cause the subfloor to swell or shrink, creating tiny but impactful dips or bumps that compromise the entire flooring structure. To avoid this, seasoned professionals use moisture barriers and humidity control measures, which are surprisingly overlooked by many installations. Additionally, understanding the specific shrinkage rate of your chosen floor type allows for strategic expansion gaps, preventing buckling and buckling-related cracks. Remember, the devil’s in the details—skipping these advanced steps is like building a house on sandy foundations. So, before you pour that leveling compound or install hardwood, think about the unseen factors and see how they impact your project’s longevity. Would you like to learn how to spot these subtle issues before they turn into costly repairs? Check out this expert guide for comprehensive tips on future-proofing your flooring projects. Your floors will thank you for paying attention to these hidden nuances—because precision today saves money tomorrow.
Keeping It Working: Essential Tools for Durable Floors
Achieving a flawless, long-lasting floor isn’t just about the initial installation; it requires the right tools to maintain and troubleshoot over time. Personally, I swear by a high-quality moisture meter like the Protimeter MMS2, which allows me to monitor subfloor humidity regularly—crucial for preventing warping or buckling in hardwood and tile installations. Additionally, investing in a professional-grade laser level, such as the Bosch GSL2.0, streamlines the process of verifying floor flatness periodically, ensuring that your surfaces remain truly level and safe for ongoing use.
Invest in Reliable Maintenance Equipment
Maintaining flooring integrity involves routine inspections and timely interventions. For hardwood floors, I routinely use a microfiber dust mop paired with a gentle cleaner like Bona Hardwood Floor Cleaner, which preserves the finish without introducing moisture—something I learned the hard way when harsh cleaners caused dullness over time. For tile, a grout renewal kit and a power scrubber can revive the appearance of grout lines, extending the visual appeal and integrity of your installation. Having these tools at hand empowers you to handle small repairs before they become costly issues, saving both time and money.
Long-Term Results Require Strategic Care
Surface cleaning won’t cut it in the long run; understanding how environmental factors influence your floors is vital. For example, controlling indoor humidity levels within 35-55% using a dehumidifier or humidifier helps prevent expansion or contraction, which over time can lead to gaps or buckling. I also schedule annual professional inspections, during which I request that an expert assesses moisture content, adhesion, and overall stability. This proactive approach has helped me catch minor issues early—like a slight tendon in a hardwood edge—saving me from extensive refinishing work later.
Envisioning Future Flooring Trends
Looking ahead, digital tools are poised to transform floor maintenance. Smart sensors embedded in flooring materials could continuously monitor moisture levels, structural shifts, and wear patterns, alerting homeowners or professionals via smartphone apps. This real-time data will empower more precise, predictive maintenance, minimizing downtime and extending the lifespan of floors significantly. Adopting such innovations now can set you apart as an early adopter of future-proof flooring care.
How Do I Keep My Floors in Peak Condition Over Time?
Establish a routine inspection schedule, utilize specialized moisture meters, and invest in quality cleaning tools tailored to your flooring type. Regular maintenance, combined with an understanding of environmental influences, ensures your floors remain beautiful and functional for years to come. Want to discover more about preserving your hardwood floors? Check out these expert care secrets and implement one advanced tip today—like installing a humidity monitor—GUARANTEED to boost your staying power.

Lessons That Forever Changed How I Approach Floor Leveling
- Never underestimate the power of thorough subfloor inspection; catching minor dips early can save dozens of headaches later.
- The biggest mistake I made was trusting my eyes alone—using precise measurement tools like laser levels transformed my results.
- Skimping on moisture control seemed harmless initially, but I learned that tiny variances can cause huge cracks down the line.
- Patience is key—waiting for leveling compounds to cure properly prevents future buckling and unevenness.
- Sharing my experiences has taught me that even seasoned pros continue learning—don’t shy away from seeking expert advice or new tools.
My Favorite Tools and Resources for Perfect Flooring
- Protimeter MMS2 Moisture Meter: Trusted for its accuracy, it offers peace of mind by preventing moisture-related issues from the start.
- Bosch GSL2.0 Laser Level: Its precision helps verify flatness, saving hours of manual checking and ensuring alignment.
- The Ultimate Floor Leveling Guide on TileTrendShop: An invaluable resource that distills complex techniques into actionable steps, continuously enhancing my skills.
- Contact Us at TileTrendShop: Their expert support channel provides personalized guidance, which has been instrumental during tricky projects.
Your Turn to Elevate Your Flooring Game
Taking the leap into quality floor leveling might seem daunting at first, but the payoff is a stunning, durable surface that lasts for decades. Remember, every perfectly level floor starts with a small step forward—don’t let minor imperfections hold you back. Are you ready to implement these insights and transform your space into a masterpiece? Share your plans or ask questions below—I’d love to hear about your journey to flawless flooring!
**Internal links:** For additional expert tips, visit this guide on precise floor leveling techniques. To explore top-rated tools, check out professional installation tips that can streamline your project.