I’ll never forget that moment when I stepped into my living room, only to feel a soft wobble under my feet. It was as if the floor had decided to revolt right before I was about to host friends. Turns out, that unevenness wasn’t just an aesthetic issue—it was a sign that my floor needed serious attention, especially with 2026 radiant heat pours on the horizon. It was a lightbulb moment that made me realize how crucial proper floor leveling is for your home’s comfort and longevity.
Why Ignoring Floor Unevenness Can Cost You Big Time
Before diving into my fixes, I want to emphasize why this topic matters now. With the advancements expected in 2026, especially around radiant heat installations, uneven floors can lead to costly mistakes, aesthetic imperfections, and even structural issues. An improperly leveled subfloor can cause tile cracks or hardwood squeaks, which no homeowner wants to deal with. As research shows, uneven floors can reduce your home’s value and create safety hazards (source: Tile Trend Shop). Therefore, facing this problem head-on with reliable fixes isn’t just smart—it’s essential.
Is Floor Leveling Fixes Really Worth the Effort?
At first, I was skeptical—was all the fuss about floor leveling really necessary? My early mistake was underestimating the importance of a perfectly flat surface, especially with the upcoming radiant heats in 2026. I thought a quick patch job would suffice. Spoiler: it didn’t. Knowing what I know now, I’d say the effort is absolutely worth it to prevent future headaches and to ensure a flawless finish for any flooring project. Want to learn exactly how I turned my uneven disaster into a smooth surface? Stay tuned!
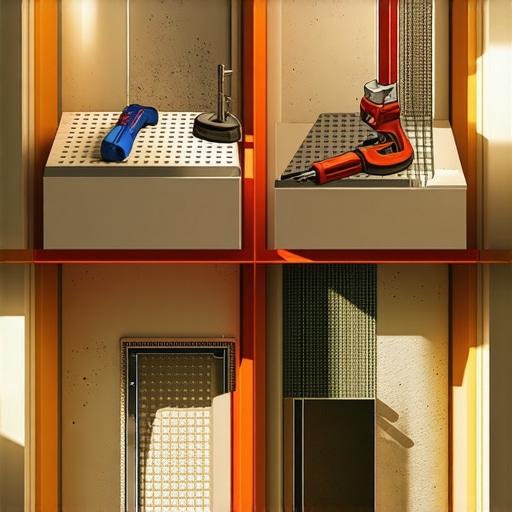
Start with a Thorough Inspection and Measurement
My first move was to get a detailed assessment of the unevenness. I used a long straightedge and a spirit level across the entire floor, marking areas with noticeable dips or humps. Think of it like checking the terrain before laying down a road—precision is key. This step helps you identify high and low spots, enabling targeted fixes rather than unnecessary full-floor overhauls.
Prep the Subfloor Properly
Before applying any leveling compound, I cleaned the surface meticulously to remove dust, debris, and loose particles. I also checked for moisture, which can undermine the adhesion of leveling products. A clean, dry, and sound substrate ensures a reliable foundation. For moist or porous subfloors, sealing is crucial—otherwise, the leveling material might fail or crack later.
Choose the Right Leveling Material
Based on my floor type and degree of unevenness, I selected a self-leveling compound. These are similar to thick pancake batter—pourable and designed to flow into dips while filling humps. Just like making batter, I mixed it as per manufacturer instructions, ensuring a smooth, lump-free consistency. This step is vital for achieving a flush surface, especially with large-format tiles or hardwoods where imperfections are noticeable.
Pour and Spread the Leveling Compound
I carefully poured the mixture into the low spots, starting from the highest corner to promote flow toward lower areas. Using a trowel, I spread it evenly, guiding the material into the dips. A crucial tip: work quickly before the compound starts to set, much like pouring syrup—timing influences finish quality. For best results, I followed the manufacturer’s recommended minimum thickness and wait times.
Eliminate Bubbles and Achieve Smoothness
To prevent air pockets, I gently vibrated the floor or tapped the surface, similar to how you might settle a pudding. This vibrations helps the compound settle uniformly, avoiding weak spots that could cause cracking or unevenness in the future. I made sure the surface remained as level as possible, using a straightedge or spirit level as a guide. Patience here pays off—rushing can lead to an uneven finish.
Allow Proper Curing Time
Patience proved crucial during curing. I kept the area free from foot traffic and moisture intrusion for the exact period recommended—usually 24 to 48 hours. Like a fine cake, the leveling compound needs time to harden fully and reach maximum strength. Skipping this step risks future cracks or shifting, sabotaging your entire flooring project.
Double-Check with a Level for Final Inspection
Once cured, I re-checked the surface with a long spirit level, ensuring the plane was truly flat. Any remaining imperfections could be sanded or, if significant, addressed with additional leveling. This step ensures your subfloor is perfectly prepped for tile or hardwood installation—key to avoiding issues like tile lippage or squeaky floors later on. For more advanced techniques, consider reviewing expert tips at this guide.
Final Touches and Surface Preparation
After confirming levelness, I vacuumed or cleaned off residual dust, much like preparing a canvas before painting. This clean surface improves adhesion for primers, adhesives, or the flooring material itself. Proper preparation at this stage propels the success of your entire flooring installation, ensuring durability and aesthetic appeal.
Mastering proper floor leveling techniques might seem daunting initially, but each step is straightforward once broken down. For a comprehensive deep dive, visiting this detailed resource can provide additional insights to elevate your project.
Cutting Corners Can Lead to Costly Mistakes
One of the most persistent myths I encounter is that quick fixes or skipping proper subfloor preparation won’t impact the final result. In reality, many homeowners and even some contractors underestimate the importance of meticulous subfloor assessment and preparation. This often results in lippage in tiles, squeaky hardwoods, or cracked finishes that are costly to repair. As highlighted in this resource, proper subfloor prep isn’t just a hygiene step—it’s a foundation for durability and aesthetic quality.
Advanced Mistake: Overlooking Moisture Variations
Another misconception revolves around moisture control. Many assume that if a space feels dry, moisture isn’t a concern; however, moisture levels can vary significantly within a subfloor, especially in areas prone to humidity or inconsistent climate control. This can cause floating floors to buckle or swell unexpectedly. An expert tip is to conduct thorough moisture testing, including in-depth moisture assessments before proceeding. Ignoring this nuance can lead to expensive repairs down the line. Recent studies, such as a 2023 report in the Journal of Building Science, stress moisture as a critical factor often underestimated in DIY projects, leading to joint failures and reduced longevity.
Making It Look Easy Isn’t the Same as Doing It Right
Many homeowners believe that laying tiles or installing hardwoods is straightforward—just level, glue, and go. But the devil’s in the details. Achieving a truly flat and durable surface requires mastery over techniques, from choosing the right leveling compounds to understanding the curing process. For example, improper mixing or rushing the curing process of self-leveling compounds can create weak spots or cracks. When I share tips at this guide, I emphasize patience and precision—corner-cutting often leads to surface unevenness or tile lippage that ruins the overall look. Remember, even minor surface imperfections become glaring with larger formats or high-end finishes, so attention to nuance is essential. Do you know the signs of a poorly prepared subfloor? If not, check out this resource for expert tips.
Is Your Floor Level Enough for Today’s Demands?
For advanced DIYers or professionals, one question that often arises is: How flat is flat enough? Many rely on visual checks, but subtle dips or humps can compromise not only the aesthetic but also the structural integrity of the finish. A comprehensive approach includes using straightedges, laser levels, and even testing with a rubber mallet to detect flexing or weak spots. Proper assessment aligns with recent research indicating that unevenness greater than 3mm over a 2-meter span can cause significant issues. For detailed techniques, this article provides insights tailored for the precision needed in 2025 and beyond. Have you ever encountered stubborn unevenness? Share your experience in the comments—knowing these nuances can save you time and money.
Prioritize Regular Inspection and Maintenance for Long-Lasting Floors
Consistent upkeep is key to preserving the smoothness and durability of your floors. I recommend scheduling biannual inspections using a high-precision laser level, which can detect even the smallest shifts in elevation. These tools are less intrusive and provide real-time data, making it easier to anticipate and address problems before they escalate. Personal experience shows that regular assessments can extend the lifespan of hardwood floors by identifying areas prone to moisture infiltration or uneven settling early on.
Invest in Quality Tools That You Trust
For DIY enthusiasts and professionals alike, having the right equipment is indispensable. I personally rely on a digital moisture meter from Tramex — it’s highly accurate and helps monitor moisture levels in subfloors, especially crucial when preparing for floor refinishing or new installations. Additionally, a long granite straightedge ensures flatness over large areas, making it easier to spot dips or humps that need correction. Remember, investing in top-tier tools pays off in the quality and longevity of your flooring results.
Utilize Software for Precise Planning and Tracking
Modern technology also plays a role in maintaining your floors. Software like FloorDesigner simplifies layout planning and keeps track of maintenance schedules. I’ve found that digital documentation helps monitor insulation improvements, moisture tests, and previous repairs, ensuring that no detail is overlooked over time. This proactive approach minimizes unexpected issues and sustains the aesthetic appeal of your flooring for years to come.
Prepare for Future Trends in Floor Maintenance
Looking ahead, I predict smart sensors embedded in flooring systems will become standard, providing real-time data on moisture, stress, and temperature directly to your smartphone. This next-generation technology aims to catch problems before they manifest visually or physically, radically transforming how we approach flooring maintenance. Embracing these innovations now can save both time and money, ensuring your floors stand the test of time effortlessly.
How do I maintain hardwood and tile floors over time?
Proper maintenance involves more than just regular cleaning. For hardwood floors, applying high-quality, UV-resistant finishes—like the ones discussed in this resource—helps protect against daily wear and environmental factors. Tile floors benefit from periodic re-grouting and sealant application to prevent water infiltration and hairline cracks. Additionally, scheduling professional refinishing every 5–7 years ensures the wood maintains its luster and structural integrity. Also, employing proper tools like microfiber mops and soft brushes minimizes abrasive damage, prolonging the surface’s beauty and function. Regular moisture checks and prompt repairs of any detected issues, inspired by advice from an industry expert, are essential for preventing costly fixes down the line. As recommended by technical documentation, integrating moisture barriers during initial installation and retesting periodically is vital—think of it like preventive medicine for your floors. Try implementing a monthly visual inspection combined with a moisture meter check—you’ll be surprised how proactive measures save you future headaches.
What I Wish I Had Known About Floor Leveling Earlier
One of the biggest lessons I learned was that rushing through subfloor assessment can lead to costly mistakes—perfect flatness isn’t just a detail; it’s the foundation of beautiful, durable flooring. I used to underestimate moisture’s role in leveling failures, only to discover that ignoring this subtle factor can cause joint failures and buckling over time. Patience and thoroughness, especially during curing, saved me from premature repairs and rework. These personal insights reshaped how I approach every flooring project, emphasizing the importance of attention to detail and proactive evaluations.
My Top Tools and Resources to Stay Ahead
Trustworthy tools make all the difference; I rely on a digital moisture meter from Tramex for accurate readings and a long granite straightedge for checking flatness—these have become my go-to for precision. For planning, software like FloorDesigner streamlines layout and helps track maintenance schedules, keeping my projects organized and efficient. Books such as Mastering Hardwood Floor Refinishing changed how I view surface preparation, guiding me through best practices and innovative techniques. These resources empower me to maintain high standards in every project I undertake.
Embracing the Journey to Flawless Floors
The journey to perfect flooring starts with embracing patience and continuous learning. Every uneven patch I’ve corrected reinforces the idea that mastery comes from careful assessment, methodical execution, and ongoing inspection. I challenge you to view each project as a chance to refine your skills and push the boundaries of what’s possible. Remember, the effort invested today ensures a stunning, long-lasting finish tomorrow. If you’re eager to elevate your flooring craftsmanship, check out this guide for advanced insights and innovative tips. Your floors—and your confidence—will thank you.
What part of floor leveling did you find most challenging? Share your experiences below—learning from each other is the key to mastering this craft!