
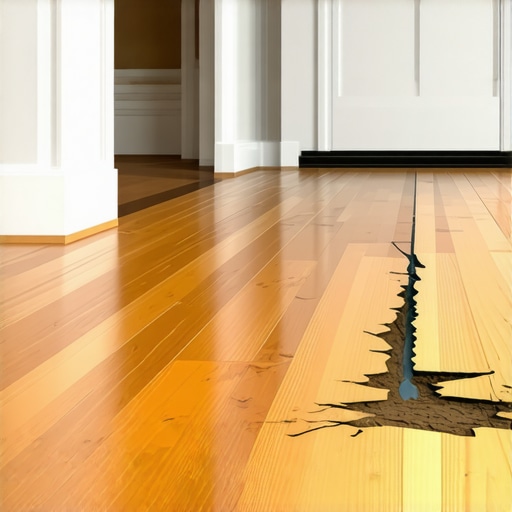
I remember the moment clearly—I stepped into my living room and felt that unmistakable squish under my feet. Turns out, my radiant heating system was inadvertently causing my beautiful hardwood floors to cup and gap, a problem I didn’t even realize was happening until it was almost too late. That lightbulb moment made me dive deep into the hidden pitfalls of radiant floor heating and its impact on wood flooring, learning the hard way that what seems like a cozy comfort can sometimes turn against us.
How Radiant Heating Can Harm Your Hardwood Floors
Many homeowners opt for radiant heating because of its efficiency and comfort. But if not installed or maintained properly, it can be a quiet destroyer of your wooden floors. The issue primarily lies in the way heat is transferred through the subfloor system. Excessive or uneven heat can cause wood to expand and contract, leading to warping, gaps, or cupping. This damage not only affects the aesthetic appeal but also shortens the lifespan of your flooring.
Early on, I made the mistake of assuming that all radiant heating systems behave the same. I failed to consider the importance of proper insulation and moisture control, which are crucial in protecting wood floors from thermal stress. According to experts in flooring care, ignoring these factors can lead to irreversible damage within just a few years. For more tips on maintaining your wood floors, check out this comprehensive guide.
Could Your Radiant Floor Be More Harm Than Good?
Before rushing to replace your floors or turn off your heating system, let’s explore whether your setup is genuinely causing damage, or if you just have a typical case of wear and tear. Many homeowners underestimate the importance of proper installation techniques, which can make all the difference. I’ll share insights from my own experience—like how neglecting to use a vapor barrier or failing to monitor humidity levels contributed to my flooring issues.
If you’ve noticed your hardwood floors developing cracks, gaps, or cupping, it might be time to evaluate your radiant heating setup. Integrating expert advice and correct installation practices can save you both money and the beauty of your floors. Ready to learn how to prevent this damage? Stay tuned as we uncover practical solutions to keep your hardwoods safe and gorgeous for years to come.
Prep Your Subfloor to Prevent Future Damage
Begin by thoroughly inspecting your subfloor for any uneven spots or debris. Use a long straightedge or a level to identify high and low areas. Think of your subfloor as the foundation of a building—if it’s not flat, everything else will be unstable. Remove any protruding nails or splinters, and fix or replace damaged sections. For complex issues, consult a professional or review this guide for detailed leveling techniques.
Achieve a Flat Surface with Proper Floor Leveling
Utilize Self-Leveling Compounds Correctly
Mix your leveling compound according to manufacturer instructions, ensuring no bubbles are trapped. Pour it over low spots, and use a notched trowel or gauge rake to spread it evenly. Allow sufficient curing time—rushing this step can cause unevenness similar to a waterbed. I once poured a batch too quickly, resulting in a lumpy, uneven surface that took hours to fix, emphasizing the importance of patience. For the best results, see this expert advice.
Smoothing Out with Trowels and Saws
After curing, use a long straightedge to check for dips or high spots and sand down any irregularities. A manual sanding block can help blend minor imperfections. Think of it like sanding a sculpture—precision is key. In my experience, going over the surface with a flooring sander on a low setting produces a perfectly flat base for your hardwood installation. Deliberate effort here saves headaches during the actual flooring process. Visit this resource for step-by-step strategies on leveling techniques.
Prepare for Tile or Hardwood Installation
Once your subfloor is flat and clean, apply a primer or vapor barrier if required by your flooring type. This prevents moisture issues that could damage your flooring over time. For hardwood, ensure the subfloor’s moisture content is below 12%. During my last installation, I used a moisture meter to confirm dryness—skipping this step could cause cupping later, much like my previous mistake. To learn more about selecting the right materials, explore this guide.
Lay Flooring Systematically to Avoid Mistakes
Start from a corner, marking your layout plan with chalk lines. Use spacers to maintain expansion gaps—these are crucial, much like leaving a cushion for your floors to breathe during temperature changes. Stagger seams randomly for strength. I once aligned all my planks perfectly and ended up with a visible pattern that looked unnatural; breaking the pattern saved my project. For tips on layout and pattern design, check this article.
Use the Right Tools for a Professional Finish
Employ a tapping block to snug planks together without damage, and a laminate roller to press joints tight. Regularly check alignment with a square or level. In my latest job, I used a weighted roller to ensure adhesive spread evenly, which resulted in fewer air pockets and a more stable surface. Proper tool selection and technique make the difference between a rough job and a finish that lasts. For detailed tool guidance, visit this resource.
Even seasoned professionals can be caught off guard by common misconceptions in flooring installation. One of the most pervasive myths is that laying a level surface guarantees a flawless finish; in reality, subtle subfloor imperfections often go unnoticed, leading to future cracks or uneven tiles. Ignoring this nuance can cause costly rework down the line. Moreover, many believe that a quick-drying adhesive is sufficient for all projects, but using the wrong type or neglecting proper curing times can result in joint failure and tile movement. Remember, patience and precision are your best allies. Advanced installers know that moisture control plays a critical role—excess moisture in the subfloor can lead to mold, warping, and adhesive failure. A study by flooring experts emphasizes that comprehensive moisture testing surpasses surface assessments, ensuring longevity. For those aiming for perfection, mastering techniques like proper floor leveling before tile or hardwood installation makes all the difference. As I’ve discovered through personal trial and error, meticulous prep work, including testing, leveling, and correct material selection, builds a solid foundation for any project. Ready to elevate your flooring knowledge? Dive into resources like this comprehensive guide and avoid costly mistakes. Remember, understanding the intricacies behind basic techniques transforms good craftsmanship into true artistry. Have you ever fallen into this trap? Let me know in the comments.
How do I keep my flooring systems in top shape over time?
Maintaining your floors requires the right combination of tools and routine care. I recommend investing in a high-quality flooring inspection mirror, not only to identify hidden issues beneath the surface but also to spot early signs of wear before they become major problems. Using a moisture meter regularly ensures your subfloor remains within the safe moisture range—below 12% for hardwoods—to prevent cupping and warping. For cleaning, a microfiber mop combined with a pH-balanced cleaner helps preserve finish and prevent buildup.
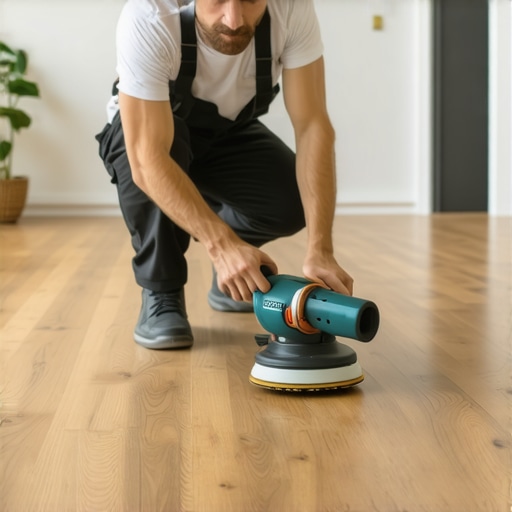
When it comes to long-term results, I advocate for periodic sanding and refinishing of hardwood floors every few years. A detail-oriented orbital sander with fine-grit pads is my go-to device, allowing smooth removal of surface imperfections without damaging the wood. For ceramic or tile floors, sealing grout lines annually with a specialized grout sealer keeps them resistant to staining and moisture infiltration. Advanced tools like a grout float and a handheld steamer make this process efficient and effective.
Predicting flooring care trends for the future
Looking ahead, I believe smart flooring maintenance will become increasingly prevalent. Connected sensors embedded in the subfloor could monitor humidity, temperature, and even structural stress, alerting homeowners before damage occurs. Automated cleaning devices, like robotic mops tailored for hardwood or tile, are also evolving to provide consistent upkeep without manual intervention. Staying ahead means embracing these innovations now; for example, integrating moisture sensors can save significant repair costs down the line.
Best practices for flooring upkeep
One area worth focusing on is the correct application of protective finishes or sealants. Using a sprayer designed for even coating, like a HVLP (High-Volume Low-Pressure) sprayer, can guarantee uniform layers and extend the longevity of your flooring. Remember, addressing problems early with precise tools is much more cost-effective than waiting until damage is visible and costly to repair. For more detailed advice, you can consult our hardwood floor care guide.
To get started, try applying a high-quality penetrating wood oil on your hardwoods this season. It’s an excellent way to nourish the wood and enhance its natural appearance while providing a protective barrier against everyday wear.
Lessons from the Trenches That No One Tells You About Floor Installation
One of my most eye-opening lessons was realizing how easily even small mistakes in subfloor preparation can cascade into costly repairs later. I once skipped thorough moisture testing, thinking a quick check was enough, only to face cupped and buckling floors months down the line. It taught me that meticulous prep work, though time-consuming, pays dividends in the long run.
Another lightbulb moment was understanding the importance of timing. Rushing the curing of self-leveling compounds or adhesives may seem efficient, but it often results in uneven surfaces or future cracks. Patience truly is a virtue when working with flooring materials—it’s about creating a solid foundation first.
Finally, I learned to respect the nuances of heat and humidity control. Even with radiant heating, improper insulation or humidity imbalance can spell disaster for hardwoods. Investing in quality moisture barriers and monitoring tools like hygrometers saves headaches—and floors—down the line.
My Go-To Tools and Resources for Flooring Success
For guaranteed professional results, I rely on trusted tools such as a high-quality moisture meter from this selection. It helps me ensure subfloor dryness before laying any materials. When it comes to leveling, I swear by expert-approved leveling guides that walk through mixing and curing techniques step-by-step. For finishing touches, industry-standard hardwood maintenance tips help me keep floors looking pristine year after year.
Reading materials like this comprehensive refinishing guide have transformed my approach, turning DIY mishaps into mastery. They provide insights that go beyond basics, ensuring I really understand the ‘why’ behind each step.
Your Next Step in Creating Flawless Floors
Embarking on your flooring project is exciting, but remember that the magic lies in thorough preparation and patience. Every misstep is a learning opportunity, guiding you towards craftsmanship that lasts. Whether you’re installing hardwood or tile, embracing the detailed techniques shared here will elevate your work and ensure beauty and durability over time. So, are you ready to take your project to the next level? I’d love to hear your plans or past experiences—share below!