It was a chilly Saturday morning when I finally decided to tackle my kitchen renovation, dreams of a sleek, elegant tile floor dancing in my head. I eagerly laid the tiles, imagining how stunning it would look, only to discover a few weeks later that cracks had started to appear. That sinking feeling hit me hard. How could something so new already be showing signs of failure? Turns out, I overlooked a crucial detail—subfloor leveling. That mistake reminded me just how vital a properly prepped foundation is for tile longevity.
The Hidden Culprit Behind Cracking Tiles
Early on in my tiling journey, I didn’t realize that an uneven subfloor is often the main reason tiles crack or pop loose. It’s not enough to focus solely on laying the tiles; the subfloor must be flawless, or you’ll face issues down the line. According to industry experts, ignoring proper floor preparation increases the risk of cracks and other damage, especially over time. That’s why investing time in subfloor leveling now can save you headaches and money later. If you’re wondering whether your floor is up to par, stay tuned—I’ll walk you through essential fixes to ensure your new tile stays perfect for years to come.
Is Subfloor Leveling Truly Worth the Effort?
Honestly, I made the mistake early in my renovation journey of rushing the subfloor prep, thinking I could fix issues after laying the tiles. Spoiler alert: that decision led to more repairs and frustrations. If I could go back, I’d prioritize proper subfloor leveling techniques, like those outlined by flooring experts in The Ultimate Guide to Floor Leveling. The good news is, correcting these problems isn’t impossible, and I’ll share four proven fixes to get your floor perfectly flat. Whether you’re remodeling your kitchen, bathroom, or any space, these tips will help you avoid cracking tiles and ensure stunning results. So, if you’ve faced the issue of tiles cracking prematurely, or you’re just aiming for a professional look, keep reading. The solutions are closer than you think, and I’ll show you exactly how to implement them.
Prepare Your Subfloor with Care and Precision
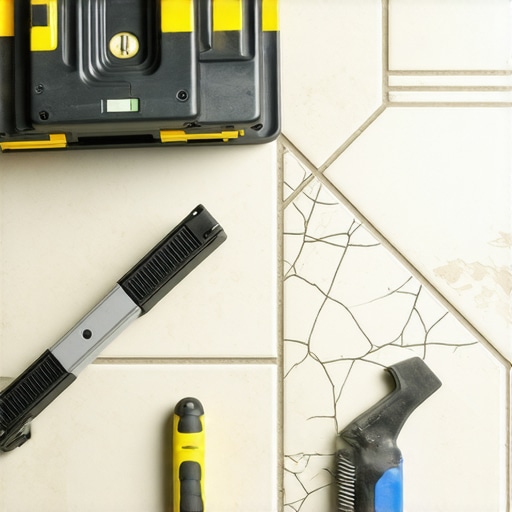
Imagine trying to build a house on quicksand—you wouldn’t get very far, right? That’s exactly what happens if your subfloor isn’t level before installing tiles or hardwood. To start, remove all debris, dust, and loose material. Use a laser level or a chalk line to identify uneven spots, making your work precise. When I did this in my kitchen, I marked high and low areas, which helped me target specific spots for correction, resulting in a much smoother surface that prevented future cracks.
Apply Self-Leveling Compound Effectively
Self-leveling compounds are your best friends in smoothing out minor dips and bumps. Pour the compound in sections, starting from the lowest point, and use a gauge rake or trowel to spread it. Don’t rush; give each section time to set as per manufacturer’s instructions. I remember meticulously pouring and spreading a batch in my dining area—I worked systematically, ensuring each layer was spread thinly and evenly. This attention paid off with a surface so smooth that tiles adhered perfectly without cracks or lippage.
Check for Persistent Unevenness
After curing, recheck with a level or straightedge. Place it across the floor in multiple directions. If you find still-slight dips or high spots, address them immediately. For minor imperfections, apply additional leveling compound or sand down high spots with a concrete grinder. During my project, I identified a few stubborn low spots that demanded a second round of leveling; fixing these prevented tile lippage later on and made the installation process much smoother.
Use Proper Techniques During Tile and Hardwood Installation
With a perfectly prepared surface, focus on installation. For tiles, employ spacers and a quality adhesive. For hardwood, ensure your subfloor is well-primed and use recommended nail or glue methods. My experience installing tile in my bathroom taught me to work systematically from one corner outward, checking for consistent spacing and level. For hardwood, I learned to stagger planks properly and avoid over-tightening nails, preventing squeaks and uneven surfaces. You can find detailed strategies at tile installation pointers that ensure long-lasting results.
Finish with Accurate Grouting and Sealing
Once tiles are set, apply grout carefully, filling joints completely to prevent movement. Seal the grout after curing to protect against moisture and staining. For hardwood, finish with sanding and sealing, matching your desired sheen. During my last project, I used a rubber float to press grout into joints firmly, then cleaned excess immediately to prevent film buildup. This small step significantly impacted the longevity and appearance of my floor, making maintenance easier for years to come.
Always Prioritize Quality and Patience
Installing floors isn’t about rushing through; it’s about building a solid foundation for beauty and durability. Take the time to level, test, and refine your surface. In my own experience, patience during each step eliminated many potential problems down the line, saving me costly repairs and frustrating call-backs. Mastering these core steps unlocks a professional finish that lasts, elevating your entire space to a new standard of quality. For more expert insights, visit hardwood care secrets and floor leveling techniques.
While many homeowners believe that installing hardwood floors is as simple as laying down planks and calling it a day, this oversimplification can lead to costly mistakes. One prevalent myth is that hardwood floors can tolerate minor subfloor unevenness without issue. In reality, even small dips or bumps can cause visible gaps, squeaks, or uneven wear over time. According to industry professionals, investing in proper floor leveling techniques is crucial for both hardwood and tile to ensure durability and aesthetic appeal. Skipping this step often results in uneven surfaces, which are difficult to correct later and may require costly refinishing or replacement.
Why do many people underestimate the impact of subfloor preparation?
A common oversight is believing that the floor material itself can compensate for imperfections in the subfloor. However, this is a misconception. Durable and flawless finishes depend on a perfectly level base. For example, underestimating the importance of moisture testing or neglecting high spots can lead to gaps, cupping, or buckling, especially in expansive materials like hardwood. Expert advice emphasizes that detailed inspection and correction before installation are investments that pay off in the longevity of your floors. To get it right the first time, consider consultation on precise floor leveling methods.
Furthermore, many believe that ongoing maintenance can compensate for installation flaws. While routine care extends the life of floors, it cannot fix foundational issues established during installation. An advanced mistake often made is assuming that minor imperfections are insignificant. Studies have shown that even slight imperfections can lead to disproportionate problems over time, such as increased crack formation in tiles or squeaky hardwoods. A deep understanding of these nuances can help you avoid premature failures and costly repairs.
Let’s address an advanced question that trips up even meticulous homeowners: What are the critical signs that your subfloor isn’t just uneven but actively damaging your flooring? Experts recommend paying close attention to persistent creaks, visible gaps, or noticeable height differences even after leveling attempts. These signs indicate underlying issues like moisture problems or subfloor rot that need to be addressed before proceeding with installation. Paying attention to these details ensures your investment in quality flooring yields long-lasting beauty and function.
Are you aware of these hidden pitfalls in flooring installation? Ensuring you avoid these common myths and mistakes can save you thousands in repairs and help you achieve that flawless finish you desire. For more professional strategies, visit floor leveling experts and learn how proper preparation can transform your space. Share your experiences or questions in the comments—I’d love to hear about your projects and help you avoid these pitfalls!
Maintaining high-quality hardwood floors, tiles, or leveled subfloors over time requires the right tools and techniques. Personally, I prioritize equipment that offers precision, durability, and efficiency. A laser level, for instance, is indispensable for ensuring a perfectly flat surface before installation. I trust the Bosch Professional Cross-Line Laser because its rotating beam helps me verify even the most complex slopes and contours, minimizing errors that could lead to cracks or uneven wear. Additionally, investing in a high-quality self-leveling compound application tool, like a gauge rake, allows me to spread the compound evenly, preventing voids or dips that could compromise the floor’s integrity. For tile installation, I always use a wet saw with a diamond blade—this ensures clean, precise cuts, especially when dealing with intricate patterns or custom sizes, reducing material waste and the need for rework. In terms of long-term maintenance, I recommend a handheld steam cleaner to periodically refresh surfaces without harsh chemicals, extending the lifespan of both hardwood and tile finishes.
Future trends point toward smarter, more precise tools. With advances in laser technology and automation, expect to see more integrated leveling systems and digital moisture meters, which provide real-time data and significantly reduce installation errors. Embracing these innovations can future-proof your flooring investments.
To keep your floors in prime condition, regular inspections using moisture meters and level checks are critical. If you notice any unevenness, address it swiftly with targeted repairs—like applying additional leveling compound or reinforcing weak subfloor areas. For example, the precise floor leveling techniques I follow have helped me achieve a flat, durable surface that resists cracking and buckling over time.
How do I maintain my hardwood or tile floors over time?
First, establish a routine for cleaning with products suited specifically for your flooring type—this prevents dirt buildup that can scratch or dull surfaces. Second, consider applying a sealant every few years; this acts as a barrier against moisture, stains, and everyday wear. Third, perform periodic level checks using a high-quality spirit level or digital device. Addressing minor dips or cracks early can save you from costly repairs later. Remember, the key to enduring beauty and function lies in proactive maintenance, supported by reliable tools and consistent attention.
If you’re ready to elevate your maintenance game, try using a laser level combined with a moisture meter for proactive checks. These two tools, when used together, can reveal hidden issues before they escalate—saving you time and money. Visit this guide to discover more about protecting your floors long-term.
What I Wish I Knew About Foundational Balance
One lightbulb moment was realizing that even the slightest unevenness in the subfloor could spell disaster down the line. I underestimated how critical meticulous site prep is, often rushing through leveling steps. Now, I understand that investing in the right tools and taking the time to get it perfect before laying down tiles or hardwood makes all the difference—it’s an investment in longevity, not just aesthetics.
How Small Fixes Save Big Money
I learned that a second round of self-leveling compound, though tempting to skip, can prevent headaches like cracking or squeaking. These small, initial investments in proper preparation avoid costly repairs later, and this practice transformed my approach from reactive to proactive. Paying attention to tiny dips and forgiving imperfections early on saved my floors from premature failure.
The Power of Proper Technique and Patience
Rushing the installation process might seem to save time, but it leads to issues that can haunt you years later. Taking my time with adhesion, grout, and sealing—employing precise tools—ensured a floor that not only looked great but stood the test of time. Patience is, in fact, a strategic advantage in achieving that professional finish veteran installers swear by.
Why Elevating Your Flooring Game Matters
Understanding the importance of this detailed process helped me realize flooring isn’t just about looks; it’s about durability, safety, and comfort. Now, I see each project as an opportunity to master the seemingly small but truly significant steps, knowing that they collectively guarantee long-lasting beauty. If you’re willing to prioritize quality and precision, your floors will reward you with decades of service.
Curated Gems to Guide Your Journey
For those eager to deepen their expertise, I recommend exploring The Ultimate Guide to Floor Leveling. It laid the foundation of my knowledge. Additionally, tools like the precision-leveling kits and moisture meters have become my trusted companions, ensuring each step is accurate. Combining expert resources with quality tools—such as laser levels and gauge rakes—really elevates your results, making the process both easier and more satisfying.
Your Turn to Craft a Floor for a Lifetime
Every successful flooring project begins with respect for the fundamentals. If you’re ready to turn your space into a durable masterpiece, embrace patience, invest in the right tools, and never underestimate the power of proper preparation. Remember, a well-laid floor isn’t just an aesthetic decision; it’s a statement of craftsmanship and lasting quality. I encourage you to start your own journey with confidence and a detail-oriented mind—because every great floor begins beneath the surface.
Have you faced unexpected challenges during your flooring projects? Share your experiences or questions below, and let’s learn from each other’s floors!
**
Reading this post really hit home for me because I recently tackled a small bathroom renovation and learned the hard way about the importance of proper subfloor preparation. I hurried through the leveling process, thinking I could fix it later, but shortly after installation, I noticed some tiles start to pop and crack. It’s frustrating because I now realize a few extra hours of meticulous leveling could have saved me all that frustration and repair costs. What surprises me is how many overlook this crucial step, assuming the material or adhesive can compensate for uneven flooring. From your experience, what are some effective ways to identify hidden unevenness that might not be obvious at first glance? I’ve started using a laser level, but I’d love to hear about personal tricks or tools others have found useful before laying the tiles. Ensuring a flawless surface sounds tedious but totally worth it in the long run.