
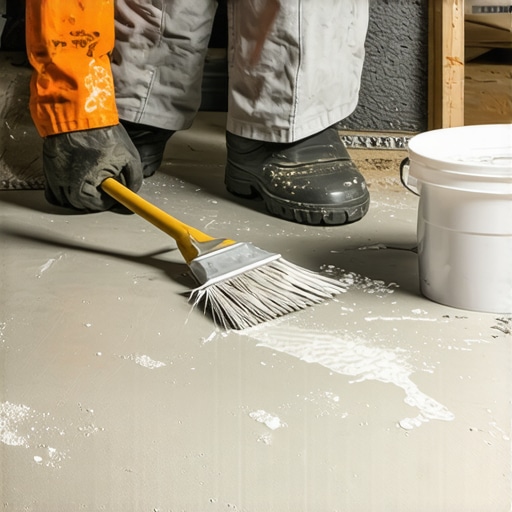
I remember the moment vividly: after hours of meticulous work on my living room floor, I poured the leveling compound only to see it bubble up like a half-deflated balloon. Frustration turned to confusion. Why was my carefully prepared primer causing such chaos? If you’ve faced something similar, you’re not alone. Many DIY enthusiasts and even seasoned pros find themselves baffled when their floor leveling attempts go awry, especially with issues like bubbling. Today, we’re going to get to the root of why your floor primer might be making your leveler bubbling worse and, more importantly, how to fix it.
Getting to the Heart of the Primer Problem
The key to a flawless, bubble-free floor starts long before the first trowel of leveling compound. It begins with the primer. Think of primer as the foundation of your entire floor project—if it isn’t applied correctly or chosen wisely, everything that follows can suffer. I’ve learned this the hard way, making early mistakes by ignoring the importance of the right primer or skipping critical application steps. These missteps can lead to trapped air, adhesion issues, and that dreaded bubbling.
What’s worse? When primer doesn’t dry properly or reacts poorly with the leveler, it can cause the leveling compound to lift and bubble, leaving you to redo the entire process. According to recent industry insights, improper surface preparation, including the use of incompatible primers, is a leading cause of bubbling and adhesion failure in floor leveling projects. This isn’t just my opinion; it’s backed by experts in flooring installation.
Have you already faced the frustration of bubbling after applying primer? If so, don’t worry—there’s a way to turn things around. The first step is understanding what went wrong, which leads us to the core issues with primers in leveling applications. Stay tuned, because we’re about to unpack the practical solutions that will save you time, money, and a lot of headache.
Prepare Your Surface for Perfect Primer Application
Start by thoroughly cleaning the substrate, removing dust, grease, and loose debris with a damp cloth and, if necessary, a mild detergent. Use a vacuum or air blower to eliminate residual dust that might interfere with adhesion. An unclean surface is like trying to paint a greasy wall—expect poor bonding and bubbling.
Choose the Right Primer for Your Floor Type
Select a primer compatible with your subfloor material and the leveling compound. For concrete, a bonding primer designed to seal porosity is essential. Refrain from using generic primers; instead, opt for products recommended by manufacturers or flooring experts. When I did my first project, I mistakenly picked a primer meant for wood on concrete, which caused bubbling—learning from that, I now always double-check compatibility before applying.
Apply Primer Properly and Consistently
Use a high-quality roller or brush to apply a thin, even coat—think of painting a wall with a mini roller for uniform coverage. Avoid puddles or thick layers, as these trap air and slow drying, leading to bubbles. During my second attempt, I paid attention to the application technique, applying in small sections and maintaining a wet edge to prevent overlaps. The result was a perfectly primed surface that dried uniformly.
Allow Adequate Drying Time
Follow the manufacturer’s guidelines for drying times, generally allowing 24 hours before proceeding. Rushing this step is a common mistake; I once applied leveling compound too soon, and the primer hadn’t fully cured, which caused bubbling. To verify dryness, gently touch the surface—if it feels cool and tacky, give it more time. Proper drying ensures the primer forms a solid bond, preventing air entrapment under the leveling layer.
Test Surface for Compatibility and Adhesion
Before pouring the leveling compound, perform a simple adhesion test: dampen a small patch of primer with water; if it beads up or resists absorption, it’s suitable. I recommend the simple test because incompatible primer reacts poorly when mixed with the leveling compound, leading to bubbling issues. This step helps you catch potential problems early, saving time and frustration later.
Apply Leveling Compound Correctly
Once the primer is fully dry, mix your leveling compound precisely as instructed, avoiding variations in water or powder ratios. Use a notched trowel to spread the mixture in a consistent layer, working quickly to prevent air pockets. During my first try, rushing through this step caused uneven surfaces and bubbles. Patience and careful technique here are crucial—think of it as laying a flat, stable foundation for the rest of your floor.
Use Additional Techniques for a Flawless Finish
Consider using perimeter dams or masking tape around edges to control the flow of leveling compound, especially on larger surfaces. These simple tricks help maintain an even thickness and prevent air entrapment at the edges. For challenging spots, a bubble-release roller can help push out trapped air, ensuring a smooth, bubble-free surface. Mastering these micro-techniques can make the difference between a professional-looking floor and a DIY disaster.
For more in-depth strategies, visit the Ultimate Guide to Floor Leveling that covers everything from surface prep to finishing touches. Remember, meticulous preparation and patience yield the best results, saving you headaches down the line.
When it comes to flooring projects, many assume that following standard instructions guarantees success. However, a deeper understanding reveals that some widespread beliefs can actually hinder your progress. For example, the idea that more adhesive or primer leads to better bonding is misleading; excess can trap air or prevent proper curing, causing long-term issues. Instead, precise application according to manufacturer guidelines is crucial for durability. Additionally, many think all hardwood floors respond similarly to environmental conditions, but species like oak and maple have different moisture sensitivities, affecting installation and longevity. Recognizing these nuances helps avoid costly mistakes. One common trap is rushing the drying time of adhesives and leveling compounds, which most overlook. This oversight can lead to bubbling, cracks, or de-lamination down the line. Experts emphasize waiting times and proper surface preparation—details often skipped by DIY installers. Advanced practitioners also focus on subfloor imperfections, employing techniques like the “shingle method” for low spots, which reduces the risk of uneven surfaces. A sophisticated question to consider: How does substrate flexibility influence the choice of flooring material in high-traffic or climate-variable areas? Studies from flooring science research show that substrate adaptability directly impacts adhesion quality and prevents future damage. To master these intricacies, explore comprehensive guides such as floor leveling techniques that go beyond basic tutorials. Recognizing and applying these advanced insights not only enhances your craftsmanship but also prolongs your flooring’s lifespan. Have you ever fallen into this trap? Let me know in the comments.
Invest in Precision Equipment for Long-Term Success
When I first started with flooring installations, I realized that the right tools could make or break the quality of the outcome. High-quality equipment not only ensures a professional finish but also saves time and reduces frustration. For instance, I always recommend using a laser level like the Dewalt DW089LG. It provides accurate, quick readings over large areas, helping to ensure your floor is perfectly level from corner to corner. This kind of precision tool is invaluable for tile and hardwood installations where uneven surfaces can cause major issues down the line.
Prioritize Professional-Grade Handheld Tools
While power tools get most of the attention, don’t overlook the importance of specialized handheld equipment. A good notched trowel, for example, is crucial for spreading thinset or adhesive evenly. I swear by the Marshalltown Notched Trowel because of its balanced weight and durability, which allows for consistent application thickness—key for preventing bubbles and ensuring adhesion. Similarly, a quality carbide-tipped saw like the DeWalt DWE575 helps me make precise cuts, especially when working with hardwood or porcelain tiles, where clean cuts are non-negotiable for a seamless look.
Utilize Floor Leveling Systems to Save Time
In many projects, especially older or uneven subfloors, manual leveling can be tedious and inaccurate. That’s where self-leveling underlayment systems come into play. I’ve had excellent results with the QUIKRETE Self-Leveling Floor Underlayment, which I apply with a specialized gauge rake to achieve an even surface rapidly. This step is critical in preventing issues like bubbling or cracking later. For an extra edge, I use laser-guided tools to verify flatness after pouring. Mastering these systems can dramatically improve long-term durability and reduce rework—something especially valuable for larger installations.
Prepare Your Workspace with Proper Measuring Devices
Accurate measurements are the backbone of a quality flooring job. I rely on digital distance meters such as the Bosch GLM 50 C due to its speed and high accuracy. It helps me measure complex room layouts and transfer those measurements directly to my cut pieces, minimizing waste and ensuring a precise fit. Additionally, when working with large formats, I double-check levelness with a long spirit level to catch subtle dips that can cause uneven surfaces or tile cracking over time. Investing in these measuring instruments pays off by preventing costly mistakes.
Predicting the Future of Flooring Tools
Expect to see more integration of smart technology into flooring tools. Imagine laser levels that connect to your smartphone app, providing real-time feedback and suggestions for corrections. As technology advances, I believe this will become standard, making DIY projects and professional jobs more accurate and efficient. Staying updated with the latest tools will give you a significant advantage, especially for complex projects involving tile or hardwood flooring.
How do I maintain my tools to ensure longevity?
Proper maintenance involves regular cleaning, especially after messy installations. Keep power tools lubricated according to manufacturer instructions, and store everything in a dry, organized space to prevent rust and damage. Calibration of instruments like laser levels or digital measuring devices should be checked periodically using manufacturer recommended procedures. For example, manufacturers often advise testing laser accuracy against a known reference point to ensure ongoing precision. Taking the time to care for your tools ensures they perform consistently, saving you money and headaches in future projects. For advanced tips on maintaining your equipment, visit this comprehensive guide.
Lessons That Saved My Floors
One of the hardest lessons I learned was the critical importance of surface preparation. Skipping thorough cleaning or rushing the drying process of primer led to bubbling that ruined entire projects, reminding me that patience and attention to detail are non-negotiable.
I also discovered that choosing the wrong primer can be a silent killer—an incompatible product causes adhesion issues that surface prematurely. Now, I always verify compatibility and follow manufacturer instructions meticulously, saving myself headaches and rework.
Another lightbulb moment was realizing that even the best leveling compound can’t fix a poorly prepared or inadequately primed surface. It’s like building a house on shaky ground; no matter how good the materials, the foundation must be solid from the start.
Tools and Tips That Changed My Approach
Over time, I’ve curated a toolkit that makes the difference—quality primers, precise measuring devices like digital level meters, and professional-grade trowels have become essentials. For instance, using a laser level helped me ensure surface flatness before pouring leveling compounds—this simple step prevented future bubbling and cracking, and I recommend checking out these leveling techniques.
Investing in the right tools and learning micro-techniques, such as releasing trapped air from leveling layers, has elevated my craftsmanship. Remember, small, consistent steps lead to big results—don’t underestimate the power of proper tool maintenance and accurate measurements.
Stay Curious, Stay Patient
The journey to a perfect floor isn’t just about following steps; it’s about embracing the learning curve. Each mistake is a teacher—whether it’s a bubbling primer or an uneven surface, it’s an opportunity to learn and improve. The right mindset combined with the right techniques transforms DIY struggles into professional successes.
Uncover Hidden Gems for Your Flooring Projects
For in-depth knowledge, I highly recommend exploring the comprehensive guide to flawless floor leveling. It’s packed with insider tips that go beyond basic tutorials, helping you anticipate issues and troubleshoot effectively.
Additionally, tools like a high-quality notched trowel, laser level, and moisture meters from trusted brands have proven invaluable in my projects. Not only do they streamline execution, but they also ensure durability—saving you time and money long-term. Check out these hardwood floor care secrets for tips on maintaining your floors after installation.
Embrace Your Flooring Journey
Designing and installing floors is as much about patience and passion as it is about technique. My advice? Approach each project with curiosity, invest in quality tools, and remember that a flawless finish is within your reach. Every step you take brings you closer to a space that truly reflects your effort and dedication.
What has been your biggest challenge when preparing your floors, and how did you overcome it? Share your stories below—I look forward to learning from your experience!