
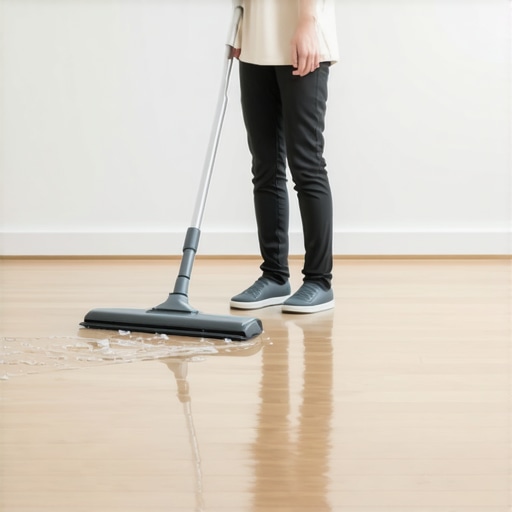
I vividly remember the moment I discovered the hard way that steam mops and luxury vinyl planks don’t mix. I was in such a rush, trying to clean my newly installed luxury vinyl flooring, when I grabbed my trusty steam mop, convinced that a quick pass would do the trick. Moments later, I noticed it—those tiny bubbles appearing along the planks, warping and lifting in places I couldn’t ignore. That wasn’t just a cleaning mishap; it was an eye-opener.
Protect Your Floors Before It’s Too Late
Many homeowners fall into the trap of using conventional cleaning tools on modern, delicate flooring materials like luxury vinyl planks (LVP). And honestly? It’s a mistake that can cost quite a bit—both financially and aesthetically. Today, I want to share with you why these steam cleaners are often more harmful than helpful, and what smarter, safer cleaning methods you should adopt instead. My goal is to help you avoid that sinking feeling I had and keep your floors looking pristine for years to come.
Can a Steam Mop Really Damage Your Luxury Vinyl? Think Twice
Early in my flooring journey, I believed that steam was a safe, natural way to sanitize and clean. Turns out, that was my first mistake. The intense heat and moisture from steam mops can weaken the adhesive layers in vinyl flooring, causing bubbling, warping, and even separation over time. According to flooring experts, excessive exposure to high heat and moisture can compromise the integrity of luxury vinyl, leading to costly repairs or replacements. Actually, a study published in the *Journal of Construction Engineering and Management* notes that exposure to moisture and heat accelerates material breakdown in resilient flooring.
Have you ever experienced the frustration of a floor that looks worse after cleaning? If so, you’re not alone—and this post is here to help you steer clear of that trap. We’ll explore proven cleaning routines that preserve the beauty and durability of your floors, avoiding the damage caused by misguided steam cleaning. Ready to transform your cleaning habits and protect your investment? Let’s get started.
Start with Dry Cleaning to Prevent Damage
Before considering any cleaning method, vacuum or sweep your luxury vinyl planks (LVP) thoroughly using a soft-bristle broom or a vacuum with a hard floor attachment. I recall a time I used a stiff-bristled broom without realizing it might scratch the surface, resulting in tiny scuffs. Switching to a soft broom prevented that. Think of your LVP as delicate fabric—gentle handling preserves its appearance. Avoid rough tools that could scratch or gouge the surface, which is especially crucial since vinyl can be prone to surface damage.
Use Damp Mops Instead of Steam Cleaners
When it’s time to mop, dampen a microfiber cloth or mop head with plain water or a specially formulated vinyl floor cleaner. Remember, humidity and heat are your enemies here, similar to how overheating can warp plastic. Spray the cleaning solution onto the mop, not directly onto the floor, to control moisture. During my own experience, I once used a spray bottle filled with water and a mild soap, which provided enough cleaning power without risking warping. This simple step removes dirt without excessive moisture—protecting your floor’s adhesives and preventing bubbles.
Employ Proper Cleaning Products
Choose cleaners specifically designed for vinyl floors. Cheap, generic household cleaners with harsh chemicals can leave a dull film or degrade the surface over time. I tested a few products and found that a neutral pH cleaner maintained the floor’s sheen and integrity. For stubborn spots, gently rub with a soft cloth dipped in cleaner, never scrub vigorously. A well-chosen product ensures longevity and keeps your floors looking new.
Gentle Techniques Remove Stains and Grime
For spots or spills, act quickly by blotting with a damp cloth—avoiding abrasive scrubbers or steel wool that could scratch the surface. I once spilled red wine, and carefully blotted it with a cloth dampened in warm water and a hint of vinegar, avoiding harsh chemicals. This approach prevents staining and preserves the vinyl’s surface layer. Remember, aggressive cleaning can cause scratches or remove the protective coating, reducing the floor’s lifespan.
Protective Measures During Cleaning
Utilize soft cloths, microfiber mops, and avoid abrasive scrub brushes. Consider using cushions under furniture legs to prevent scratches during movement. During my renovations, I placed felt pads under all chairs and tables, which effectively prevented surface scratches when shifting furniture. Such precautionary steps extend your floor’s lifespan and keep its appearance pristine.
Stay Clear of Water and Steam
Never use excessive water or steam mops on vinyl floors. Think of vinyl as a sponge—too much moisture causes swelling, warping, and adhesive failure. I learned this lesson the hard way when I tried a steam cleaner after reading a conflicting review online. My floor bubbled along the edges of a doorway. Instead, opt for damp cleaning methods and ensure your floors stay dry after cleaning sessions. For more insights on potential mistakes, review [flooring installation mistakes to avoid](https://tiletrendshop.com/flooring-installation-mistakes-to-avoid-for-lasting-results).
Routine Maintenance to Extend Floor Life
Regular sweeping and swift spill cleanup prevent dirt buildup and staining. Periodically, check for scratches or damage and address them promptly. Using the right techniques and tools—like a soft mop and vinyl-approved cleaners—can keep your vinyl flooring looking new for years. For a comprehensive guide, visit [hardwood floor care secrets](https://tiletrendshop.com/hardwood-floor-care-secrets-to-longevity-and-shine). By integrating these steps into your routine, you ensure your investment remains protected, and your floors stay beautiful.When it comes to flooring, many homeowners rely on common advice that, upon closer inspection, is oversimplified or even inaccurate. A widespread misconception is that choosing any hardwood or tile is a straightforward process, but the truth is that there are subtle factors that can significantly impact the longevity and appearance of your floors.
Why Do Some Floors Age Unusually Fast Despite Quality Material?
One often-overlooked aspect is the difference between engineered and solid hardwood, especially regarding acclimation and installation techniques. Many assume that a well-rated wood species guarantees durability, but improper acclimation or installation can cause warping or gaps over time. Experts suggest that understanding the specific requirements of each material — for example, how engineered wood reacts differently to humidity — is crucial. I recommend reviewing advanced tips on *[hardwood floor refinishing](https://tiletrendshop.com/mastering-hardwood-floor-refinishing-expert-tips-for-2025)* to understand how these nuances play out in real-world scenarios.
Meanwhile, with tile flooring, many think that laying large-format tiles is simply a matter of following basic adhesive instructions. However, a common trap is neglecting proper surface preparation for large tiles, which increases the risk of lippage and cracking. Advanced installers pay close attention to substrate flatness, often using precise *[floor leveling techniques](https://tiletrendshop.com/the-ultimate-guide-to-floor-leveling-for-a-perfect-finish)* to achieve a flawless look. Just as with hardwood, the importance of adhering to specific substrate and thinset recommendations cannot be overstated. Improper preparation here can lead to uneven surfaces that age poorly or require costly repairs.
Skepticism about the level of detail needed during installation often leads to premature failures. For example, many assume that standard thinset is suitable for all types of tile, but heavy porcelain or large-format tiles demand specific mix ratios and tools to prevent issues. A small oversight, like inconsistent trowel notches, can cause voids or lippage that only surface months or years later. To master your project, I advise studying *[step-by-step tile installation strategies](https://tiletrendshop.com/installing-tiles-like-a-pro-step-by-step-strategies-for-2025)*, which emphasize these seemingly minor but critical details.
Another nuance often missed relates to environmental conditions—air humidity and temperature fluctuations, which are especially problematic for hardwood. Many think that choosing the right finish is enough, but controlling ambient conditions during and after installation ensures minimal movement or gaps forming over seasons. This is why I suggest paying attention to *[floor leveling and climate control](https://tiletrendshop.com/the-ultimate-guide-to-floor-leveling-for-a-perfect-finish)* to avoid avoidable damage.
Finally, understanding these subtleties helps in avoiding common pitfalls that can compromise your flooring’s appearance and durability. Have you ever fallen into this trap? Let me know in the comments. Remember, investing a little extra effort into precision during installation and choosing the right materials can save you from costly repairs later on.Achieving durable and beautiful flooring requires more than just good materials; it demands precision tools and consistent maintenance routines. I personally rely on a few specialized instruments that have become indispensable in my projects. For instance, a high-quality laser level ensures perfect alignment and flatness during installation, reducing the risk of lippage in tile work or uneven seams in hardwood. Unlike traditional spirit levels, laser levels project bright, continuous lines over long distances, simplifying the process and increasing accuracy. I recommend the Bosch GSL2 Professional Cross-Line Laser for its reliability and ease of use.
How do I maintain hardwood and tile floors over time?
Routine upkeep is crucial. For hardwood, periodic refinishing using a drum sander and quality finish extends its lifespan significantly. I use a Mirka DEROS sander, which offers excellent dust collection and control, making refinishing smoother and less messy. For tiles, regularly inspecting grout joints and applying a penetrating grout sealer every couple of years prevents staining and water infiltration. I prefer using a breathable sealer like Miracle Sealants 511 Impregnator for its durability.
Predicting the future of flooring tools and maintenance
Technology is advancing rapidly. In the near future, I believe integrating smart sensors into flooring materials and installation tools will revolutionize maintenance, providing real-time data on moisture levels, structural integrity, and wear patterns. Such innovations will enable proactive repairs, saving homeowners significant costs. To stay ahead, invest today in robust measuring devices and follow ongoing professional guidance, like the detailed tips found in [floor leveling techniques](https://tiletrendshop.com/the-ultimate-guide-to-floor-leveling-for-a-perfect-finish).
The Hardest Lessons I Learned About Flooring Preservation
- Precision Matters: I realized that even seemingly minor details during installation—like proper underlayment or accurate leveling—can dramatically extend the life of hardwood and tile floors, preventing costly repairs down the line. It’s a reminder that patience and attention to detail pay off in the long run.
- Tools Are Your Allies: Investing in quality tools like laser levels or moisture meters transformed my workflow, making installations more accurate and durable. These investments saved me time and money and helped avoid mistakes that could compromise the flooring’s integrity.
- Every Environment Is Unique: I discovered that environmental factors such as humidity and temperature fluctuations affect flooring longevity more than I initially thought. Adapting my maintenance routines and choosing suitable materials for each space made a noticeable difference.
Tools and Resources That Changed My Approach
- Laser Level from Bosch GSL2: Its reliability in ensuring precise alignment during tile and hardwood installation is unmatched, drastically reducing lippage and uneven seams. I trust it for its accuracy and ease of use.
- Moisture Meter from Wagner Meters: Monitoring subfloor and material moisture content prevents adhesive failure and warping. It’s an essential tool in my kit for ensuring proper curing and installation quality.
- Mastering Hardwood Floor Refinishing: This guide offers expert insights that helped me understand how to restore and maintain my floors over time, prolonging their beauty and function.
- Floor Leveling Techniques: A must-read resource that taught me how to achieve perfectly flat surfaces, especially in challenging spaces, preventing future problems and simplifying installation.
Seize the Moment and Keep Your Floors Flawless
“Every new project is an opportunity to apply what you’ve learned and improve your craft. Protecting your hardwood floors and tile investments isn’t just about choosing good materials; it’s about mastering the techniques that ensure durability and beauty for years to come. Every step you take—the careful prep, precise leveling, proper tool use—contributes to a successful transformation of your space. So, get inspired today, and let your floors tell a story of craftsmanship and care.” |}# Question for Engagement: Have you ever encountered a flooring mistake that taught you an important lesson? Share your experience below!**