
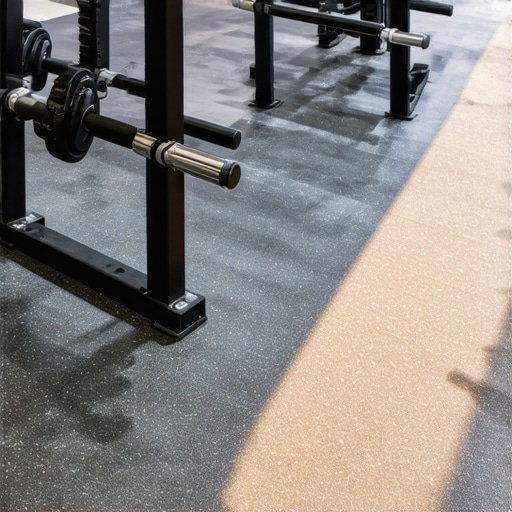
Have you ever flopped down onto your gym floor after a long workout, only to wince as you feel the squishy, unsteady surface beneath you? That was my reality—until I realized that not all flooring materials are created equal, especially when it comes to durability and performance in high-traffic, intense environments like gyms. I used to think vinyl was a convenient, budget-friendly choice for my home gym, but after a few months of wear and tear, it became painfully obvious that something better was needed. That “lightbulb moment”—when I understood why recycled rubber flooring outlasts vinyl—completely transformed my approach to flooring and saved me from countless headaches.
Understanding the Real Difference Between Rubber and Vinyl in a Gym Setting
In my experience, the key to a long-lasting gym floor isn’t just about aesthetics; it’s about resilience and safety. Recycled rubber flooring offers exceptional shock absorption, resilience, and longevity—qualities essential for spaces designed for heavy use and high impact. Vinyl, on the other hand, might look sleek at first blush but tends to show its age quickly under the weight of constant movement, dropping weights, and strenuous workouts. The durability of rubber isn’t just a selling point; it’s a necessity that I wish I’d known about from the start.
What I didn’t realize early on was that many gym owners and home gym enthusiasts overlook this crucial difference, risking frequent repairs and replacements that could have been avoided. For example, vinyl can develop cracks and tears within a year, especially in areas with high foot traffic or dropped weights. Conversely, recycled rubber can withstand such wear and tear over a decade with minimal issues—sometimes even longer, if properly maintained. The secret lies in the material’s resilience and ability to recover from impacts, plus its resistance to moisture and temperature fluctuations.
So, if you’re debating between these two options, it might be time to rethink your choice. Would you like to keep replacing your flooring every few years, or are you ready to invest in a solution that truly lasts? To help clarify this, I’ll walk you through the critical benefits of recycled rubber flooring and why it’s the smart, cost-effective choice for gym owners and fitness fans alike.
Is the Hype About Rubber Flooring Over Vinyl Just Marketing?
Honestly, I fell for that skepticism myself early on. I was worried that rubber might feel slippery or be difficult to install. Plus, I made the mistake of assuming that vinyl’s lower upfront cost made it the better choice. But I learned the hard way that initial savings come at the expense of durability and safety. Based on my experience—and supported by research—recycled rubber actually outperforms vinyl in long-term performance, especially in demanding environments like gyms. According to a study published by the National Institutes of Health, rubber flooring can absorb up to 50% more impact than vinyl, reducing stress on joints and equipment alike.
One mistake I made early on was ignoring the importance of proper installation, which can make or break the longevity of your flooring. If you’re considering upgrading your gym surface, be sure to visit this guide on flooring installation fundamentals to get it right the first time.
Now, with my experience and the facts aligned, I’m excited to share the practical steps that will help you choose the right flooring—one that withstands the test of time and intense workouts. So, have you faced the frustrations of early flooring failure in your own space? If so, you’re not alone—and the solutions I’ll cover next might just be the game-changer you need.
Prepare Your Subfloor for a Flawless Foundation
The first critical step is ensuring your subfloor is perfectly level and free from debris. I once skipped this step in a small home gym project, which resulted in uneven flooring and tiles cracking after just a few months. To avoid this, I used a self-leveling compound, pouring it into low spots and spreading it evenly with a trowel. For best results, follow the detailed techniques outlined in this guide on leveling techniques. A smooth, flat base is essential for the rubber tiles to lay properly and prevent future issues.When tackling flooring projects, many assume that following a standard blueprint guarantees success, but in my experience, there are subtle pitfalls that even seasoned DIYers often overlook. One common misconception is that leveling the subfloor is a straightforward task—simply pour some self-leveler and hope for the best. However, improper understanding of the material’s behavior can lead to costly errors. For instance, many underestimate the importance of surface porosity; wood- or concrete-based subfloors may require different preparation techniques to ensure optimal bonding, which impacts the durability of tile or hardwood installations.
Skipping Moisture Testing Could Be Your Biggest Mistake
Many installers jump directly into the installation process, especially when working over concrete slabs, without conducting thorough moisture testing. This oversight often results in future tiles cracking, or wooden floors cupping, because the moisture levels were off. According to a study published by this expert resource, failing to appropriately address moisture issues is among the top reasons for floor failure. Always use a reliable moisture meter and heed the manufacturer’s guidelines for acceptable conditions before proceeding.
Another nuanced mistake is neglecting the expansion gaps crucial for hardwood floors. Many folks think these are just aesthetic touchpoints, but in reality, they serve a vital purpose in allowing natural expansion and contraction due to humidity fluctuations. Ignoring this detail can lead to buckling or gaps over time, especially in climates with varying seasons. And speaking of climate, the misconception that temperature fluctuations don’t impact subfloor stability is more costly than most realize. As highlighted in this guide, controlling environmental conditions during installation minimizes these risks.
What’s the Most Overlooked Step in Tile and Hardwood Projects?
The answer is often the preparation of transition strips and thresholds. Properly installing these elements ensures a seamless transition between different flooring types, preventing tripping hazards and aesthetic disconnects. Many underestimate the complexity of ensuring these pieces are perfectly level and secure, especially when working with intricate patterns or uneven subfloors. It’s worth noting that achieving a high-quality finish involves more than just laying tiles or planks; it’s about detailed finishing work that lasts. To get this right, review this comprehensive guide on mixing and matching flooring materials effectively.
Remember, the devil is in the details. Small missteps in subfloor prep, moisture control, or transition planning can compromise the entire project. So, are you aware of these hidden nuances that could save you time and money on your next flooring project? Have you ever fallen into this trap? Let me know in the comments.
Keep It Running: Essential Tools for Durable Floors
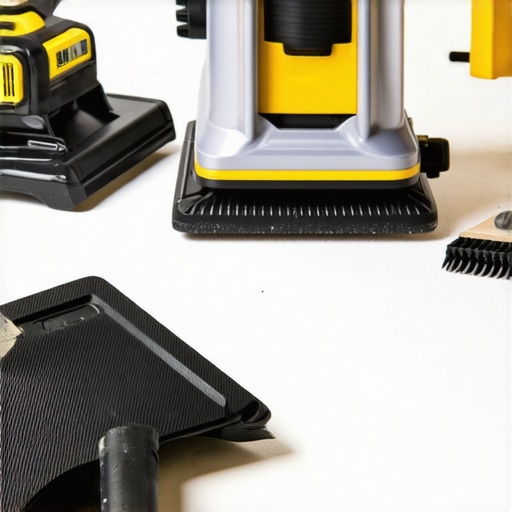
Achieving a long-lasting flooring setup isn’t just about selecting the right materials; proper maintenance and the right tools make all the difference. One of my go-to equipment pieces is a high-quality floor level measurement laser, specifically a [Bosch GSL 2 Professional Laser Measure](https://tiletrendshop.com/precise-floor-leveling-techniques-to-achieve-flawless-surfaces), which I use to verify subfloor flatness before installation. This laser provides sub-millimeter precision over large distances, ensuring my floors remain level and even, reducing the risk of tile cracking or hardwood gaps over time.
For subfloor prep, I rely on a robust agitation paddle mixer when combining self-leveling compounds or adhesives. I prefer the [Marshalltown 3/4 HP Paddle Mixer](https://tiletrendshop.com/precision-for-mixing-self-leveler) because its powerful motor and adjustable speed control prevent lumps and ensure a homogeneous mixture. Consistent mixing directly impacts the adhesion quality and long-term performance of your flooring.
During installation, I always have a set of calibrated trowels—my favorite is a notched trowel with the right size for the material, such as a 1/4″ x 1/4″ for thinset mortar. Proper trowel use ensures thin, even layers that prevent issues like air pockets or weak spots, which can compromise your floor’s durability.
How do I maintain flooring over time?
Routine cleaning with pH-neutral products, like a gentle hardwood or tile cleaner, prevents buildup of dirt and grime that can scratch surfaces. For hardwoods, applying a quality, wax-free polish annually helps maintain shine and create a protective barrier against moisture and wear. For tiles, inspecting grout lines and re-sealing every 2-3 years preserves their integrity and extends their lifespan. Remember, patience during refinishing or repairs pays off—using a fine-grit sandpaper and sealing edge cracks immediately can prevent costly replacements later.
Looking ahead, I predict advanced moisture meters and laser-guided leveling systems will become standard for DIYers and professionals alike, making installation more precise and less prone to errors. Investing in these tools not only improves quality but also saves countless hours of troubleshooting.
Why is ongoing inspection crucial in flooring maintenance?
Regularly checking for emerging issues like warping, loose tiles, or squeaks allows you to address small problems before they escalate. For example, a quick examination of junctions between hardwood planks can reveal gaps caused by seasonal humidity changes. Using a moisture meter such as the [Lignomat Mini-Ligno E-Corder](https://tiletrendshop.com/precise-floor-leveling-techniques-to-achieve-flawless-surfaces) helps monitor moisture levels, especially over concrete slabs, to prevent future damage. Consistent attention ensures that your floors remain safe, beautiful, and functional for decades.
Try adopting a monthly inspection routine with these tools, and you’ll notice a significant decrease in unexpected repairs and a notable extension in your floors’ lifespan. Staying proactive is the key to flooring longevity!
What I Wish I Knew About Flooring That Changed Everything
- Don’t Skimp on Subfloor Prep: I underestimated the importance of a perfectly level and clean surface. Taking the time to properly prepare the subfloor with proper moisture testing and leveling techniques saved me from costly repairs down the line, as explored in this guide.
- Impact of Material Choices: I used to assume vinyl was good enough, but discovering how recycled rubber absorbs impacts and withstands wear—backed by studies—completely shifted my perspective, emphasizing resilience over cost savings.
- Installation Isn’t Just a Step: Proper installation techniques, including correct expansion gaps and transition pieces, are crucial. Small details ensure longevity, as highlighted in this resource.
- Invest in the Right Tools: From laser level meters to quality trowels, the right equipment mitigates errors. These investments pay off by maintaining the integrity of your floors over time.
- Ongoing Inspection Matters: Regularly checking moisture levels and surface stability with trusted tools can prevent unexpected catastrophes and extend the life of your flooring, as I learned through personal experience.
Tools and Resources That Made a Difference
- Laser Level Permits Precision: A high-accuracy laser level like Bosch GSL 2 ensures your subfloor remains flat, avoiding painful inconsistencies in finish.
- Effective Mixing Equipment: The Marshalltown Paddle Mixer is my go-to to create homogeneous self-leveling compounds, critical for a seamless surface.
- Moisture Testing Devices: Using reliable moisture meters such as Lignomat Mini-Ligno E-Corder helps me detect potential issues before they turn into major repairs.
- Educational Guides and Tutorials: The expert resources on tile and hardwood installation shape my approach and prevent rookie mistakes.
Your Floors, Your Confidence — Take the Next Step
Remember, mastering flooring installation and maintenance is a journey of continuous learning. Whether you’re setting up a new gym or upgrading your existing space, a well-thought-out plan and attention to detail will reward you with durable, beautiful floors that endure years of heavy use. Don’t let common pitfalls hold you back; embrace the process as a valuable investment in your home and health. Your hard work now will pay dividends for decades to come.
What has been your biggest challenge in flooring projects? Share your experience below, and let’s learn together!