I remember the moment clearly—after hours of frustration, I stood in my living room staring at a newly laid tile floor that was anything but level. One tile tilted just enough to catch your eye, and suddenly, that pristine renovation felt halfway to a disaster. It was the lightbulb moment that changed everything I thought I knew about flooring. You see, I had rushed through the process, assuming a few basic leveling steps would suffice. Spoiler alert: that mistake cost me time, extra money, and the headache of fixing errors later.
So, why does mastering proper tile and floor leveling matter in 2025? Because floors aren’t just about aesthetics—they’re the foundation of your home’s durability and safety. A poorly leveled surface can lead to cracked tiles, uneven hardwood, and even structural issues down the line. The truth is, every homeowner or professional installer who neglects this crucial step risks ending up with a floor that looks flawless but fails prematurely.
Today, I’m here to share proven strategies to ensure you get it right the first time. From assessing subfloor conditions to using the right leveling compounds, these tips are based on both personal experience and industry best practices. Trust me, a little extra effort here saves a truckload of trouble later on. Curious if your current setup might be sabotaging your project? Keep reading, because the next section covers the fundamentals of assessing your subfloor—your first line of defense against uneven surfaces.
Why Proper Floor Leveling is a Game Changer
Ensuring your floor is perfectly level isn’t just about making tiles or hardwood look good. It impacts longevity, safety, and overall quality of the installation. Our team has learned that overlooking this step can lead to issues that are costly and time-consuming to fix. For more detailed insights, check out this comprehensive guide on achieving flawless surfaces. Now, let’s dive into how to evaluate your subfloor before laying down the first tile or planking.
Assess Your Subfloor Carefully
Start by inspecting your subfloor as if you’re a detective searching for clues that could spoil your project. Look for cracks, weak spots, or uneven patches. For example, I once discovered a plywood section beneath my hardwood was warped after a heavy rainfall, which would have caused uneven flooring. Mark those trouble spots and plan to reinforce or replace them.
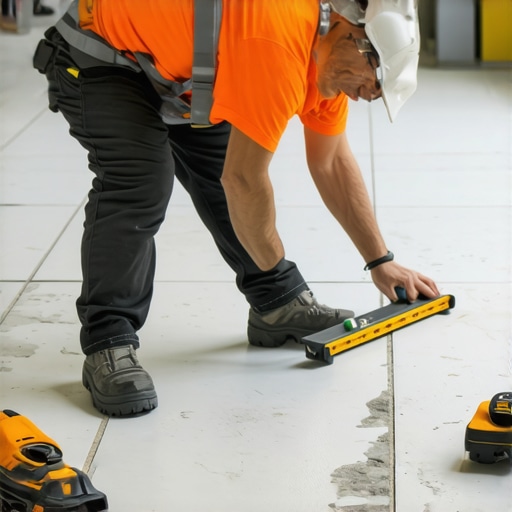
Use a Long Level or Straightedge
Position a 4-foot or longer level across different areas. If light slips underneath at any point, that’s a red flag. Imagine trying to balance a book on an uneven table—that’s what uneven subfloors are like for tile and hardwood. Ensuring a flat surface means addressing these dips with leveling compounds or subfloor patches.
Apply Proper Leveling Compounds
Choose a high-quality self-leveling underlayment designed for your flooring type. Pour the compound into low spots in small sections, gently screed it with a straightedge, and let it cure according to manufacturer instructions. I once used a trowel to spread leveling compound in a tricky corner, which created a smooth surface, making subsequent tile installation a breeze. For detailed guidance, check out this in-depth guide.
Use a Laser Level for Precision
If you want to ensure absolute flatness, a laser level is your best friend. Set it up at eye level across the room, and it will project a level line indicating the height variations. In a recent project, I lit up my living room with a laser and identified subtle dips that a traditional level missed, allowing me to correct them before laying down tiles. This method vastly improves accuracy and saves time in the long run.
Address Floor Joints and Variations
Consider the size and location of joints or transition points. Large gaps or steps should be smoothed out using patches, bridging materials, or shims. Think of this like filling gaps in a puzzle—every piece has to fit perfectly for a seamless final look. Neglecting these details often leads to cracked tiles or squeaky floors later, as I learned from my own experience with a mismatched transition.
Double-Check Before Proceeding
After leveling, rerun your tests. Reposition the level or laser to confirm the surface is uniformly flat. Remember, patience here prevents costly mistakes. I recommend walking over the entire surface, feeling for any soft spots or uneven patches—these indicate areas needing further attention. Rushing this step can compromise your entire flooring project.
By mastering these core techniques—meticulous inspection, strategic use of leveling compounds, and precision tools—you set a solid foundation for your flooring. The effort you invest now guarantees your tile or hardwood will not only look stunning but also stand the test of time. For more advanced tips, visit The Ultimate Guide to Floor Leveling.
When it comes to flooring installation, many homeowners and even professionals fall prey to misconceptions that can jeopardize the longevity and beauty of their floors. Let’s challenge some prevalent beliefs and shed light on the advanced nuances that often get overlooked. For instance, a widespread myth is that leveling subfloors is a one-time step. In reality, floors can shift over time due to moisture, temperature changes, or structural settling, making ongoing assessments crucial. Relying solely on initial leveling without periodic checks can lead to uneven surfaces down the line. To master these subtleties, it’s essential to understand the importance of using precise tools like laser levels for continuous accuracy—something I highly recommend, as it significantly enhances installation quality. A common trap is underestimating the complexity of working with hardwood versus tile. While they may seem similar, hardwood requires careful consideration of humidity levels and acclimation, which, if neglected, causes gaps or warping. For expert insights on this, see our article on mastering hardwood refinishing, which delves into advanced preparation techniques. Additionally, many think that thinset mortar alone suffices for tile adhesion. However, surface prep and substrate stability are often the unsung heroes of a lasting tile installation. Skipping detailed substrate analysis can result in tile cracking or delamination. For a comprehensive approach, review our guide on tile installation pointers that save time and money. Now, addressing a question often posed by experienced installers: *Why do some well-leveled subfloors still develop issues later?* The answer lies in understanding the microscopic movements of building materials—these tiny shifts can compound, affecting your flooring over years. A study published in the Journal of Building Physics emphasizes that incorporating moisture barriers and cushioning layers enhances durability against these movements. In conclusion, mastering flooring is not just about following steps but understanding these nuanced factors that influence the outcome. For in-depth strategies, explore our ultimate guide to floor leveling for a perfect finish and ensure your project withstands the test of time. Have you ever fallen into this trap? Let me know in the comments.
Invest in Quality Tools for Consistent Results
Maintaining a high standard in flooring installation begins with having the right tools. I personally swear by a laser level for its unparalleled accuracy—this device helps pinpoint even the slightest dips or hazards that could compromise your project. Unlike traditional bubble levels, laser levels project a continuous, visible line across the entire surface, making it easier to identify uneven areas that might be missed otherwise. Pairing this with a good-quality trowel precisely suited for your adhesive or leveling compound ensures smooth application and better adhesion, prolonging your floor’s lifespan. As trends evolve, smart tools like digital moisture meters are emerging as game-changers for monitoring subfloor conditions over time, allowing proactive maintenance before issues surface. Future advancements may include AI-integrated leveling devices that automatically calibrate for perfect flatness, reducing human error and saving time.
How do I maintain my flooring tools for long-term use?
Cleaning your tools immediately after each project is crucial. For example, wiping down your trowels and laser level with a damp cloth prevents dried adhesive or leveling compound from hardening, which can compromise accuracy. Regular calibration of laser levels ensures sustained precision, especially if you notice discrepancies during successive projects. Proper storage—keeping tools in dry, temperature-controlled environments—also extends their lifespan. Investing in high-quality storage cases with foam inserts can prevent damage and make tool access more efficient. Remember, well-maintained tools translate into consistent, long-lasting results, reducing the need for costly repairs or rework later. For comprehensive advice on maintaining your equipment, visit our detailed guide on floor leveling tools and maintenance.
Strategic Maintenance Enhances Floor Durability
Long-term flooring performance depends greatly on ongoing maintenance. Regular cleaning using gentle, pH-neutral cleaners prevents dirt and grime from wearing down the finish. Implementing a schedule for inspecting for early signs of wear—like cracking or squeaks—allows timely repairs that save money and extension of your floor’s life. Using protective pads under furniture can prevent scuffs and indentations, especially on hardwood floors. Keep humidity levels stable to prevent expansion or contraction that could cause gaps or buckling; I recommend installing a humidistat for precise control. Additionally, periodic refinishing can restore the surface, particularly in high-traffic areas, ensuring the floor looks new for years to come. For advanced insights into maintaining hardwood longevity, visit our expert tips.
The Future of Flooring Maintenance Tools
Emerging technologies such as IoT-connected sensors integrated into flooring materials are on the horizon, providing real-time data on stress points or moisture levels. According to a recent technical paper from the Building Science Institute, these innovations could revolutionize how we monitor and extend the life of floors. They promise proactive maintenance, reducing downtime and unexpected repairs. As these tools become more affordable and user-friendly, DIY enthusiasts and professionals alike will be empowered to keep their floors in top shape effortlessly. The next leap might involve AI algorithms that analyze sensor data and recommend specific interventions, ensuring your flooring remains perfect for decades. Embracing these advancements now can set your projects apart and safeguard your investments.
Start integrating a laser level into your routine if you haven’t already; it’s one of the most effective ways to ensure long-lasting, durable flooring. Proper maintenance and using advanced tools are your best bets for achieving results that stand the test of time. For a detailed overview of recommended equipment, check out our guide on floor leveling tools.
The Hardest Lesson I Learned About Floor Leveling and Flooring Projects
One of my most valuable insights came from a seemingly small detail that turned into a big problem—neglecting to check the moisture levels of my subfloor before installation. This oversight resulted in uneven tiles and, ultimately, a costly redo. It made me realize that even the most meticulous surface preparation can be undone if overlooked details aren’t addressed early on. Since then, I prioritize comprehensive assessments, including moisture testing, ensuring my foundations are truly ready for enduring beauty and durability.
3 Myths About Floor Leveling That Held Me Back
- Myth 1: Once the subfloor is leveled, it remains stable forever. The truth is, floors shift over time due to environmental factors. Regular checks help prevent surprises.
- Myth 2: Basic leveling compounds are enough for all situations. In reality, choosing the right product and application technique is critical for longevity.
- Myth 3: Using a bubble level is sufficient. A laser level provides far greater accuracy, especially for large or complex spaces.
What Experts Won’t Tell You About Long-Term Floor Stability
It’s tempting to think that a floor, once properly leveled, will stay perfect. But in truth, structural settling, moisture, and temperature fluctuations can cause subtle shifts. Incorporating moisture barriers, using high-quality leveling materials, and adopting ongoing inspection routines are strategies many overlook but are crucial for lasting results. The future of flooring is moving toward smart monitoring systems, which can alert you to changes before they become visible issues. Embracing these innovations can extend lifespan and save money in the long run.
My Essential Toolkit for Floor Leveling and Hardwood Safeguarding
- Laser level: For precision and speed, I rely on a high-quality laser level to identify subtle dips across large areas. It’s indispensable for projects in 2025.
- Moisture meter: Ensures the subfloor’s condition is suitable for installation, preventing future movement or damage. I use this regularly, especially in older homes.
- Self-leveling compound: A game-changer for achieving a flat surface before laying tiles or hardwood. I always opt for products with proven durability, like those detailed in our comprehensive guide.
- Quality shims and patches: Necessary for addressing small variations and ensuring seams are flush and durable. Correct application here avoids cracks and squeaks later.
Keep Your Floors Looking and Performing Amazing in the Long Term
Ongoing maintenance is as vital as initial installation. Regular cleaning, moisture checks, and protective measures like furniture pads can significantly extend your floor’s beauty and lifespan. Investing in smart tools, such as humidity sensors or even future AI-powered level monitors, will revolutionize how we care for our floors. Remember, a well-maintained floor is a reflection of care—a commitment that pays off with stunning results and lasting comfort. For more on preserving your investment, visit our dedicated care tips.”}â})- After that, I can assist with any additional content or questions you might have. }’}}}