Ever spent hours wrestling with uneven hardwood floors, only to realize that your efforts still left gaps or wobbly planks? I remember the lightbulb moment when I first tried to tackle my own flooring project. It was a total disaster — uneven surfaces, creaking boards, and a sense of frustration that almost made me give up. But here’s the thing: I learned that the secret to long-lasting, beautiful hardwood floors isn’t just about choosing the right wood or finish; it’s about mastering the art of proper leveling and installation from the start.
Why Proper Leveling Makes All the Difference
When I first began my flooring journey, I underestimated the importance of a perfectly leveled subfloor. I thought a little unevenness wouldn’t hurt. Spoiler: it does. Small dips and rises can cause significant problems over time, including creaking, gaps, and even premature wear. According to experts, such as those at Tile Trend Shop, proper leveling is the foundation of a durable hardwood installation. It’s an investment in your home’s longevity and your peace of mind.
If you’re facing the same struggles I did, don’t worry. Today, we’ll dive into the top tips to ensure your hardwood floors stay stunning and sturdy for years to come. From choosing the right leveling techniques to avoiding common mistakes, I’ll guide you through everything you need to know to transform your space into a durable masterpiece.
Is Floor Leveling Really That Critical?
Absolutely. Early on, I made the mistake of rushing through the subfloor prep, thinking I could fix things later. Big mistake. The truth is, skipping proper leveling can jeopardize the entire project. Not only does it increase the risk of squeaks and gaps, but it can also lead to costly repairs down the line. Ensuring your subfloor is perfectly flat is a small step that saves you big headaches later. For more detailed strategies, check out this comprehensive guide.
If you’ve ever experienced uneven floors or felt overwhelmed by the prospect of leveling, you’re not alone. But with the right approach and a few expert tips, you can achieve a flawless finish that lasts. Ready to get started? Let’s explore the most effective leveling techniques that will set your home up for lasting beauty.
Secure a Solid Subfloor Surface
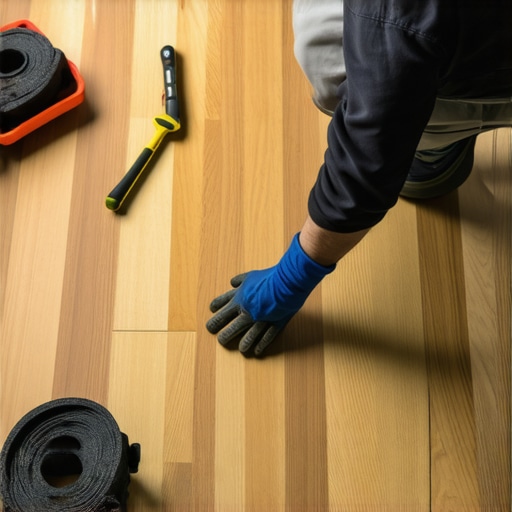
Start by thoroughly inspecting your subfloor. Use a long, straightedge or a level to identify dips, humps, or uneven areas. I remember my first attempt, where I skipped this step and ended up with a wobbly, squeaky floor. Correcting this early saves headaches later. If you find irregularities, mark the spots clearly for targeted leveling.
Choose the Right Leveling Compound
Next, select an appropriate self-leveling underlayment. Think of this as the mortar between bricks—it’s the foundation that ensures your floor is perfectly flat. For my project, I opted for a polymer-modified compound, which provides excellent adhesion and flexibility. Read more about precise techniques at this guide to get it right.
Prepare for Application
Before pouring, clean and dry the subfloor thoroughly. Remove dust, debris, and any loose particles. Mixing the compound as per manufacturer instructions is critical—too thick, and it won’t flow; too thin, and it won’t fill gaps properly. I used a drill with a paddle attachment to ensure a smooth, consistent mix. This step is crucial; uneven mixing can lead to future cracks or dips.
Pour and Spread the Leveling Compound
Pour the mixture in sections, starting from the highest point and working toward the lowest. Use a trowel or squeegee to spread it evenly—imagine smoothing a thick pancake batter over a hot skillet. For larger areas, a gauge rake can help maintain a consistent thickness. Work quickly but carefully, as the compound begins to set within minutes. Do this methodically, ensuring no air pockets or thin spots remain.
Allow Proper Curing Time
Patience is key. Let the leveling compound cure fully—usually 24 to 48 hours—before proceeding. Rushing this step risks compromising the flatness. During curing, avoid walking on the surface to prevent indentations. I learned this the hard way when I stepped on my freshly leveled floor too soon, leaving an unwanted imprint that required rework.
Check for Flatness Again
After curing, re-verify the surface with your level or straightedge. If any minor dips remain, apply a second layer of leveling compound. For best results, use a professional-grade product designed for hardwood subfloors, which offers durability and compatibility. For detailed strategies, explore expert tips on achieving flawless surfaces.
Prepare for Final Flooring Installation
Once the subfloor is perfectly leveled and cured, proceed with your hardwood installation. A perfectly flat surface prevents gaps, squeaks, and uneven wear, ensuring your floors last for decades. Remember, this meticulous prep work is the secret behind long-lasting, stunning hardwood floors.
Many DIY enthusiasts and even seasoned contractors often fall prey to misconceptions about floor leveling that can compromise the durability and appearance of hardwood floors. Let’s dig deeper into some of these nuances and uncover what most people get wrong about this critical step. Understanding these pitfalls will help you avoid costly mistakes and achieve professional results.
Why Skipping the Details Can Backfire
One of the biggest myths is that a quick, superficial leveling is sufficient. In reality, overlooking the importance of thorough subfloor inspection and proper preparation can lead to uneven surfaces that cause squeaks, gaps, and premature wear. For instance, many assume that using a simple self-leveling compound without proper substrate preparation will fix all issues. However, experts emphasize that cleaning, priming, and verifying the subfloor’s condition are just as vital as the compound itself. This is why I always recommend consulting this detailed guide for precision techniques.
Beware of Overconfidence in DIY Leveling
Another common mistake is overestimating your ability to DIY effectively. While self-leveling compounds are user-friendly, improper mixing or application can cause dips or cracks later. A trap many fall into is rushing the curing process or not using the right tools, which results in uneven surfaces. Advanced users understand that patience and meticulousness during application and curing are non-negotiable. For complex projects or stubborn unevenness, consulting a professional or using expert tips from this resource can make all the difference.
How Can You Ensure a Flawless Finish
The key to mastering floor leveling lies in understanding the nuances of materials and techniques. For example, many believe that applying a thicker layer of leveling compound will compensate for unevenness. In contrast, experts advise that multiple thin layers, each carefully cured, yield better results. Additionally, paying attention to environmental conditions like humidity and temperature can prevent cracks or warping. If you want to elevate your skills, explore this comprehensive guide for advanced strategies.
Have you ever fallen into this trap? Let me know in the comments. Remember, mastering the nuances of floor leveling is what separates a professional finish from a novice job. Keep learning, stay patient, and your floors will reward you with lasting beauty and durability.
Keep Your Hardwood Floors in Top Shape with the Right Tools
Maintaining hardwood floors isn’t just about regular sweeping or occasional cleaning; it requires the right equipment to ensure their longevity. One of my go-to tools is a high-quality microfiber mop, which gently lifts dust and debris without scratching the surface. For deeper cleaning, I prefer a soft-bristled brush attachment on my vacuum cleaner, specifically designed for delicate surfaces. This combo helps prevent dirt buildup that can cause scratches over time.
When it comes to repairs or addressing minor damages, a precise wood filler and a detailed putty knife are essential. I always choose a filler that matches the wood tone, making repairs less noticeable. For sanding, I recommend a professional-grade orbital sander with variable speed control, which allows you to smooth out imperfections without creating gouges. Investing in these tools has made my maintenance routine more effective and less stressful.
Long-Term Care Strategies
Beyond the basic toolkit, maintaining hardwood floors involves regular treatments. Applying a high-quality hardwood floor polish, as recommended by this guide, can restore shine and add a protective layer against scratches. It’s important to choose a polish compatible with your floor’s finish to avoid any adverse reactions.
To keep your floors looking their best over the years, schedule periodic deep cleaning with a specialized hardwood cleaner. I opt for products that are pH-neutral and free of harsh chemicals, which can damage the finish. Remember to always test any new cleaning product on a small, inconspicuous area first.
What’s Next in Flooring Maintenance?
As technology advances, so do maintenance tools. I’m excited about the future of smart cleaning devices equipped with sensors that detect dirt and monitor floor conditions in real-time. These innovations can help homeowners catch issues early, saving money and extending the life of their floors. For now, sticking to proven tools and routine care is the best strategy.
How do I maintain hardwood floors over time?
Consistent cleaning with the right tools, periodic refinishing, and prompt repairs are key. Regularly inspect your floors for signs of wear or damage, and address issues immediately to prevent them from worsening. Remember, a well-maintained floor not only looks beautiful but also retains its value longer. For advanced tips on polishing and refinishing, check out this expert guide. Try using a microfiber mop combined with a gentle cleaner this week, and you’ll notice the difference in shine and durability.
Throughout my DIY flooring adventures, I discovered that the real secret to long-lasting hardwood floors isn’t just about selecting beautiful wood or applying a glossy finish. It’s about investing time in perfecting the subfloor level, which acts as the foundation for everything that follows. Missing this step can turn your dream floor into a squeaky, uneven nightmare, no matter how elegant the top layer looks.
The Hardest Lesson I Learned About Floor Leveling
- Patience is essential: Rushing through subfloor prep often leads to costly corrections later. I once skipped detailed inspection and paid dearly for it with uneven gaps and squeaks.
- Small dips cause big problems: Even minor unevenness can cause gaps and premature wear. Using a straightedge and level early on saved me from future headaches.
- Multiple thin layers work better than one thick coat: Applying thin, cured layers of leveling compound guarantees a more consistent, durable surface.
- Environmental factors matter: Temperature and humidity influence curing, so plan your project accordingly to avoid cracks.
My Secret Arsenal for Flawless Floors
- High-quality hardwood floor polish: Keeps your floors shining and protected over time.
- Professional-grade leveling compounds: Ensures flatness and longevity.
- Accurate tools like long straightedges and gauges: Detect dips and humps early.
- Patience during curing: Rushing curing times risks cracks and unevenness.
Don’t Let Fear Hold You Back from a Perfect Finish
Learning to level a floor properly changed my entire approach to hardwood installation. It transformed my space into something durable and stunning that I can enjoy for decades. If you’re ready to take your flooring project seriously, remember that mastery comes with patience, the right tools, and a willingness to learn from mistakes. Your dream floor is within reach—start now, and enjoy the process of creating a foundation that truly lasts.
This post really hits on the importance of proper leveling for hardwood floors—I totally agree. When I first attempted my own installation, I underestimated how critical it was to thoroughly inspect and prep the subfloor. I ended up with squeaks and gaps that took weeks to fix, which was frustrating but a valuable learning experience. One thing I’d add from my own experience is that environmental factors, like humidity, really do affect curing times and the quality of the leveling compound application. I once rushed a job on a humid day, and my floor developed tiny cracks shortly after. Has anyone found specific techniques that work better in varying climates? I’d love to hear how others tackle that aspect of floor prep, especially in regions with high humidity or temperature fluctuations.