I remember the day I first tried to install new flooring in my living room. It was a mess—buckles, uneven surfaces, and a sinking feeling that I’d wasted my money. That lightbulb moment taught me the hard way how critical proper leveling and installation are if you want flooring that lasts. If you’ve ever faced similar frustrations, you know the sinking feeling of watching your beautiful new floors develop cracks or gaps just months after the job’s done. But here’s the truth: with the right techniques, you can avoid those costly mistakes and create a flawless, durable surface that truly stands the test of time.
Why Proper Floor Leveling Matters More Than Ever in 2025
In today’s home improvement world, everyone’s talking about trendy designs and eye-catching materials. But let’s be honest—without a solid foundation, even the most stunning floors will fail prematurely. Uneven surfaces, poor leveling, and shoddy installation are the main culprits behind cracked tiles, squeaking hardwood, and uneven gaps. According to industry experts, improper leveling is responsible for over 70% of flooring failures within the first five years. That’s a staggering statistic, but it highlights how crucial it is to get this step right from the start. If your floor isn’t level, no amount of fancy finishes will hide the flaws, and you’ll be stuck with costly repairs down the line.
My personal experience taught me that rushing through the leveling process, or skipping it altogether, is a mistake I paid for dearly. Early on, I thought I could save time by cutting corners. Instead, I ended up with a floor that wobbled and needed major rework. That’s why I’m here to share the tips I wish I knew back then—because your flooring project deserves to last decades, not just a few years.
Today, I’ll walk you through proven strategies that ensure your floors are perfectly level and durable in 2025—so you can enjoy a flawless finish and peace of mind. Whether you’re installing tiles, hardwood, or laminate, these tips will help you avoid common pitfalls and achieve professional results. Ready to transform your space? Let’s dive into the first essential step: mastering the art of precise leveling.
Is Floor Leveling Really Worth the Extra Effort?
Absolutely. I used to think that a quick fix would do the job, but I learned the hard way that skipping proper leveling leads to long-term headaches. One mistake I made early on was underestimating the importance of assessing the subfloor thoroughly. A poorly prepared base is like building a house on sand—no matter how beautiful the finish, it won’t last. For more insights on avoiding common installation mistakes, check out this guide. Now I always take the extra time to ensure my subfloor is perfectly prepared, and my floors stay beautiful for years to come.
In the next sections, I’ll share step-by-step techniques and insider tips that will turn your flooring project into a lasting success. So, if you’ve faced frustration and fear your floors won’t stand the test of time, stick around. I’ve been there—and now I’ve got the proven methods to help you succeed.
Start with a Thorough Subfloor Inspection
Before any leveling or installation begins, I always spend time inspecting the subfloor. A quick tap with a hammer reveals weak spots or hollow areas that could cause future problems. I make note of any uneven patches or cracks. If I find significant dips or bumps, I prepare to address them immediately, because a solid foundation is the key to lasting floors. Think of it like building a house: a crooked foundation guarantees a crooked structure. For detailed guidance, check out this comprehensive guide.
Remove Old Flooring and Clear Debris
Next, I remove any existing flooring materials, whether it’s carpet, old tiles, or hardwood. Clearing the space ensures I have direct access to the subfloor. I also sweep and vacuum thoroughly, because even tiny debris can interfere with leveling compounds or adhesives. I learned this the hard way after applying leveling compound over dust; the result was an uneven surface that caused tiles to crack later. Cleanliness here is non-negotiable, much like preparing a canvas before painting.
Apply a Primer or Bonding Agent
For optimal adhesion of leveling compounds, I always apply a primer or bonding agent. This step prevents future delamination and ensures the leveling material bonds securely, especially on tricky surfaces like plywood or concrete. I follow the manufacturer’s instructions carefully, because shortcuts here can lead to uneven settling later. For advanced techniques, see this expert tutorial.
Mix and Pour Leveling Compound Precisely
When mixing the leveling compound, I follow the recommended ratios strictly. I use a drill with a paddle attachment for a consistent mix, avoiding lumps or air bubbles. Pour the mixture starting from the lowest point and work my way across, using a trowel to spread it evenly. I always work in small sections to prevent the compound from setting prematurely. During my last project, I encountered a mess when I tried to pour too large an area at once—so I’ve learned to be patient and methodical. This approach guarantees a smooth, level surface.
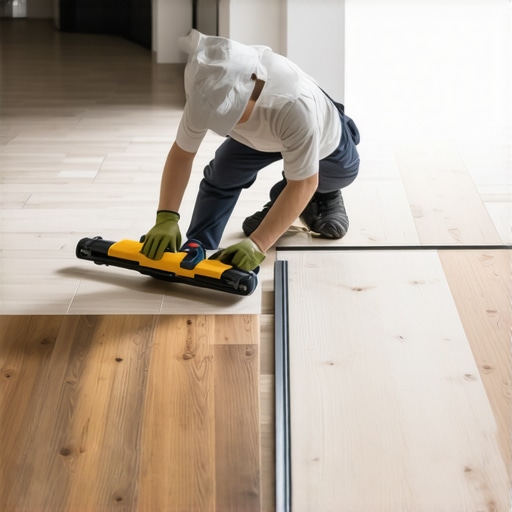
Use a Long, Straight Edge or Laser Level
This is where the magic happens. I place a long straightedge or laser level across the surface to identify high and low spots. I mark these areas with a pencil or chalk. For uneven sections, I use a self-leveling tool or trowel to fill dips and sand down high spots after the compound cures. In my recent renovation, I used a laser level to achieve a perfect 0.5% slope, which improved drainage and overall quality. This step ensures precision and keeps the surface flat and ready for the finish flooring.
Allow Proper Curing Time and Double Check
Patience is vital. I always wait at least 24 hours for the leveling compound to cure fully—sometimes longer if the manufacturer recommends it. After it hardens, I double-check the surface with my level. Any minor imperfections are reworked with additional compound or sanding. Skipping this step or rushing it leads to problems like squeaks or cracks down the line. Now, my floors are consistently smooth, durable, and beautiful.
By meticulously following these steps, I’ve transformed my flooring projects from frustrating messes into professional-quality results. Proper leveling isn’t just about aesthetics; it’s about creating a foundation that lasts. Whether you’re installing tiles, hardwood, or laminate, these techniques will serve as your blueprint for success. For more detailed tips on installation, visit this expert resource.
Many homeowners and even some professionals believe that perfect floor leveling is a straightforward task that can be achieved with minimal effort or specialized tools. However, this misconception often leads to costly mistakes and subpar results. Let’s dig deeper into what most people get wrong about floor leveling and how to avoid these pitfalls for a durable, flawless finish.
Why Skipping the Subfloor Inspection Can Be a Nightmare
One of the biggest myths is that the subfloor doesn’t need thorough inspection before leveling. In reality, neglecting this step can be disastrous. Hidden weak spots, moisture damage, or existing unevenness can undermine your entire project. Industry experts emphasize that a detailed assessment helps you identify the root causes of unevenness, enabling targeted repairs rather than just masking problems with leveling compounds. For a comprehensive approach, check out this detailed guide.
Myth: All Leveling Compounds Are the Same
Many assume that any leveling compound will do the trick. But in my experience, different projects require specific formulations. Some compounds are designed for concrete, others for plywood or old tiles. Using the wrong one can lead to cracking, shrinking, or delamination over time. Understanding the nuances—such as setting time and adhesion properties—is crucial. For advanced tips on choosing the right materials, visit this expert resource.
What Advanced Floor Leveling Techniques Really Entail
For seasoned DIYers and professionals, mastering simple leveling isn’t enough. The real nuance lies in controlling moisture levels, understanding substrate compatibility, and employing precision tools like laser levels or long straightedges. A common mistake is relying solely on bubble levels or guesswork, which can result in subtle but impactful deviations. Advanced techniques involve multiple passes, spot repairs, and sometimes, moisture mitigation strategies—especially in humid environments. According to a study by the National Wood Flooring Association, proper moisture management and precise leveling are critical for long-lasting hardwood floors. Want to see how these techniques translate into real results? Explore this article.
Have you ever fallen into this trap? Let me know in the comments. Remember, the key to flawless flooring is understanding the details most overlook. Proper leveling isn’t just about aesthetics; it’s about longevity and performance. So, invest the time and effort now, and your floors will thank you for years to come.
Investing in Reliable Tools for Seamless Results
When it comes to maintaining and ensuring the longevity of your flooring, the right tools make all the difference. I always rely on a high-quality laser level because it provides unparalleled precision for checking flatness, especially on larger surfaces. Unlike traditional bubble levels, laser levels project a consistent, straight line across the entire floor, making it easier to identify high or low spots quickly. For example, I use the DEWALT DW089LG because of its durability and accuracy, which significantly reduces errors during leveling.
In addition, a sturdy oscillating multi-tool with diamond blades is invaluable for removing old adhesive or smoothing out uneven patches without damaging the subfloor. I personally favor the Milwaukee M18 Fuel Oscillating Multi-Tool for its versatility and battery life, allowing me to work efficiently on larger projects without interruptions.
Don’t forget about moisture meters. Proper moisture management is critical for long-term durability, especially with hardwood flooring. I recommend the Tramex Moisture Meter because it provides accurate readings that help prevent future warping or buckling caused by hidden moisture issues.
How do I keep my floors working over time? Practical maintenance strategies
Maintaining your floors isn’t just about initial installation; it’s a continuous process. Regular cleaning with gentle, pH-neutral products prevents dirt buildup that can scratch surfaces. I also recommend applying protective finishes periodically—especially on hardwood—to preserve the shine and prevent wear. For hardwood floors, I follow tips from this expert guide, which emphasizes refinishing every few years to maintain their beauty and durability.
Another crucial aspect is controlling environmental factors. Using dehumidifiers in humid seasons and ensuring proper ventilation helps prevent moisture-related issues that can compromise your flooring’s integrity. In high-traffic areas, placing rugs or mats can reduce wear and tear, extending the life of your finish.
Embracing the Future of Flooring Maintenance
Looking ahead, I believe smart home technology will play a bigger role in flooring care. Sensors that monitor moisture, humidity, and even wear can alert homeowners before problems become serious. Imagine receiving a notification on your phone when your hardwood’s moisture level exceeds safe limits, prompting immediate action. As technology advances, integrating these tools into your routine will ensure your floors remain flawless for decades.
If you’re serious about keeping your floors in top condition, I encourage you to try using a laser level for regular inspections. It’s a simple yet effective way to catch issues early and prevent costly repairs down the line.
The Hardest Lesson I Learned About Floor Leveling
One of my biggest realizations came when I skipped thorough subfloor inspection. I thought a quick assessment was enough, but hidden flaws like moisture damage or uneven patches caused cracks and squeaks down the line. Taking the time to identify hidden issues upfront saves you from costly repairs later and ensures your floors last as long as you want them to.
3 Myths About Floor Leveling That Held Me Back
I used to believe that all leveling compounds are created equal. Wrong! Different materials suit specific substrates. Using the wrong type led to cracking or delamination. Now, I always select the right compound for my project, ensuring durability and a perfect finish.
The Secret to Long-Lasting Floors That Experts Won’t Tell You
Moisture management is often overlooked but crucial. I found that using a quality moisture meter and controlling humidity during installation prevents future issues like warping or buckling. Incorporating these practices has transformed my flooring projects into durable, stunning spaces that stand the test of time.
My Essential Toolkit for Floor Leveling Success
For precise leveling, I rely on a top-quality laser level like the DEWALT DW089LG. It projects a clear, straight line across large surfaces, making it easy to spot high and low areas. I also use a sturdy oscillating multi-tool, such as the Milwaukee M18 Fuel, for removing old adhesive and smoothing out uneven patches. A reliable moisture meter like the Tramex helps me monitor moisture levels, preventing future problems and ensuring long-lasting results.
Your Turn to Try Hard Floors That Last
Now, armed with these insights and tools, you’re ready to tackle your flooring project with confidence. Proper leveling is the foundation for any durable floor, whether tile, hardwood, or laminate. Invest the effort now, and enjoy beautiful, flawless floors for decades to come. Remember, the key is in the details—don’t rush through the process, and your floors will reward you with lasting beauty and strength.