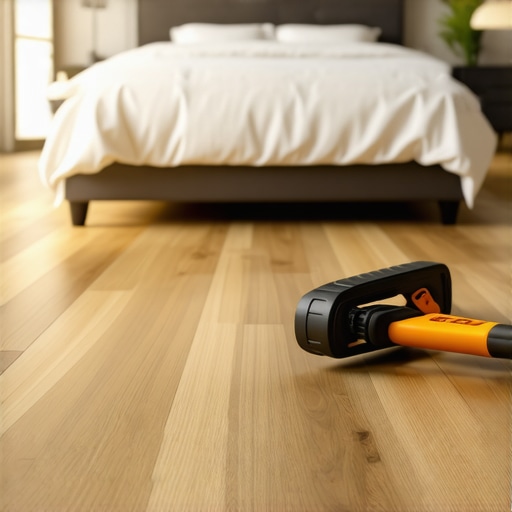
I remember the first time I tackled a hardwood flooring project. I was eager, full of enthusiasm, but I quickly learned that a small mistake in leveling the floor could turn a beautiful finish into a nightmare that lasts for years. I had uneven floors, creaky boards, and a lot of frustration—things I wouldn’t wish on anyone trying to improve their home. It was a lightbulb moment for me: proper leveling isn’t just a step; it’s the foundation of lasting beauty and durability in hardwood and tile installations.
Why Floor Leveling Is the Secret to Durable, Stunning Floors
Getting your floors perfectly level might seem like a tedious chore, but trust me, it’s worth every minute. When floors aren’t leveled correctly, it’s like building a house on shifting sands. Over time, uneven surfaces cause boards to crack, squeak, and wear unevenly. Worse, they can harbor moisture and debris, leading to damage that’s costly to repair. According to experts, improper leveling is one of the top mistakes that can ruin flooring projects and shorten their lifespan. So, if you’re dreaming of floors that stay beautiful for decades, mastering the art of leveling should be your top priority.
Have You Faced This Common Flooring Woe?
Maybe your hardwood squeaks every time you walk, or your tile cracks prematurely. I’ve been there. Early on, I made the mistake of rushing through the leveling process, thinking I could fix it later. That mistake cost me time, money, and a lot of stress. The good news? You can avoid these pitfalls by following proven tips and techniques. I’ll walk you through the core strategies that ensure your floors stay flat and beautiful, no matter what.
Start with a Solid Assessment
Before you pick up tools, walk across your floor and identify uneven spots, dips, or high points. Use a long level or a straightedge to gauge the surface. I vividly remember the first time I did this; I found a hump that was barely noticeable but enough to cause tiles to crack later. Document these irregularities to plan your approach effectively.
Prepare Your Surface Thoroughly
Clear the area completely—removing furniture, debris, and old flooring if necessary. Sweep and vacuum to eliminate dust and loose particles. A clean, dry surface is essential for proper adhesion and leveling. I once skipped this step and ended up with a lumpy, uneven finish, which taught me the importance of prep work.
Choose the Right Leveling Method
For minor unevenness, self-leveling compounds work wonders. For larger dips or high spots, consider grinding or adding additional subfloor layers. I recommend using a high-quality self-leveling compound compatible with your flooring type, like those discussed in this guide. When applying, pour the compound gradually and spread it with a squeegee or trowel, working quickly before it sets.
Use a Long, Straightedge for Spreading
To ensure an even surface, drag a long straightedge or a screed across the freshly poured compound. Think of it as leveling a cake batter; you want a smooth, flat surface. I once used a piece of metal trim as a screed, and it made a significant difference in achieving a professional finish. Always work in small sections to prevent the compound from hardening before you finish spreading.
Allow Proper Curing Time
Patience is key. Follow manufacturer instructions for curing times, typically 24-48 hours. Rushing this step can compromise the entire project. I learned this the hard way when I hurried and walked on the surface too soon, causing minor cracks. Proper curing guarantees stability and durability for your flooring.
Final Checks and Adjustments
Once cured, recheck the surface with a level. Minor high spots can be sanded down with a pole sander. If necessary, apply additional compound to low areas, let it cure, and re-sand. This iterative process ensures a perfectly flat surface that will support your hardwood or tile for decades. For a detailed walkthrough, consult this comprehensive guide.

Many DIY enthusiasts and even seasoned professionals often fall prey to myths and misconceptions when it comes to floor leveling, which can significantly compromise the durability and look of the finished surface. Let’s dig deeper into some of these pitfalls and uncover the nuances that can make or break your project.
Why the ‘More Compound, Better Results’ Myth Is Dangerous
One of the most widespread misconceptions is that applying an excessive amount of self-leveling compound guarantees a perfectly flat surface. In reality, over-application can lead to cracking, uneven drying, and an unnecessarily heavy floor that stresses your subfloor and flooring materials. The key is to follow manufacturer instructions precisely and use the right amount based on the irregularities present. Remember, quality over quantity always wins in flooring projects. For detailed techniques, consider reviewing this guide.
The Hidden Danger of Rushing Curing Time
Many assume that walking on the compound early or rushing the curing process won’t cause issues. However, premature weight can cause shifts, cracks, or bubbles, undermining the entire effort. Proper curing times are essential for stability and long-lasting results. A common mistake is to skip or shorten these times, which can lead to uneven settling and even damage to the flooring down the line. Patience here is a virtue. For insights on curing, see this expert advice.
Advanced Question: How can I ensure my subfloor is compatible with leveling compounds?
Great question! The compatibility of your subfloor with leveling compounds is often overlooked but crucial. For instance, some subfloors like plywood or certain concrete surfaces require specific primers or treatments to prevent issues like delamination or moisture problems. Failing to prepare the subfloor properly can lead to failure of the leveling layer, causing cracks and unevenness later. Consulting with manufacturers’ guidelines and testing moisture levels beforehand can save you from costly mistakes. For a thorough approach, visit this detailed resource.
Have you ever fallen into this trap? Let me know in the comments. Remember, mastering these nuances makes the difference between a professional-looking finish and a project doomed to fail. When in doubt, consult expert guides or professionals to ensure your flooring stands the test of time.
Maintaining top-notch results in flooring projects requires more than just skill; it hinges on using the right tools and methods. Over the years, I’ve refined my toolkit to include equipment that ensures accuracy, efficiency, and durability. Investing in quality tools might seem costly upfront, but it pays dividends in the long run, saving you time, money, and frustration.
Why a High-Quality Laser Level Is a Game Changer
When it comes to assessing and maintaining floor levelness, a laser level is an absolute must-have. Unlike traditional bubble levels, laser levels project a precise, consistent line across large surfaces, making it easier to spot dips, high spots, and irregularities. I personally rely on a rotary laser level because it offers 360-degree coverage, which is invaluable for large spaces. This tool helps me verify that the surface remains perfectly flat throughout the project, especially during the curing phase of self-leveling compounds. For detailed guidance, the ultimate guide to floor leveling emphasizes the importance of precise measurements.
Why a Durable Trowel Is Essential for Spreading
Applying leveling compounds uniformly is critical. That’s where a high-quality notched trowel comes into play. I prefer a stainless steel trowel with a specific notch size that matches the compound’s recommended thickness. The right trowel minimizes air pockets and ensures an even layer, which directly impacts the longevity of your flooring. I’ve tested many models, but my go-to is a sturdy, ergonomic trowel that reduces fatigue during extended use. For expert tips on application techniques, check out this detailed guide.
The Value of Moisture Meters and Surface Testers
Before commencing leveling or installation, I always measure moisture levels in the subfloor. Moisture meters prevent future issues like warping or cracking. I prefer digital moisture testers because they give quick, reliable readings. This step is especially crucial when working with concrete or plywood subfloors, as improper moisture balance can compromise the entire project. Regular surface testing during curing also helps catch problems early, ensuring the long-term durability of the flooring. For more insights, visit this resource.
Future Trends in Floor Maintenance and Tools
Looking ahead, I believe smart technology will increasingly integrate into flooring tools, offering real-time data and automated adjustments. Imagine laser levels with Bluetooth connectivity or moisture meters that sync with your smartphone, providing instant feedback and maintenance alerts. Embracing these innovations can streamline your workflow and extend the lifespan of your floors. For now, I recommend you try using a laser level during your next project—it’s a proven way to maintain perfect flatness and achieve professional results.
How do I keep my floors performing over time?
Regular maintenance is key. Clean your floors with gentle, pH-neutral cleaners, and avoid harsh chemicals that can degrade the surface. Periodically check for signs of unevenness or moisture issues, especially after seasonal changes. Applying a protective finish or sealant helps preserve the surface and prevents damage from wear and moisture ingress. If you notice any irregularities, address them promptly with targeted repairs, such as re-leveling small sections or resealing. For comprehensive care routines, see this guide.
When I first started working on my floors, I underestimated the importance of proper leveling. That mistake taught me that even tiny dips or high spots can compromise the entire project, leading to cracks, squeaks, and uneven wear. The key takeaway? Never skip the assessment phase; your floors will thank you for it in the long run.
Lessons That Changed My Approach to Floor Leveling
- Less is More: Applying excessive leveling compound might seem like a quick fix, but it often causes more harm than good. Follow manufacturer instructions and trust that the right amount makes all the difference.
- Patience Pays Off: Rushing the curing process can lead to cracks and shifting. Waiting the recommended time ensures long-lasting stability.
- Invest in Quality Tools: A reliable laser level and a sturdy trowel are game-changers. They help achieve a flat surface that withstands years of foot traffic.
- Prepare the Subfloor: Moisture testing and surface cleaning are non-negotiable steps. Skipping them risks future buckling or delamination.
- Regular Checks Are Essential: Even after installation, monitor for unevenness or moisture issues, especially after seasonal changes.
My Favorite Resources for Flawless Flooring
- This comprehensive guide offers expert tips on leveling techniques that I rely on for professional results.
- Precise leveling methods help me avoid common pitfalls and ensure a perfectly flat surface.
- Floor maintenance tips keep my floors looking new decade after decade.
- Contact professional advice when in doubt about complex subfloor issues or moisture problems.
Your Turn to Try
Now that you understand the importance of proper floor leveling, I challenge you to apply these lessons on your next project. Remember, a well-leveled floor is the foundation of durable, stunning hardwood and tile. Don’t rush the process—your future self will thank you for the flawless finish. What’s the biggest challenge you’ve faced with floor leveling? Share your experience below and let’s learn together!