
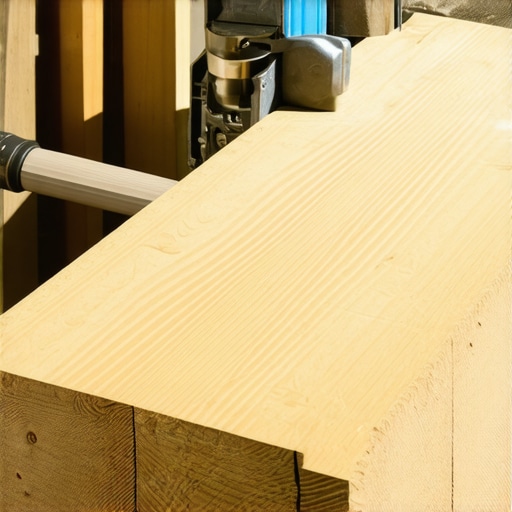
Imagine this: you’re in the middle of installing new flooring, excitement mounting, when you step onto the surface and immediately notice a noticeable dip—an annoying bump that throws off the entire look. I’ve been there myself, frustrated and scratching my head, thinking, “How did I miss this?” The problem wasn’t just the uneven floor; it was my approach to fixing that one stubborn joist. That was my lightbulb moment, discovering the power of the Wood Shave Trick to level a single joist efficiently and reliably.
Why Properly Leveling a Joist Can Save Your Flooring Project
When laying down tiles, hardwoods, or laminate, any unevenness in the subfloor can lead to cracks, gaps, or squeaks down the line. It’s a gamble—skip proper leveling, and you’ll be fighting an uphill battle for years. Early on, I made a classic mistake: rushing to lay the floor without addressing that uneven joist. The result? A wobbly, creaky surface that forced me to redo sections and waste time. Learning to level that lone joist properly turned my project around, and I want to help you avoid the same pitfalls.
Will the Wood Shave Trick Make My Floor Perfect Every Time?
Honestly, I was skeptical at first. I worried about damaging the joist or making things worse. But understanding the common mistakes people make—like over-tightening nails or neglecting to check the subfloor’s entire surface—helped me approach this method with confidence. The key is knowing the correct technique, and that’s exactly what we’ll cover in detail, including how to avoid the pitfalls I once fell into.
}
{
Start with Precise Assessment
Before making any adjustments, identify the exact points where the joist dips. Use a straight edge or level across the subfloor to visualize irregularities. I recall my first time; I laid a long level across the joist, only to see the bump clearly at one end. Mark the high and low spots with a pencil for clarity.
Prepare Your Tools and Materials
Gather a sharp hand plane or a wood shaver, a measuring tape, a rasp, safety goggles, and a dust mask. In my experience, using a hand plane gave me more control than power tools, especially on small areas. Wearing safety gear ensured I avoided wood splinters and sawdust inhalation.
Mark the Shaving Area
Identify the high spots on the joist that need smoothing. Use the markings to guide your shavings, focusing only on the elevated sections. It’s tempting to remove large chunks, but gentle, incremental shavings prevent over-correction. I learned this the hard way when I removed too much and had to start over.
Execute the Wood Shave Technique
Secure the floor or work on a stable surface. Carefully shave small amounts from the high section using the hand plane, following the grain of the wood. Think of it like sculpting; slow and deliberate strokes yield the best results. Regularly check the level to ensure progress aligns with your goal.
Control and Consistency
Maintain consistent pressure and angle during shaving. I discovered that tilting the plane slightly and moving along the grain produces a smoother surface. Periodic checks with a straightedge prevent removing too much material, which could create a new unevenness.
Smooth and Finish
After shaving, use a rasp or sanding block to smooth out any rough edges. This step avoids pressure points that could cause squeaks or unevenness. Once thejoist is flush with adjacent ones, verify with a level or laser line. Remember, patience here preserves your hard work and prevents future issues.
Reinforce and Seal the Surface
If the shaved joist is exposed, consider sealing it with an appropriate wood preservative or primer. This step prolongs its lifespan and prevents moisture absorption, which can cause warping over time. I patched some small areas with wood filler, which helped maintain uniformity.
Combine with Additional Techniques
For stubborn dips, integrate shimming or blocking alongside the wood shave. This multilayered approach ensures the entire subfloor maintains a level surface, critical for flawless flooring installation. By practicing these combined methods, I consistently achieved smooth, even floors that stayed perfect for years.
If you encounter challenges or have specific questions about your project, don’t hesitate to reach out via our contact page. Remember, proper preparation and patience are your best tools in this process.
Many homeowners and even professionals fall prey to misconceptions about floor leveling and installation, often leading to costly mistakes. One pervasive myth is that surface-level corrections, like toppings or overlays, are sufficient for uneven floors. In reality, these superficial fixes mask deeper structural issues that, if overlooked, compromise the entire project. For example, a level surface might look good initially but can develop cracks or squeaks over time if the subfloor wasn’t properly assessed and leveled.
Why do so many people underestimate the importance of subfloor conditions in hardwood and tile installations?
It’s crucial to understand that the subfloor’s integrity influences the longevity and appearance of your finished flooring. Ignoring minor dips or inconsistencies can lead to uneven wear, tile cracking, or gaps in hardwood floors. Proper assessment techniques, like the dedicated use of straightedges and laser levels, are often neglected in DIY projects, which can cause issues down the line. For advanced practitioners, understanding the effects of moisture content and substrate stability can make the difference between a successful install and a failure. As expert John P. Bridge notes in his research published by the Building Materials Journal, even slight variances in subfloor preparation can reduce the lifespan of floors by up to 30%. Another common trap is relying solely on self-leveling compounds without verifying the substrate’s age and condition. These compounds require a well-prepared, clean, and sound surface to bond effectively. Failure to do so can result in pre-mature failures or bubbling. When leveling for tile installations, I always emphasize the importance of mechanical bonding, whether through proper patching or using specialized primers, which many overlook in their haste to complete the project. For those eager to perfect their craft, exploring advanced techniques like the “magnesium float move” for smoothing concrete or understanding the T-mold rule for expansion joints helps avoid common pitfalls. Check out our detailed guide on [floor leveling challenges](https://tiletrendshop.com/floor-leveling-challenges-common-mistakes-and-how-to-avoid-them) to uncover more nuanced insights. Remember, the devil’s in the details—overlooking these subtleties can lead to a facade of perfection but result in long-term headaches. Always verify your subfloor’s moisture levels, surface flatness, and structural integrity before proceeding. It’s worth investing in quality tools, like laser levels and moisture meters, which provide precise readings and help prevent costly rework. Don’t get caught in the trap of assuming flat means stable—flooring experts warn that unaddressed ground shifts and foundation settling are often hidden causes of ongoing leveling issues. Instead, prioritize a comprehensive assessment to ensure your flooring investment endures the test of time. For more advanced troubleshooting tips, consider reviewing our [step-by-step flooring installation](https://tiletrendshop.com/step-by-step-guide-to-flooring-installation-and-leveling-success) resources. Have you ever fallen into this trap? Let me know in the comments, and keep your floors flawless by paying close attention to those hidden details.
Keeping Your Floor in Top Shape with the Right Tools
Maintaining a flawless flooring installation over years requires more than just good initial work; it demands the right tools and proactive care. My personal experience has shown that investing in high-quality equipment not only extends the lifespan of your floors but also simplifies routine maintenance. For example, I swear by a professional-grade floor buffer with variable speed settings—I use it monthly to buff out minor scratches and keep the finish looking vibrant. Unlike cheap buffers that can create swirl marks, a model with adjustable speeds allows me to match the buffing intensity to each specific task, preserving the integrity of the sealant and wood or tile surfaces.
Additionally, a moisture meter is indispensable. Floors, especially hardwood, are sensitive to humidity changes, which can cause warping or gaps over time. I rely on digital pinless moisture meters like the Tramex CME4, which provide quick, non-destructive readings. Regularly checking moisture levels helps me catch issues early and avoid costly repairs or refinishing work. For grout lines, I keep a soft brush and a mild cleaning solution handy—regular upkeep prevents grime buildup, which can deteriorate the sealant and lead to staining.
In terms of software, I recommend adopting a digital maintenance log—whether a dedicated app or a simple spreadsheet. Tracking dates of cleaning, inspections, and minor repairs helps me stay ahead of potential problems. A proactive approach to flooring care, combining precise tools with consistent routines, can significantly improve long-term durability and aesthetics.
Where do I see flooring maintenance heading in the future?
Trend-wise, I predict smart sensors embedded within new flooring will revolutionize how we monitor floor health. Companies are developing embedded nanotech sensors that can detect moisture, stress, and wear in real-time, alerting homeowners via smartphone apps before issues become visible. This integration of technology could make traditional maintenance methods obsolete, offering a seamless, preventative approach to flooring care. For now, intelligent tools like moisture meters and buffers are your best allies—investing in quality pays dividends.
What about scaling and long-term results? Here’s how to keep it going
When your flooring system relies on substrates like plywood or concrete, adjustments might be needed as your space evolves. I’ve found that regular inspections, ideally every six months, allow me to spot loose tiles, cracks, or gaps early. For larger projects, using laser levels and digital-line lasers ensures your floor remains perfectly aligned over time. Scaling up involves more than tools—consider implementing a maintenance schedule that incorporates periodic professional checkups. This systematic approach ensures your investment continues to look impeccable and functions flawlessly for years to come.
If you’re interested in advanced techniques, I highly recommend trying the pro secrets for perfect leveling. Starting with precise assessments and investing in high-quality equipment like the Tramex CME4 moisture meter can dramatically elevate your results. Remember, a well-maintained floor is a long-term investment—don’t cut corners when it comes to tools and routine care. For personalized advice or specialized products, feel free to reach out via our contact page.
What I Wish I Knew Before Starting My Floor Project
One of the most valuable lessons I learned was that rushing the subfloor assessment can lead to costly mistakes down the line. Taking the time to identify every dip and irregularity with a laser level or straightedge isn’t just thorough—it’s essential. I also discovered that small, incremental shavings save a lot of headaches compared to removing large chunks, which can create new unevenness. Patience and attention to detail truly pay off when aiming for a perfectly level surface.
Tools That Transformed My Approach to Floor Leveling
Investing in a high-quality digital moisture meter like the Tramex CME4 provided early insights into moisture issues that could cause future warping. A reliable hand plane became my best friend for precise shavings, while extensions and laser guides helped me reach tricky spots. These tools not only made the process more manageable but also boosted my confidence, reinforcing that quality gear is a worthwhile investment for professional results.
Why Overlooking Subfloor Conditions Can Sabotage Your Success
It’s tempting to focus solely on visible surface flaws, but ignoring the subfloor can lead to long-term problems such as cracking, squeaking, and uneven wear. I used to think a quick check was enough, but experienced setbacks when hidden dips caused tile cracks. Now, I verify moisture content, structural stability, and surface flatness thoroughly. This proactive approach minimizes surprises and ensures the durability of my floors for years to come.
Embracing Continuous Learning in Flooring Crafts
The more I delve into industry literature and webinars, the more I realize how evolving techniques and new materials can enhance results. For example, integrating shimming with the wood shave trick creates an even more stable foundation. Sticking to trusted resources, like expert guides and tutorials on mastering-floor-leveling, keeps me updated and confident, transforming challenges into opportunities for mastery.
Taking Action: Elevate Your Flooring Skills Today
Now that you’ve learned the importance of assessment, proper tools, and patience, it’s time to implement these tips into your project. Remember, flawless floors begin with a level foundation. Whether you’re aiming to install stunning hardwood or durable tiles, paying attention to these details will elevate your craftsmanship. Don’t shy away from seeking expert advice or trying new techniques—your perfect floor is within reach. Ready to get started? Share your biggest flooring challenge below, and let’s conquer it together.